14
LIGHTCAMERA USER GUIDE
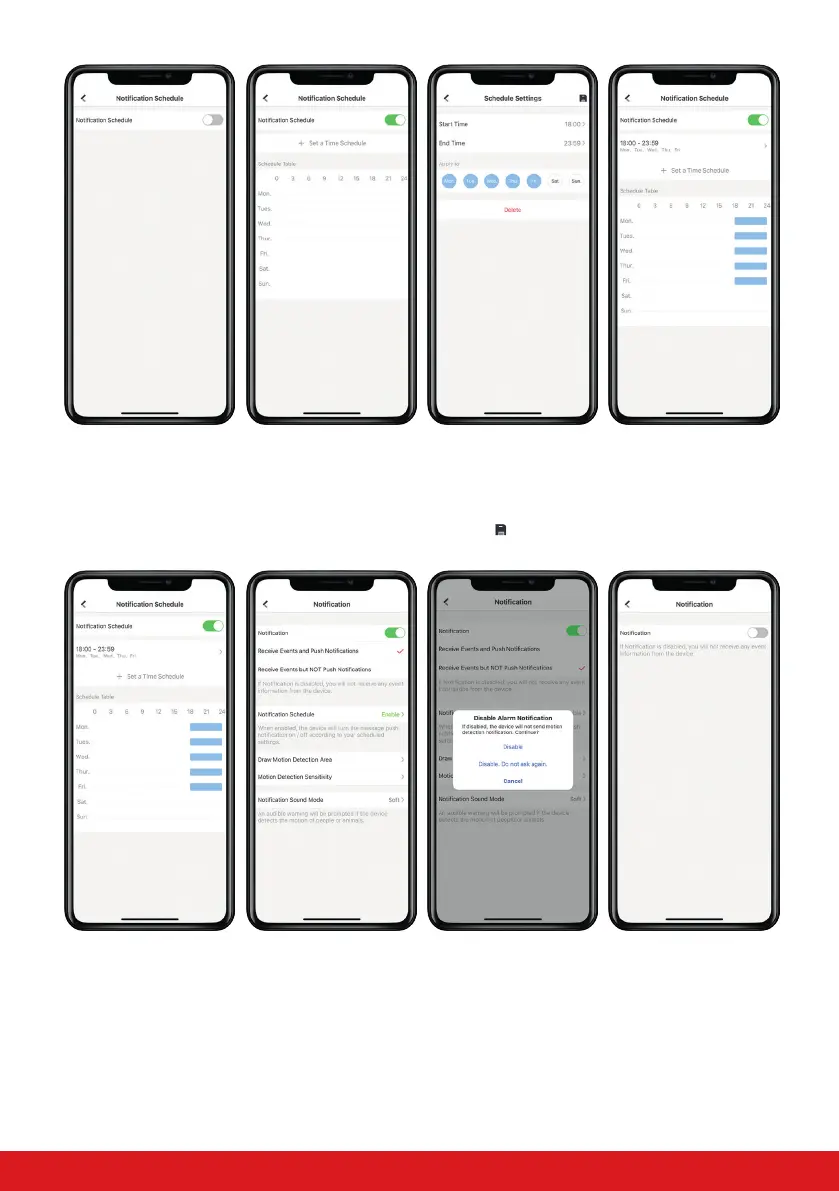
Step 1
To enable the notication
schedule, tap the slider at
the top of the screen.
Step 2
Select ‘Set a Time
Schedule’ to enter time
parameters.
Step 3
Enter the start and the
end time of the schedule
and the days this is to
aect. Tap
in the top
right corner to save.
Step 4
The programmed
schedule will now be
visible on the ‘Schedule
table’.
Step 5
Select the ‹ icon in the
top left corner to return
to the previous menu.
Step 6*
Tap the notications
slider at the top to disable
notications.
Step 7*
The app will prompt you
to conrm whether you
want to turn notications
o. Select ‘Disable’.
Step 8*
The notications will are
now disabled but will still
be delivered depending
on the schedule.
* If the notications are scheduled should be enabled at the time of conguring the schedule, leave the
notications slider enabled and the schedule will automatically switch it o at the relevant programmed time.