Fixed Local Network Address and Domain Name System (DNS)
Most routers assign connected devices a random IP
address that is not currently in use by another device on
your internal network. With the exception of 2Wire brand
routers, when a router or networked device reboots due to
a power loss or other issue, the addresses will change and
the port forwarding configuration will no longer work. For
that reason, we recommend changing your NVR’s network
setting to a fixed, or “static” IP address which will not
change.
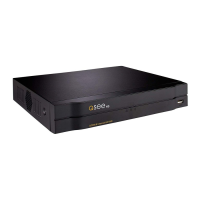
STEP 6 Domain Name System (DNS)
DNS enables you to take advantage of additional features including the
ability to access your NVR using a conventional domain name and having
your system send out e-mail alerts.
To access these functions, you will need to enter the DNS number that you
obtained from your router in Step 4 into the Preferred DNS box (B) into the
Network Menu. Each block of numbers (between the periods) must be entered
individually using the Virtual Keyboard (right) as described on the Quick Start
Poster that also came with your NVR.
Once you have entered the DNS number, click Save.
Close the window.
STEP 5 Static Internal IP (Network) Address
Return to the Network Menu.
Uncheck the box marked DHCP (A).
Click Save.
Proceed to Step 6 without closing the window.
NETWORK
IP Version
P Address
Subnet Mask
Gateway
TCP Port
UDP Port
Max Connection
Preferred DNS
Alternate DNS
WAN IP
HTTP Port
RTSP Port
DHCP
0 . 0 . 0 . 0
0 . 0 . 0 . 0
0 . 0 . 0 . 0
0 . 0 . 0 . 0
255 . 255 . 255 . 0
0 . 0 . 0 . 0
37777
37778
80
554
20
IPv4
Default
Network Setting
Save Cancel
B
A
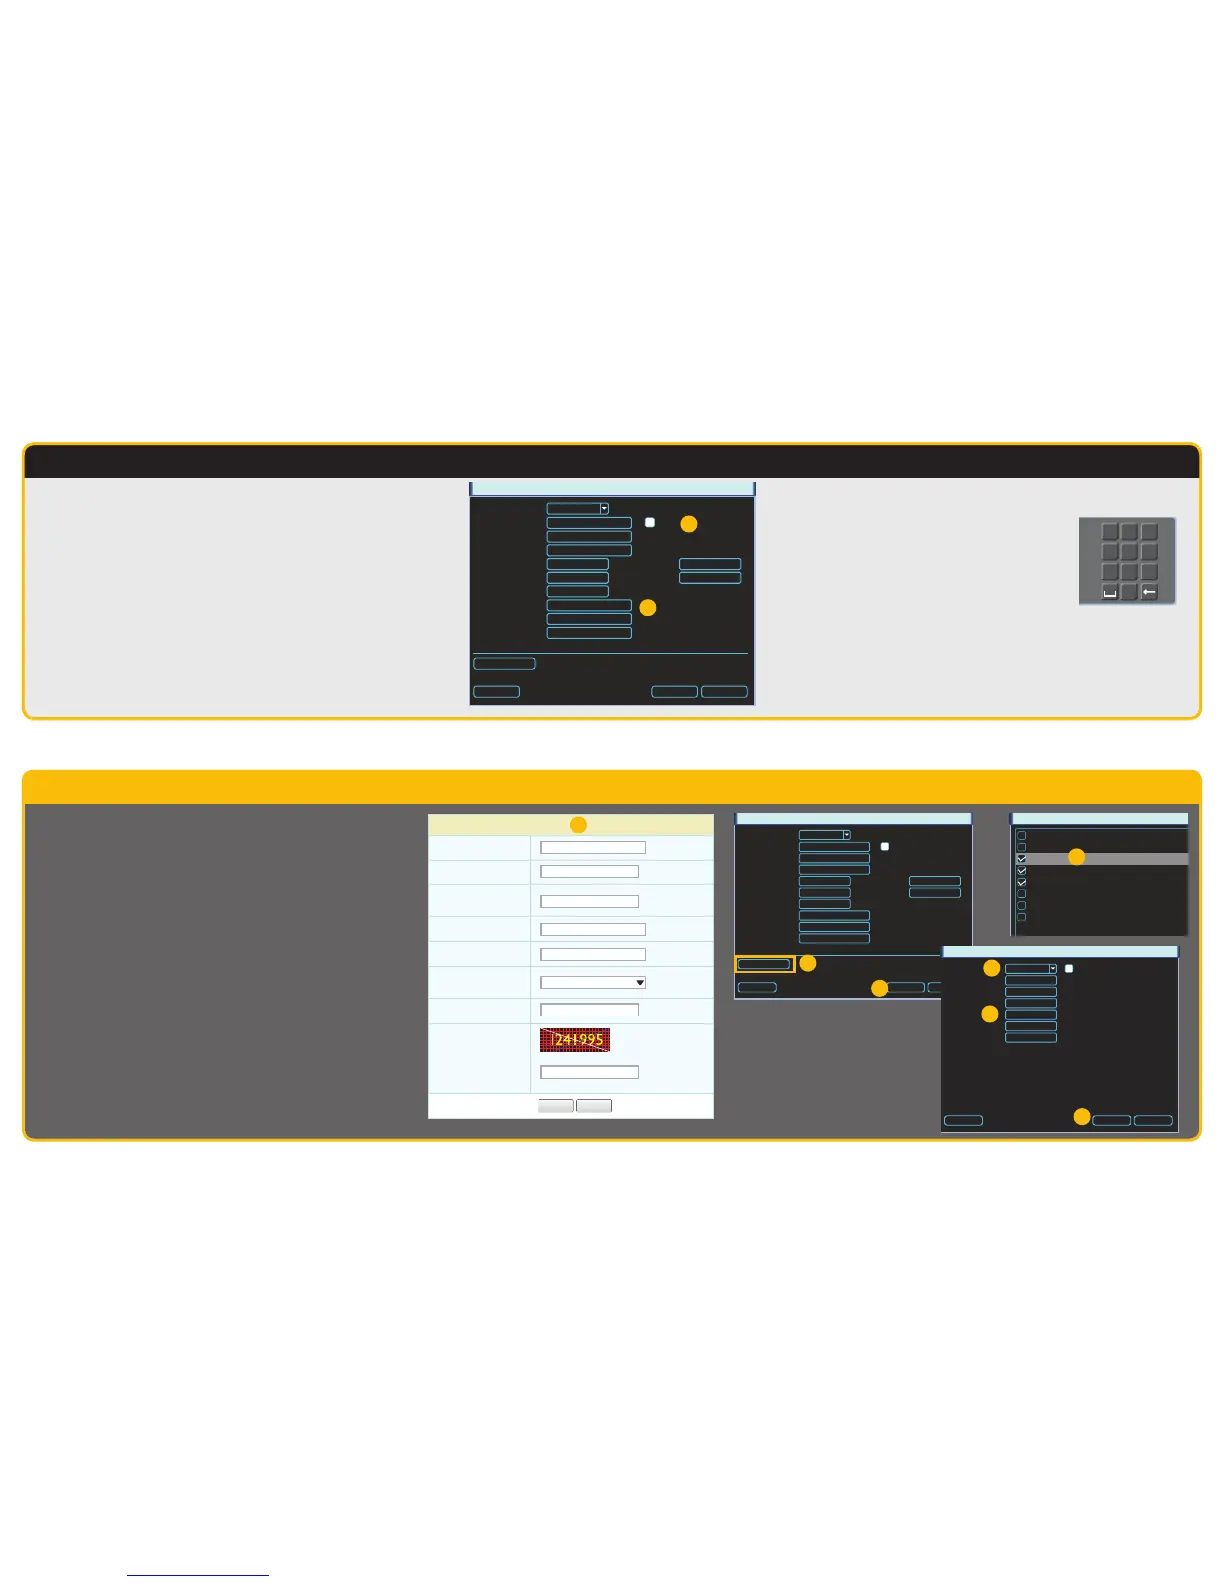
Dynamic Domain Name Service (DDNS)
This is an optional step which allows you to take advantage of Dynamic Domain Name Service, or
DDNS. Not to be confused with DNS from Step 6, DDNS allows you to enter a conventional web address
when remotely logging into your NVR from outside of your network. It also allows you to avoid having
to repeat Steps 4 and 5 when/if your ISP reassigns IP addresses. Q-See offers DDNS service for free at
www.MyQ-See.com and your NVR is configured accept account information from that site.
A. Open a browser window and go to www.MyQ-See.com
B. Register with the website and follow the instructions for creating a domain name. The website
will display your pubic IP address and your domain name which will look like this:
http://example.myq-see.com
C. In your NVR, open the Network window.
D. Click on the Network Setting button at the bottom to open the Network Setting window.
E. Check the box to the left of DDNS and double-click on DDNS itself to open the DDNS window.
F. Select MyQ-See.com in the DDNS server pull-down menu.
G. Enter your account information – including the user name and password that you used when
creating your domain name .
H. Click the Save button to preserve your settings.
I. When you return to the Network window, ensure that the DDNS box is checkmarked before
clicking on Save as well before closing.
NEW USER REGISTRATION
EMAIL ADDRESS
PASSWORD
FIRST NAME
LAST NAME
ANSWER
SECURITY
QUESTION..
CONFRIM
YOU’RE HUMAN
PASSWORD
CONFIRM
Submit
Submit
Reset
Reset
My first phone number
New Captcha
Enter the text you see above
A-B
NETWORK
IP Version
P Address
Subnet Mask
Gateway
TCP Port
UDP Port
Max Connection
Preferred DNS
Alternate DNS
WAN IP
HTTP Port
RTSP Port
DHCP
0 . 0 . 0 . 0
0 . 0 . 0 . 0
0 . 0 . 0 . 0
0 . 0 . 0 . 0
255 . 255 . 255 . 0
0 . 0 . 0 . 0
37777
37778
80
554
20
IPv4
Default
Network Setting
Save Cancel
NETWORK SETTING
IP FILTER
PPPOE
DDNS
UPNP
EMAIL
FTP
Register
Switch Settings
Trusted Sites : 0
No Available DDNS Setup
Port Forwarding
Mail Sever : 25
Record FTP : 461.966.106.12
0.0.0.0 : 8000
10.1.1.1
 Loading...
