Chapter 6: Maintenance
Cleaning Pump Interior
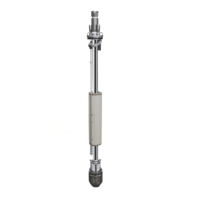
Removing the Pump’s Casing
.1 Gently brush off built-up solids from the float, the discharge line, the pump casing and the control rod guide.
1. Remove the bolt at the bottom of the pump which holds the inlet screen in place (bottom loading pumps only).
2. The pump can be steam cleaned without damage.
2. Remove the three bolts at the bottom of the pump which hold the inlet in place. (See Figures 6,7,8,and 9)
3. Remove thick deposits of hardened scale on the discharge tube by using a handbrush or by lightly tapping the
discharge tube with a small hammer. Be careful not to strike any pins or other components, since they may be
damaged.
4. Twist and slide the casing down off the pump’s frame.
3. Remove. the inlet from the pump’s casing by pulling it out.
The inner workings of the pump should now be exposed for inspection and cleaning. (See Figures 6 Through 11)
Note: A Scotch Brite® abrasive pad is useful for cleaning debris from the pump components.
Iron Build-up Cleaning Procedure
1. The bottom “spider” should be removed by unthreading it from the pump’s discharge pipe. (See Figures 6,7,8,and 9)
2. Visually inspect the 1 inch stainless steel fluid discharge pipe for scale build-up or debris. Also, do the same with the float
that rides up and down on the SS discharge pipe.
3. Should there be scale deposits on either or both the discharge pipe or float, then remove the float from the SS fluid discharge
pipe as follows . (See Figures 6,7,8,and 9)
4. The 1 inch stainless steel fluid discharge pipe can now be cleaned using either a ScotchBrite pad, a wire brush or
a wire wheel on either a drill or a grinding machine. After removing the scale/debris, it is recommended the pipe
be water rinsed.
Both the internal and external surfaces of the float will generally require cleaning. The cleaning material choices
include a Scotch Brite pad, and a light grade 150 sandpaper.
The plates are removed to ease cleaning, they should be replaced on the same float end from which they came.
That is, the plates should maintain their original top and bottom positions.
5. The white plastic square Control Rod is the next component to be cleaned. The control rod is the item that fits
through the smaller hole in the float and is adjacent to the SS discharge pipe in the assembled pump. To Clean
use the Scotch Brite pad or a razor or Exacto knife (not sandpaper).
6. The final component to be cleaned is the outer AP4+ casing. The fastest and most effective way to clean out
the inside surface of the pump casing is to use a three-stone honing tool. The technique is to move the hone in-
and-out, a half dozen times or so through, each end of the casing. The time for the casing cleaning should take no
longer than 5 minutes.
After the casing has been removed from the AutoPump please follow the procedure below:
Remove the small SS hairpin from the bottom spring cup. Removing the hairpin and spring cup will allow you to
remove the spring, sliding stop and float from the SS discharge pipe.
The AutoPump is now ready for re-assembly by following the steps above in reverse order.
13
Note: Before threading the bottom “spider” onto the pump’s discharge pipe, be sure to wrap the discharge pipe’s
threads completely with Teflon tape.