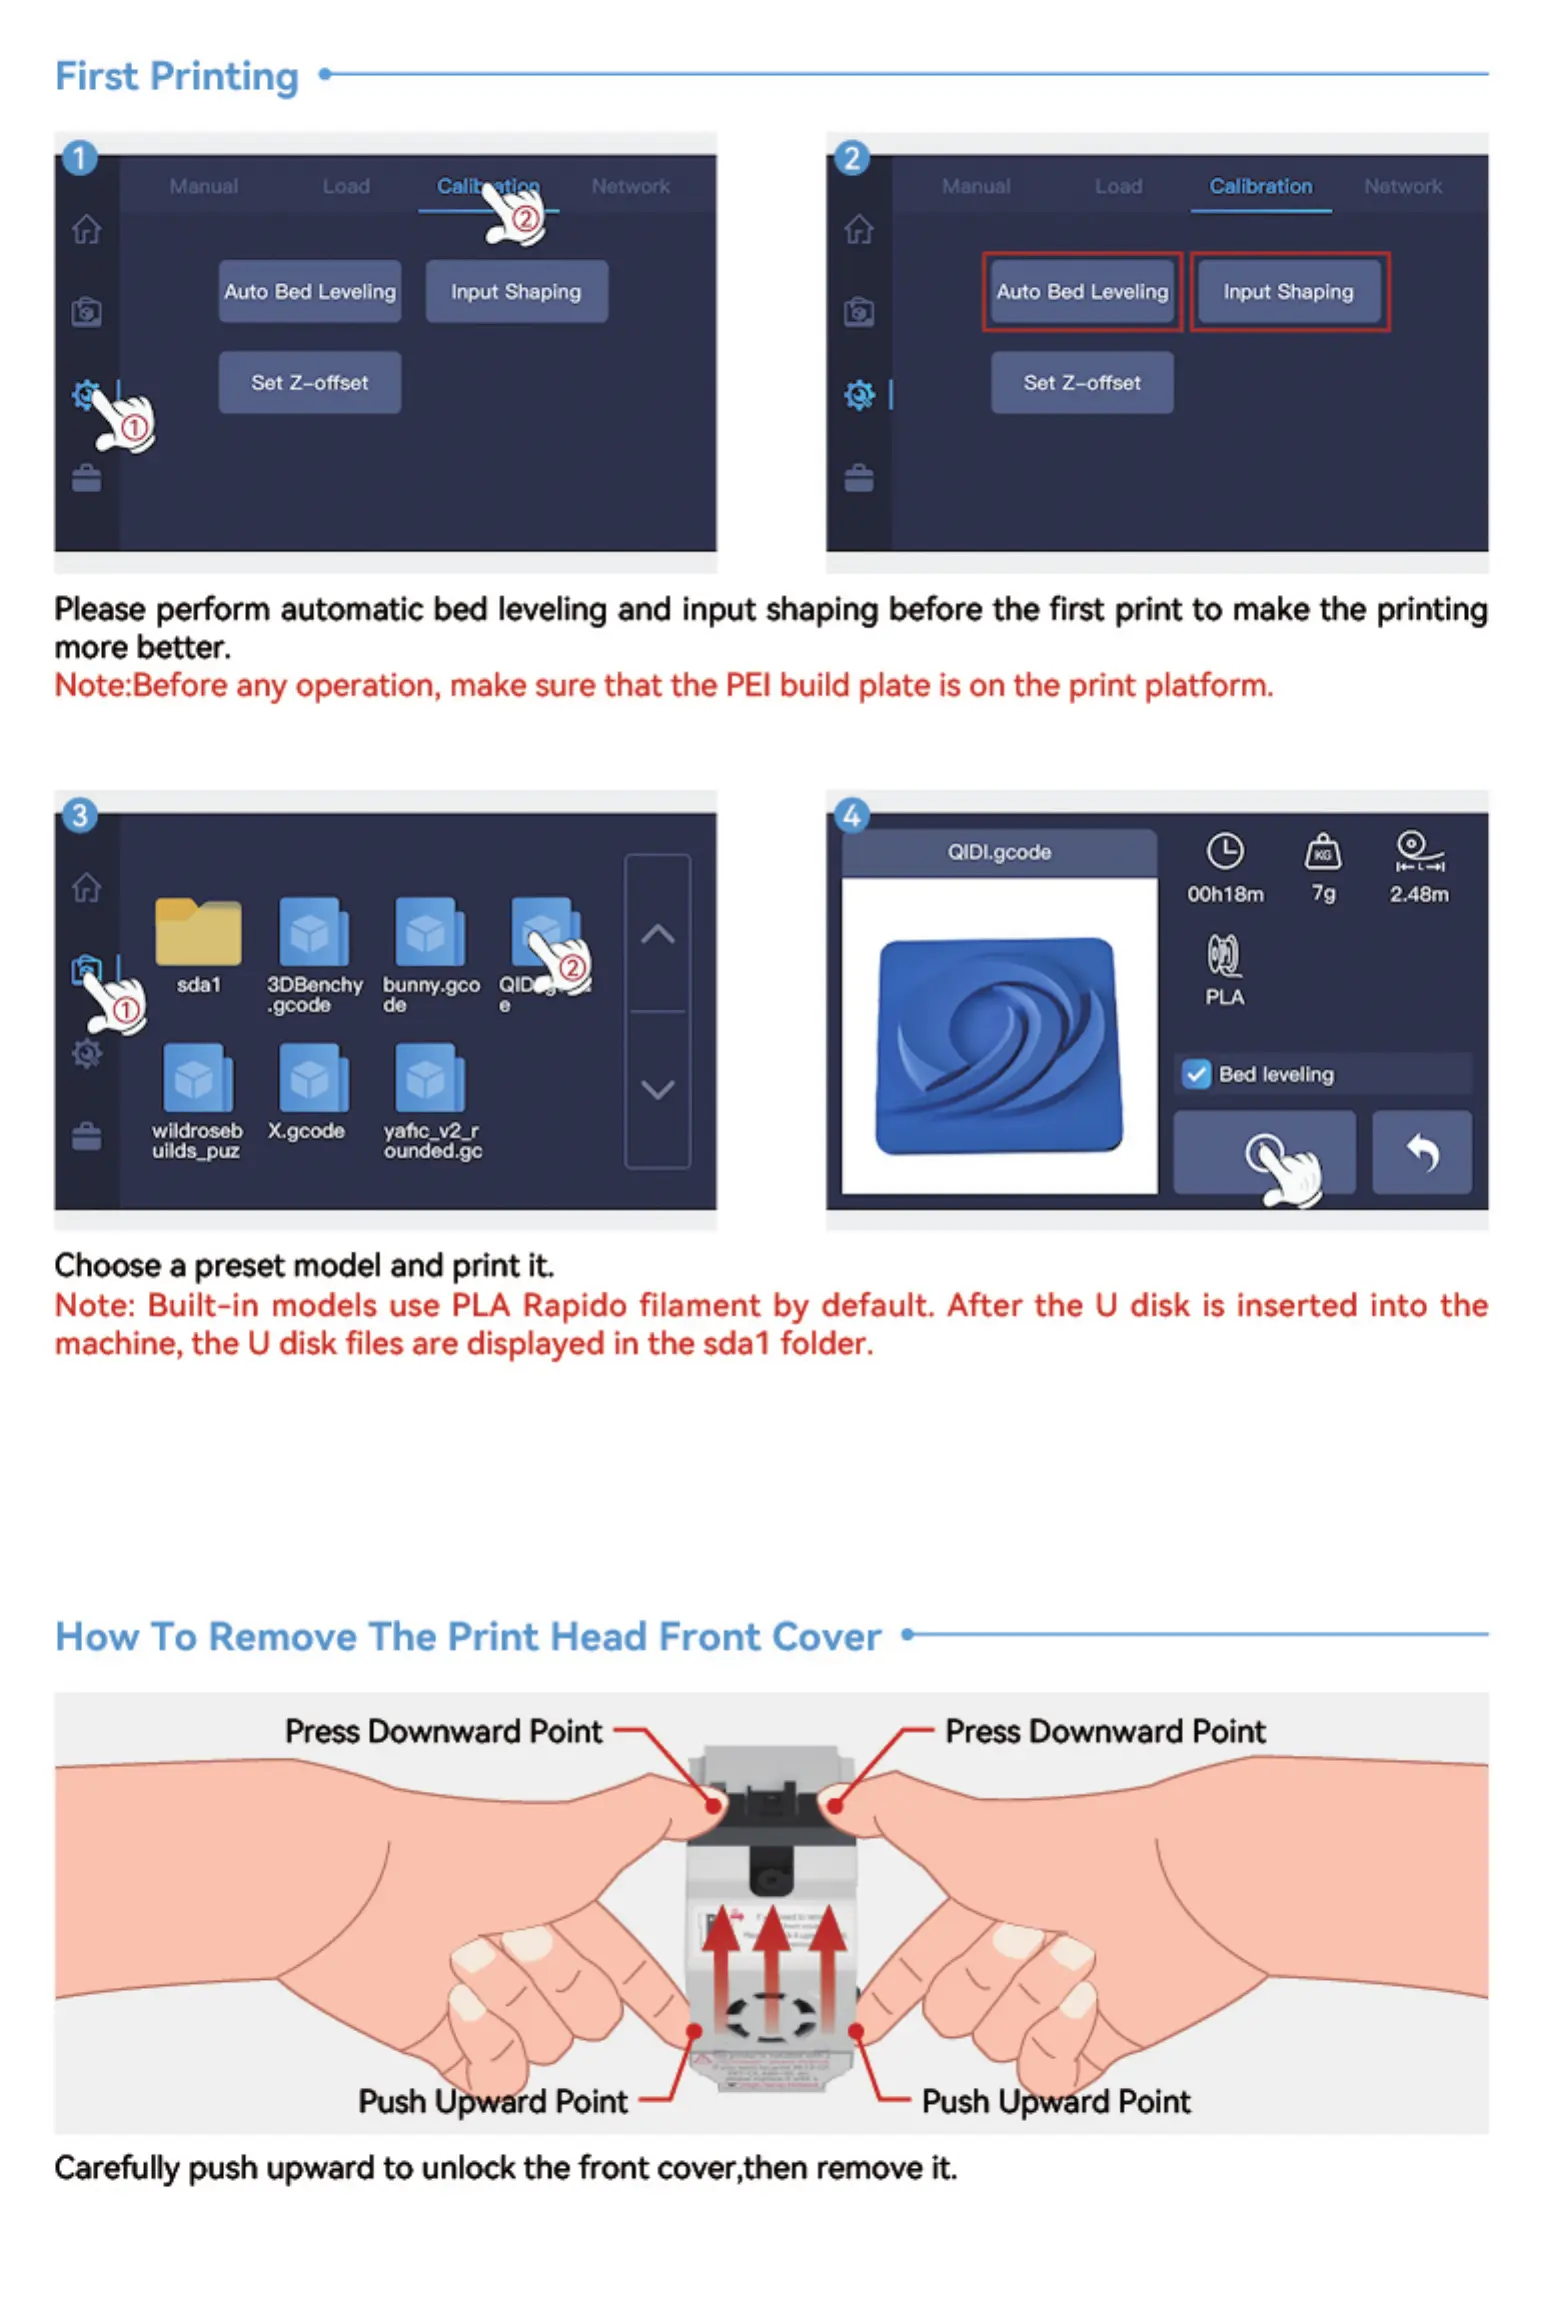
First Printing
Manual Load Manwal E,-oaU
Calibration
llnput Shaping
Network
Auto Bed I-eveling
Set Z—offset
Input Shaping Auto Bed Leveling
Set Z—offset
Please perform automatic Ibed leveling and input shaping before the first print to make the printing
more better.
Note:Before any operation, make sure that the PEI build plate is on the print platform.
2.48m
sdat
ogonchy bunny.gco
.geode
wildroseb X.gcode
uilds_puz
do
vafic_v2-r
ounded.gc
OOh18m
Bed leveling
Choose a preset model and print it.
Note: Built-in models use PLA Rapido filament by default. After the U disk is inserted into the
machine, the U disk files are displayed in the sdal folder.
How To Remove The Print Head Front Cover
Press Downward Point Press Downward Point
Push rd Point Push U rd Point
Carefully push upward to unlock the front cover,then remove it.