designated for the recovered refrigerant and labelled for that refrigerant (i.e.
special cylinders for the recovery of refrigerant). Cylinders shall be complete with
pressure relief valve and associated shut-off valves in good working order. Empty
recovery cylinders are evacuated and, if possible, cooled before recovery occurs.
The recovery equipment shall be in good working order with a set of instructions
concerning the equipment that is at hand and shall be suitable for the recovery
of flammable refrigerants. In addition, a set of calibrated weighing scales shall
be available and in good working order. Hoses shall be complete with leak-free
disconnect couplings and in good condition. Before using the recovery machine,
check that il is in satisfactory working order, has been properly maintained and
that any associated electrical components are sealed to prevent ignition in the
event of a refrigerant release. Consult manufacturer if in doubt.
The recovered refrigerant shall be returned to the refrigerant supplier in the
correct recovery cylinder, and the relevant Waste Transfer Note arranged. Do not
mix refrigerants in recovery units and especially not in cylinders.
lf compressors or compressor oils are to be removed, ensure that they have been
evacuated to an acceptable level to make certain that flammable refrigerant
does not remain within the lubricant. The evacuation process shall be carried out
prior to returning the compressor to the suppliers. Only electric healing to the
compressor body shall be employed to accelerate this process. When oil is drained
from a system, il shall be carried out safely.
B INSTALLATION OF THE AIR CONDITIONER
1. Unpack the machine and accessories and check that the hose between the indoor
and outdoor unit is properly connected. Also check whether the condensation
drain has a rubber cover. Finally, check whether the accessories are complete.
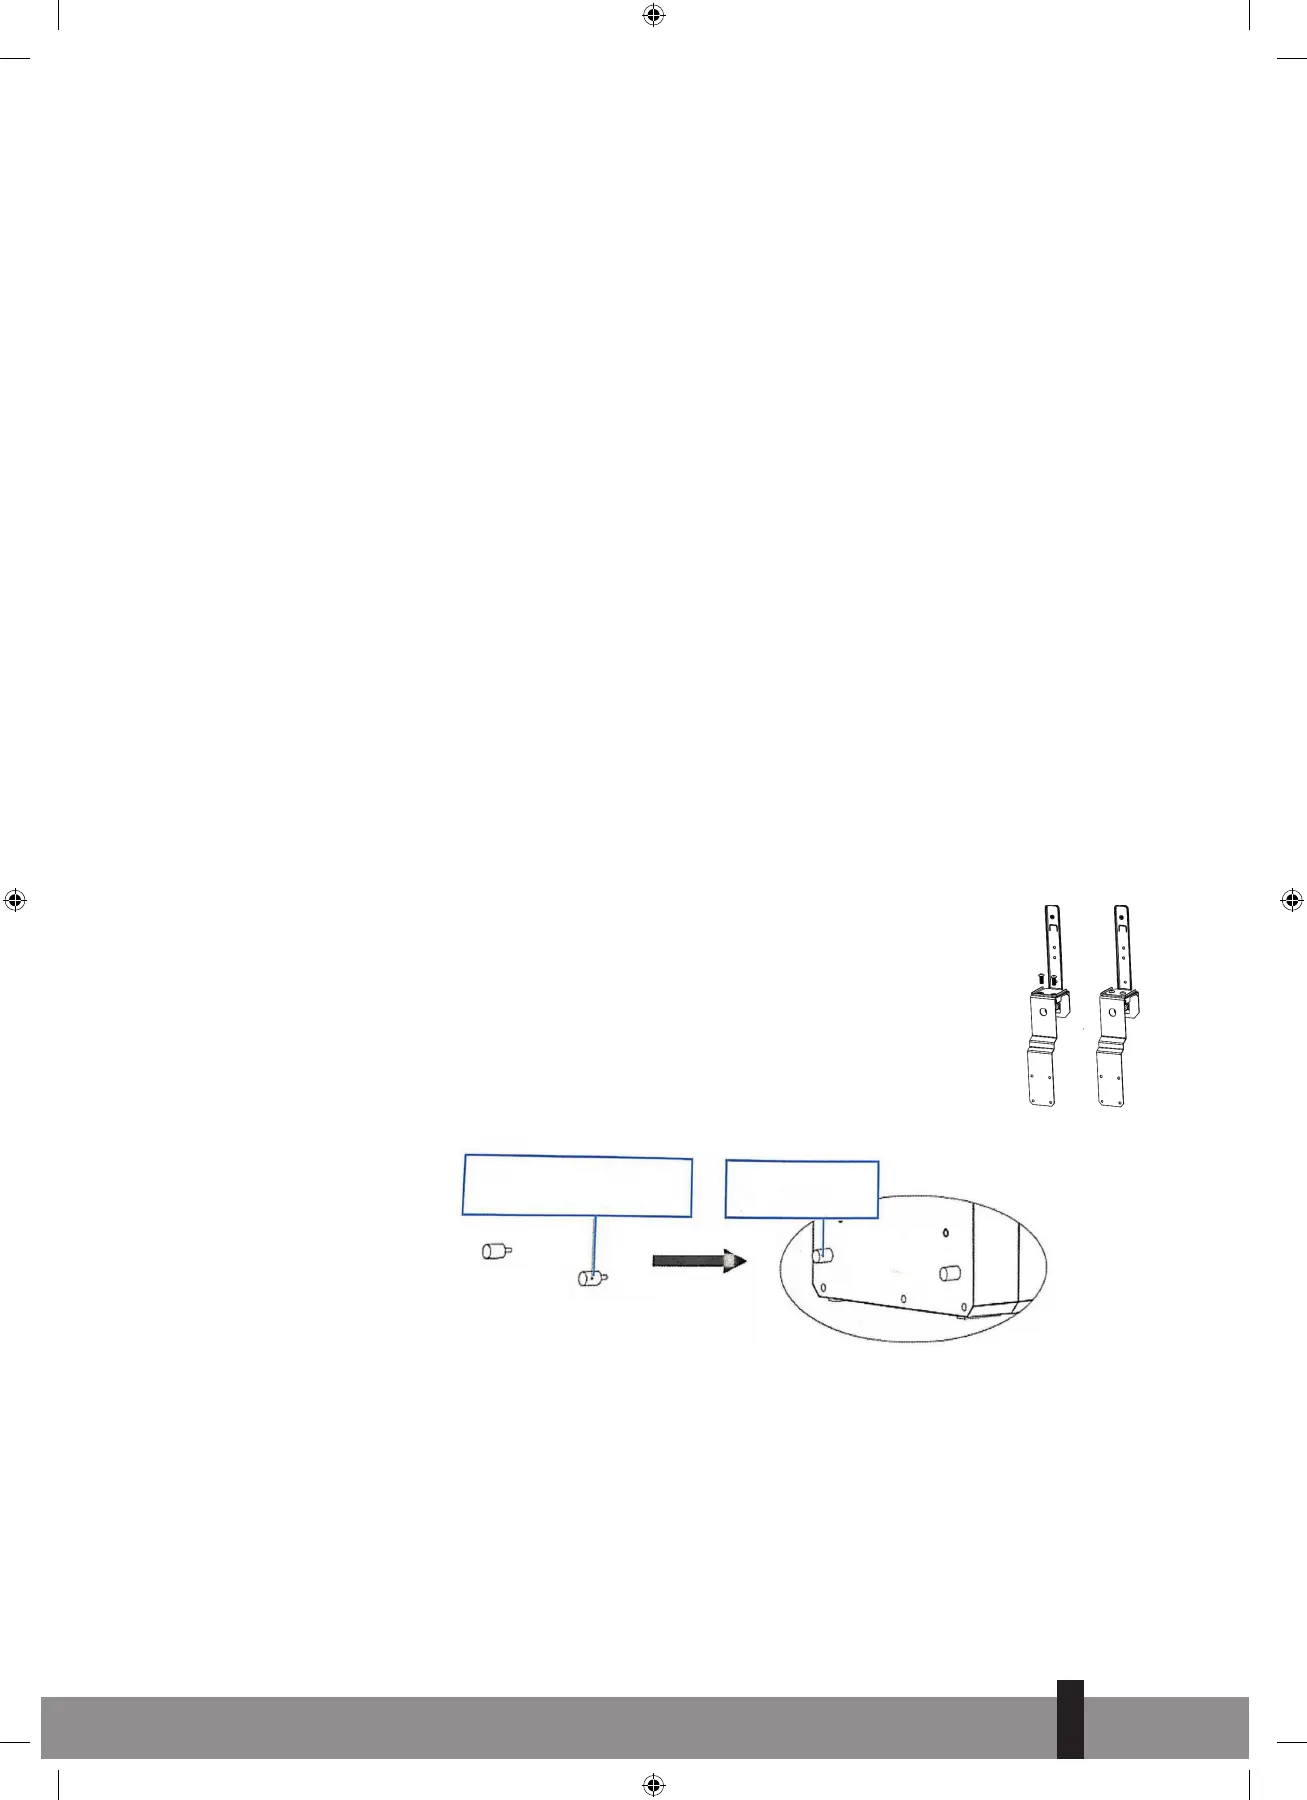
2.1 Install the accessories as shown in the picture. Connect the
outer bracket to the support block and the inner bracket by
tightening the M6 screws. This is how you form the carrying
handle.
2.2 Place the shockproof rubber dampers on the back of the
outdoor unit.
Shockproof rubber
dampers
Shockproof rubber
dampers
4
55
man_MS-AC 5001 ('22) V4.indd 55man_MS-AC 5001 ('22) V4.indd 55 19-05-2022 11:1219-05-2022 11:12
 Loading...