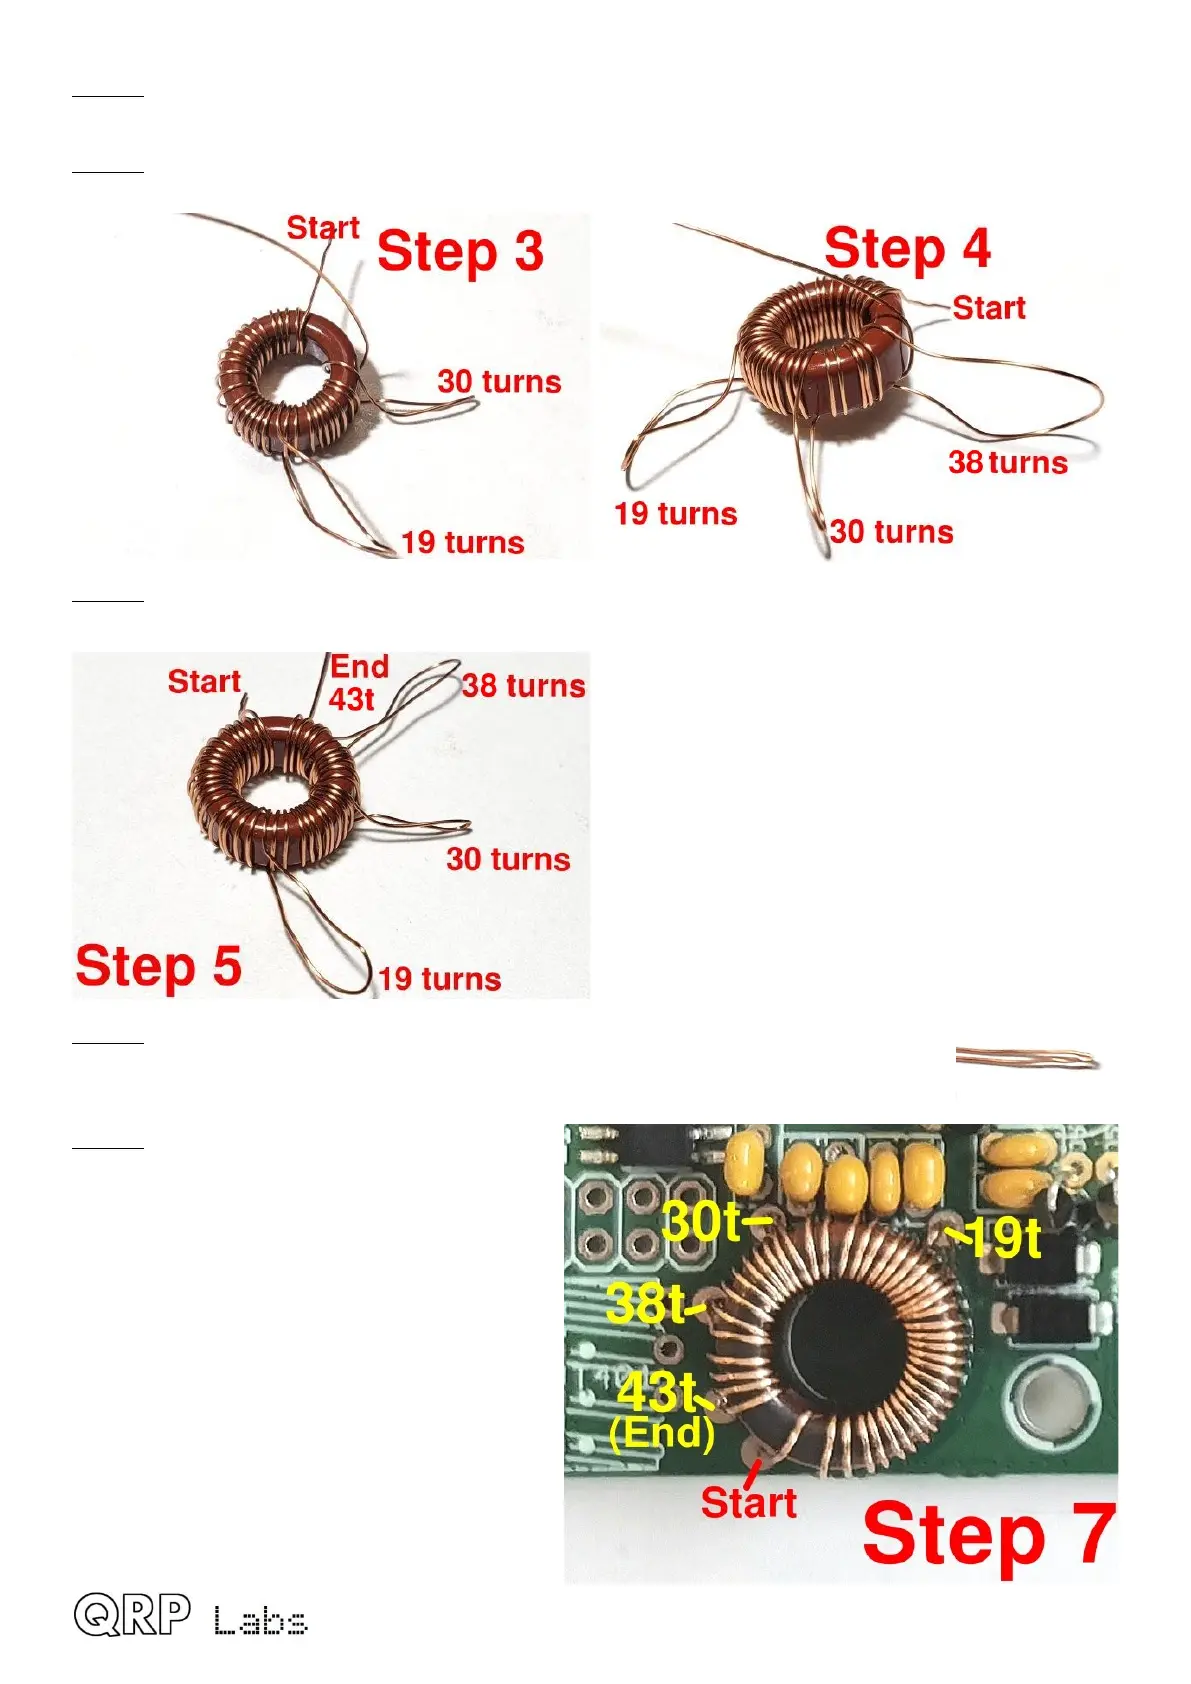
Step 3: Wind up to the 30
th
turn then make another loop between the 30
th
and 31
st
turns. This is for
the 30 turn tap.
Step 4: Wind up to the 38
th
turn then make another loop between the 38
th
and 39
th
turns. This is for
the 38-turn tap.
Step 5: Wind the remaining turns to complete the
total of 43 turns.
Step 6: Now with a pair of pliers, you can squeeze each of the loops into a sharp
point, such that it is easy to fit through the large holes at the 19, 30 and 38-turn
taps (see photo, right).
Step 7: Insert all the wires in their correct
holes.
You should pull them firmly from the
underside of the board to ensure that there
are no loose wires on the top side.
Now cut each wire to about 2mm length (at
most) and solder in place. It is essential to
remove the enamel from the wire. My
favourite method of doing this is simply to hold
the soldering iron to the joint, with plenty of
solder, for at least 10 seconds. The enamel
burns away in this time.
An alternative method is to scrape the wire.
QMX assembly Rev 1.00e 33
 Loading...

