EasyManua.ls Logo

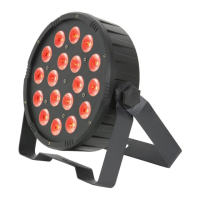
Qtx PAR100 User Manual

Qtx PAR100
9 pages
To Next Page IconTo Next Page
Page #1 background imageLoading...
Page #1 background image
PAR100
High Power 3-in-1 LED
Plastic Par Can
Item ref: 154.030UK
User Manual

Questions and Answers:

Qtx PAR100 Specifications

General IconGeneral
Power Supply100-240Vac, 50/60Hz
Beam Angle25°
Weight1.3kg
DMX Channels4
ControlAuto, Sound-activated, DMX, Master/Slave
Channels4
Voltage100-240V
Light SourceLED
LED ColourRGB

Summary

General Safety and Precautions

High Voltage Warning

Warning against opening the unit due to high voltage and non-serviceable components.

Read Manual Before Use

Instruction to read the manual thoroughly before operating the product.

Initial Setup and Programming

Important - Initial Set Up

Procedure to ensure the unit is in master mode before programming.

Programming Modes

Overview of accessing programmes via manual control buttons.

Sound Assisted Show Setup

Instructions for setting up the sound-activated show mode.

Built-in Shows

Pre-programmed Auto-Colour Jump Show

Guide to selecting and configuring the auto-colour jump show.

Duration Adjustment for Auto Shows

How to tailor the duration of primary colours in auto shows.

Colour Scroll Show Setup

Instructions for setting up the colour scroll show and fade speed.

Single Colour Modes

Preset Static Colour Selection

How to select one of 7 preset static colours and manage strobe effects.

Custom Colour Setup

Guide to creating custom colours by adjusting RGB intensity levels.

Master/Slave and DMX Modes

Master/Slave Mode Operation

Linking multiple units for synchronized shows via master/slave configuration.

DMX Mode Operation

Connecting and controlling units via DMX controller.

Setting the Number of DMX Channels

Configuring the unit for 3-channel or 7-channel DMX control.

DMX Addressing and Menu Items

DMX Addressing

Setting the required start address for DMX communication.

LED Display Control

Option to turn off the 7-segment LED display during operation.

Advanced Settings and Diagnostics

Display Invert (DI SP)

Inverting the display for easier programming when the fixture is mounted upside down.

LED Test Routine (LESE)

Performing a self-test to check the functionality of all LEDs.

Hours of Use Display (FhrS)

Viewing the total operational hours of the unit.

Internal Temperature Display (tEnP)

Checking the internal operating temperature of the unit.

Remote Control Functions

BLACK OUT Mode

Entering standby mode and controlling the infrared remote.

AUTO Mode

Switching to automatic mode for sequential colour changes.

SOUND Mode

Activating sound-activated mode for colour changes based on sound.

STROBE Mode

Using the strobe button for single or long stroboscopic effects.

FADE Mode

Switching between colours with a fading effect.

SPEED Mode

Adjusting speeds within fade mode (SP1 to SP9).

SENSITIVITY Mode

Adjusting sensitivity for sound-activated mode.

Troubleshooting

No Power (Mains)

Checks for correct mains voltage and outlet connection.

No LED Display

Troubleshooting steps for a non-functional LED display.

No Light Output

Checking control panel settings and DMX modes for light output issues.

No Strobe Output

Verifying strobe settings on control panel or DMX controller.

Unresponsive to DMX

Steps to diagnose DMX communication issues, including address and connections.

Overheating/Cutting Out

Ensuring the unit is not placed too close to a heat source.

Related product manuals