18
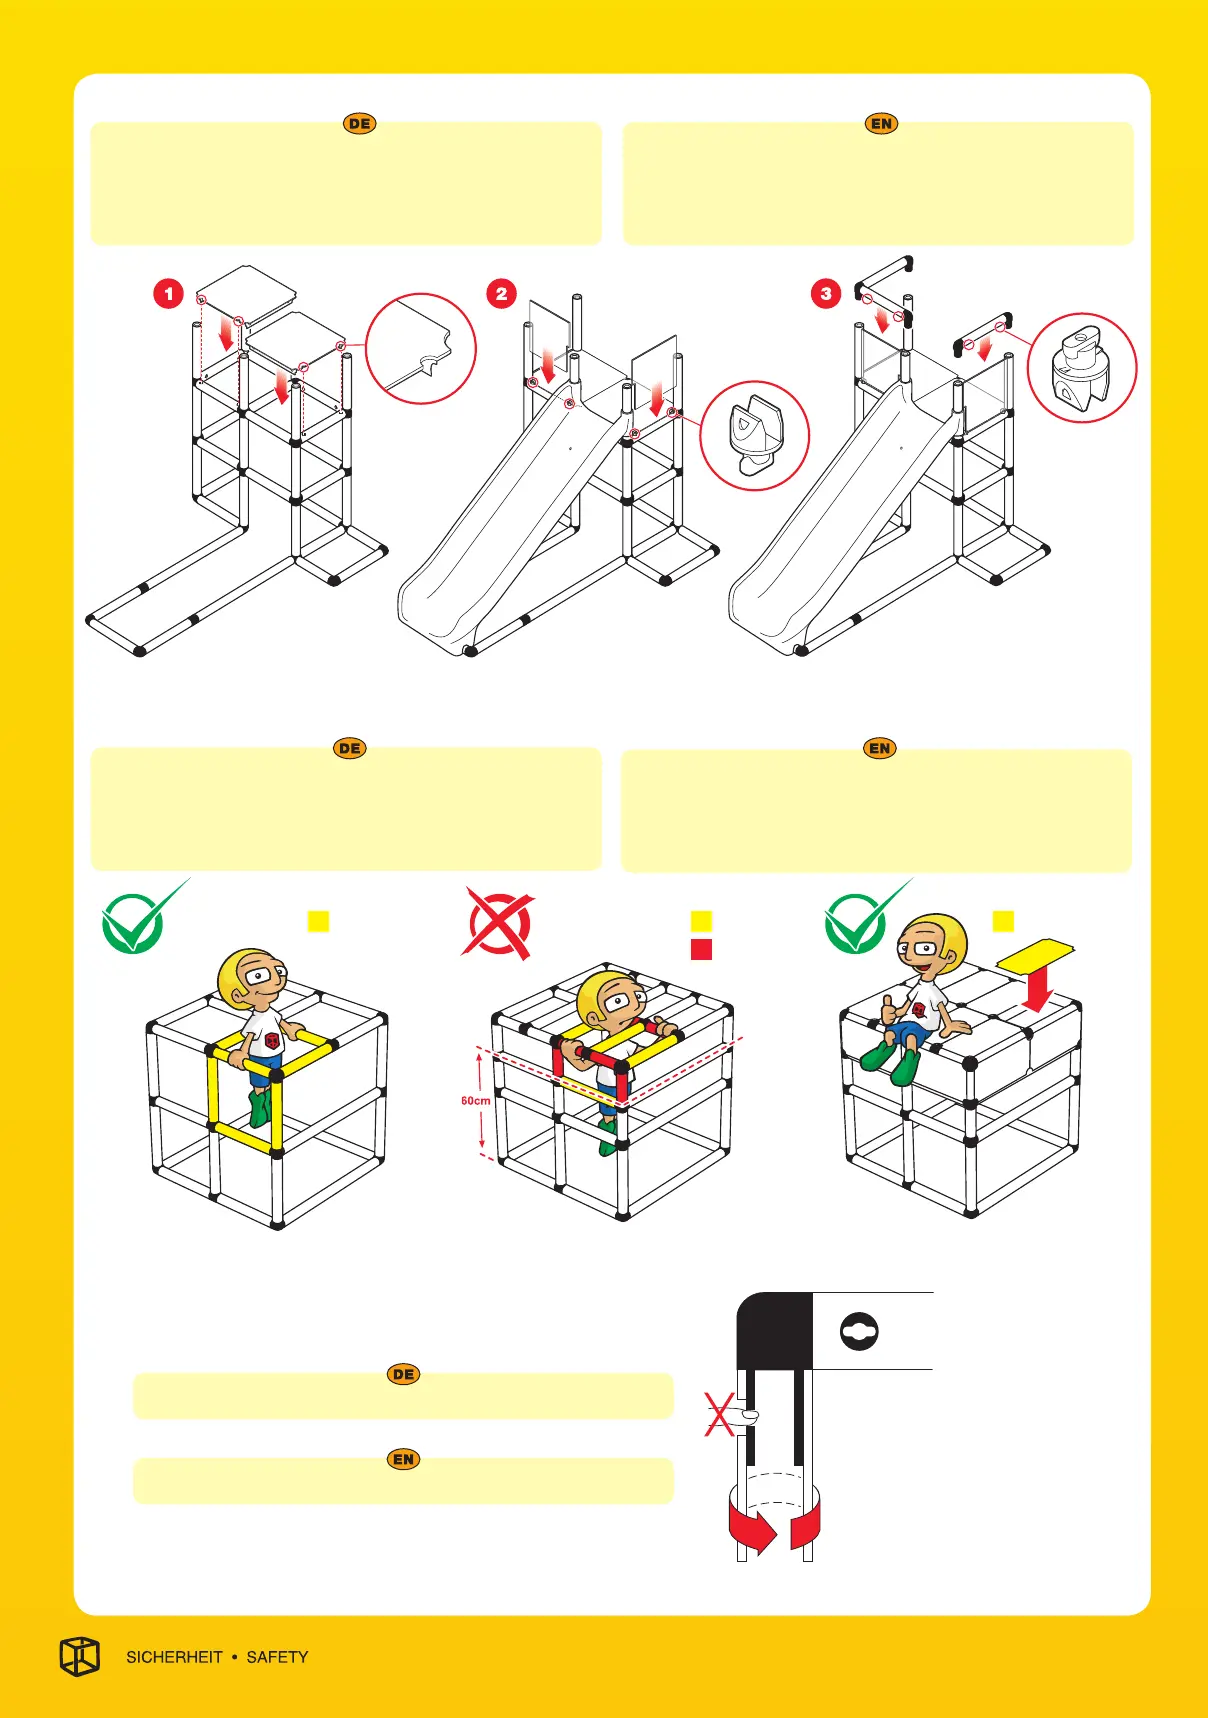
Illustration 1: Insert the 40 x 40 cm QUADRO panel, which has notches (Art.
00342-00345) for the plexi screw, into the model.
Illustration 2: Now insert the plexiglass panel with the notches for the Inte-
grated Slide (Art. 00369).
Illustration 3: Close the open ends of the tubes in the model.
Abb.1: Setzen Sie die QUADRO 40 x 40 cm Spezialplatte mit den Ausspa-
rungen (Art. 00342-00345) für die Plexischraube in das Modell ein.
Abb. 2: Nun setzen Sie die Plexiglasscheibe (für Integralrutsche),
(Art. 00369) mit der Aussparung ein.
Abb. 3: Schließen Sie die offenen Rohrenden des Modells.
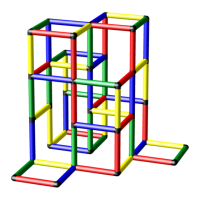
Achtung! Bitte beachten Sie bei Eigenkonstruktionen:
Für Konstruktionen vertikal oder horizontal ab 60 cm Höhe gilt: Öffnungen
die ein Innenmaß von 35 x 15 cm aufweisen, müssen durch die QUADRO
Halbplatte (Art. 00202 - 05) geschlossen werden, da die Gefahr einer Kopf-
falle und damit einer Strangulation besteht.
Caution! For your individual designs:
For constructions vertically or horizontally from 60 cm heights onwards ap-
plies: openings that have inside dimensions of 35 x 15 cm have to be cove-
red by a Halfpanel (Art. 00202 - 05), otherwise the construction turns into
an entrapment hazard. Risk of strangulation.
2. Kopffalle Entrapment hazard
Caution: Never put fingers in open screw holes! Risk of crimpings!
Achtung: Nie Finger in offene Schraublöcher stecken, da Quetschgefahr besteht!
Rohr tube Rohr tube Platte panel
40 x 20 cm35 cm
15 cm
35 cm
1.25 Integralrutsche + Plexiglasscheibe Integrated Slide + Plexiglass panel
3. Fingerfalle Finger trap