EasyManua.ls Logo

Qualcast MEB1334M - User Manual

Qualcast MEB1334M
23 pages
Print Icon
To Next Page IconTo Next Page
Loading...
Instruction Manual
Important - Please read these instructions fully before starting assembly
These instructions contain important information that will help you get the best from
your mower, ensuring it is assembled correctly and safely.
If you need help or have damaged or missing parts, call the Customer Helpline
on 08456 400 800.
Qualcast
1300W Electric Rotary Mower (Model: MEB1334M)
Aug 2012
UK/Ireland 08456 400 800
Web www.argosspares.co.uk
After Sales Support

Questions and Answers

Summary

Safety Information and Warnings

Warnings Symbols Explained

Symbols indicating safety measures for assembly and operation of the mower.

General Safety Guidelines

Intended Usage and Liability

Mower designed for private gardens; misuse voids warranty and liability.

Power Supply Requirements

Verify rating plate data matches your mains supply before connecting the equipment.

Personal Safety Precautions

Electrical Safety

Use RCD protection, approved plugs, and compliant extension cables. Check cables for damage.

Pre-Operation Checks

Check for damage, secure guards, proper grass collector fit, and blade condition before use.

Maintenance Safety

Disconnect power for maintenance. Use qualified personnel and wear gloves for blade work.

Safe Mowing Practices

Operating Environment Safety

Avoid enclosed spaces, rain, wet grass. Mow across slopes, avoid steep gradients.

Handling and Movement Safety

Keep feet away from blade. Do not lift when running. Ensure secure footing.

Bystander and Pet Safety

Ensure no people or pets are nearby. Maintain a 10-meter distance from the running mower.

Operating and Maintenance Safety Rules

General Safety Rules

Read all safety requirements. Errors may cause shock, fire, or injury. Keep instructions safe.

Cord and Blade Safety

Do not use damaged cords. Keep extension cords away from the blade. Disconnect from mains.

Operating and Maintenance Safety Precautions

Disconnecting Power

Disconnect mains when leaving unattended, before cleaning, after striking object, or if vibrating.

In the Box Contents

Parts List

Identifies all components included in the mower packaging with corresponding numbers.

Assembly Steps

Step 1 - Bottom Handle Support Assembly

Attaching the bottom handle supports to the mower deck using bolts and quick-release levers.

Handle Assembly

Step 2 - Top Handle Assembly

Connecting the top handle section to the bottom handle supports using bolts and quick-release levers.

Grass Collector Assembly

Step 2 - Grass Collector Assembly

Assembling the grass collector box by clipping halves together and inserting the grass flow insert.

Fitting and Removing Grass Collector

Step 3 - Fitting; Removing the Grass Collector

Instructions on how to attach and detach the grass collector, ensuring safety guards are in place.

Operating Instructions and Tips

Setting the Cutting Heights

Visual guide and explanation for adjusting the mower's cutting height from 20mm to 70mm.

Cutting Height Adjustment Details

Cutting Height Table

Details the cutting height settings (1-6) corresponding to specific millimeter measurements.

Mower Operation

ON;OFF Operation

Procedure for starting and stopping the mower using the lock-off safety button and on/off lever.

Stopping the Mower

Stopping Procedure and Safety

How to stop the mower by releasing the lever and important safety precautions during stopping.

Mowing Advice and Techniques

Mowing Techniques

Guidance on overlapping lines, cutting frequency, blade care, cable management, and grass collection.

Maintenance Procedures

Cleaning and Maintenance

Instructions for cleaning the mower, including safety advice on disconnecting power.

Blade Maintenance Overview

Visual guide to the mower's underside focusing on the blade for maintenance purposes.

Blade and Component Maintenance

Blade Replacement and Sharpening

Steps for replacing or sharpening the blade, including torque specs and safety.

Carbon Brushes

Guidance on checking/replacing carbon brushes, recommending qualified electrician intervention.

Maintenance and Storage

Information on no internal maintenance needs and storage recommendations for dry, inaccessible locations.

Troubleshooting Common Issues

General Troubleshooting Table

Table listing common mower faults, their possible causes, and recommended solutions.

Technical Data and Support

Technical Specifications

Specifications of the mower including voltage, power, speed, dimensions, and noise levels.

Disposal and Support Information

Guidance on proper disposal, recycling, and contact details for after-sales support.

Overview

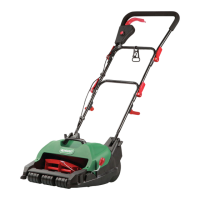
This document is an instruction manual for the Qualcast 1300W Electric Rotary Mower, model MEB1334M. It provides comprehensive information on the assembly, operation, maintenance, and troubleshooting of the lawnmower.

Function Description:

The Qualcast 1300W Electric Rotary Mower is designed for use in private gardens for cutting grass. It operates as a rotary mower, meaning it uses a rotating blade to cut the grass. The electric motor provides 1300W of power, making it suitable for typical domestic lawn care. The mower is intended for its prescribed purpose only, and any other use is considered misuse, for which the user/operator will be liable for any damage or injuries. It is not designed for commercial, trade, or industrial applications, and using it for such purposes will void the warranty.

Important Technical Specifications:

  • Model: MEB1334M
  • Power Input: 1300W
  • Voltage: 220-240 V ~ 50 Hz
  • Motor Speed: 3350 min⁻¹
  • Cutting Width: 34 cm
  • Cutting Height Adjustment: 20, 30, 40, 50, 60, 70 mm; 6 levels
  • Volume of Grass Collector: 35 liters
  • Wheel Size: 140/170 mm
  • LpA Sound Pressure Level: 76 dB(A) K=2.05dB(A)
  • LWA Sound Power Level: 96 dB(A)
  • Vibration at the Handlebars ahv: < 2.5 m/s²
  • Protection Class: II

Usage Features:

The mower is designed for ease of use and safety.

  • Assembly: The manual provides step-by-step instructions for assembling the bottom handle support, top handle, and grass collector. Quick release levers are used for handle assembly, allowing for adjustment of the handle height to suit the operator and for folding for storage. The grass collector is assembled from two halves and includes an insert to assist grass flow.
  • Starting and Stopping: To operate the mower, the user must first press the lock-off safety button (1) to unlock the on/off lever (2), and then operate the on/off lever to switch the mower on. Releasing the on/off lever stops the motor.
  • Cutting Height Adjustment: The mower offers 6 cutting height levels, ranging from 20 mm to 70 mm. To adjust, the user gently pulls the height adjustment lever towards them to disengage it, moves it to the desired position, and ensures it clicks back firmly. It is crucial to disconnect the power cord before adjusting the cutting height.
  • Grass Collection: The mower is equipped with a 35-liter grass collector. A "Grass Full Indicator" (though not explicitly detailed in the provided pages, it's mentioned as a feature in the contents) helps the user know when to empty the collector. The deflector guard must always be correctly fitted with the grass collector for safe operation.
  • Mowing Advice: The manual recommends mowing in overlapping lines with sharp blades to prevent grass from fraying and turning yellow. It advises against cutting more than half the grass height at once, especially for longer grass, suggesting multiple passes with gradual height reduction. Users should mow away from the power socket and cable, ensuring the mains lead is on the mowed section of the lawn.
  • Safety Features: The mower incorporates several safety measures, including a lock-off safety button, warnings against using the machine in rain or wet conditions, and instructions to keep bystanders at a safe distance. It emphasizes disconnecting from the mains supply before any maintenance or if the machine strikes a foreign object or vibrates abnormally. Users are advised to wear eye and ear protection, strong anti-slip footwear, and long trousers. The machine should not be used on gradients exceeding 15 degrees.

Maintenance Features:

Regular maintenance is crucial for the mower's performance and longevity.

  • General Cleaning: Always disconnect the mains power plug before cleaning. Keep safety devices, air vents, and the motor housing free of dirt and dust. The equipment should be wiped with a soft brush or blown with compressed air at low pressure after use. The mower should be cleaned regularly with a moist cloth and soft soap, avoiding cleaning agents or solvents that could damage plastic components. Water should not seep into the device.
  • Blade Maintenance: The blade should be checked regularly for sharpness and damage. A blunt blade can be sharpened by a specialized workshop, while damaged or imbalanced blades must be replaced with genuine replacement blades. The manual provides steps for changing the blade: turn the mower over, hold the blade firmly, undo the fastening screw, remove/replace the blade, ensure the blade's wings are angled upwards when fitting, and retighten the fastening bolt to approximately 25 Nm. Work gloves must be worn during blade maintenance.
  • Carbon Brushes: In case of excessive sparking, the carbon brushes should be checked and replaced only by a qualified electrician.
  • Storage: The mower should be stored in a dry place, out of reach of children. The manual states there are no other parts inside the mower requiring additional maintenance.

Troubleshooting:

The manual includes a troubleshooting table to address common problems:

  • Mower does not start: Possible causes include no power at the mains socket, a defective on/off switch, worn carbon brushes, or a defective motor. Solutions involve checking electrical connections, fuses, and seeking repair by a qualified technician.
  • Motor stops: Usually due to a blocked blade. Solution: disconnect from mains and remove the blockage.
  • Untidy finish, motor labours: Possible causes are a cut height that is too low, a blunt blade, or a blocked blade area. Solutions include setting a higher cut height, sharpening/replacing the blade, or removing the blockage.
  • Blade fails to turn: Can be caused by an incorrectly assembled blade or grass blocking the blade. Solutions: install the blade correctly or remove the blockage.
  • Strange noises, rattling or vibrations: Possible causes are a loose blade screw or a damaged blade. Solutions: tighten the blade screw or replace the blade.

The manual emphasizes the importance of reading all instructions fully before assembly and operation to ensure safety and optimal performance. It also provides customer helpline information for assistance and spare parts.

Qualcast MEB1334M Specifications

General IconGeneral
BrandQualcast
ModelMEB1334M
CategoryLawn Mower
LanguageEnglish

Related product manuals