SCREENSAVER
File Selection
Load Image
Test Image
Select Screensaver from USB
Load Screensaver
Test Screensaver
Stand-by
43
You can change the values for date, time, stand-by time, screen brightness and menu
language by clicking in the reference cells, using the adjustment buttons (10.8) and
confirming with the confirmation button (10.9).
The stand-by time (10.3) indicates the time required to activate the screensaver and is set
in seconds.
Click on button 10.6 to customise the screensaver (par. 11), after inserting a USB key,
containing the desired image(s), into the appropriate port.
11 SCREENSAVER
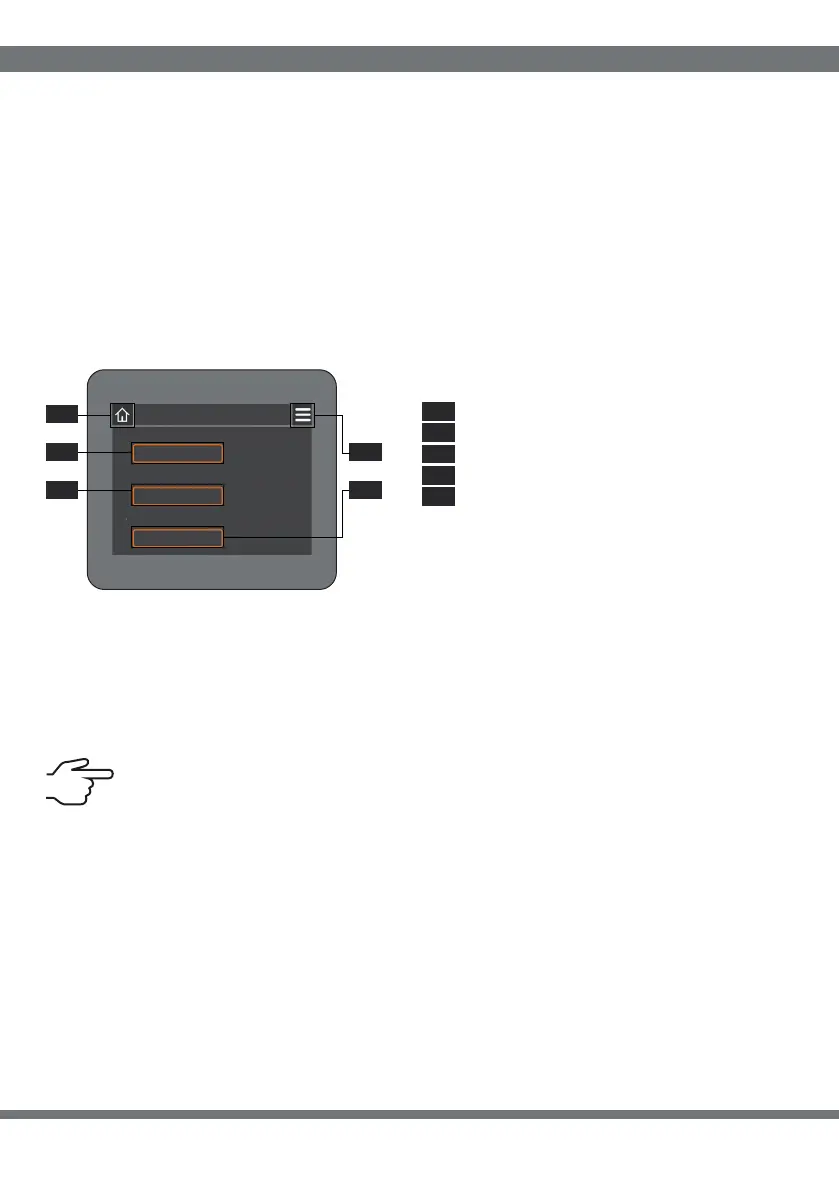
“File Selection” button
“Upload Image” button
“Image Test” button
Display: return (par.10)
Home: return (par.1)11
11
11
11
11
5
1
2
3
4
.
.
.
.
.
11 11
11 11
11
1
5
4
2 3
. .
. .
.
Click on button 11.1 to select the desired image from those contained within the USB stick
and confirm by clicking the green tick in the top right-hand corner. Click on button 11.2 to
load the image (when finished, the message “Programming complete” will appear). Using
button 11.3 you can see a preview of the selected image, to exit click on the screen.
The image chosen as screensaver must have a “.bmp” extension and a
resolution of 320x240 pixels.
SOFTWARE INTERFACE
 Loading...