13
Flood Gate Manual | www.quickdams.com
GENERAL MAINTENANCE AND INSTALLATION
Removing the clamp
Keep the allen screws and allen wrench in a safe place as they will
be needed to secure the Stanchion to the Base in the event of
a ood.
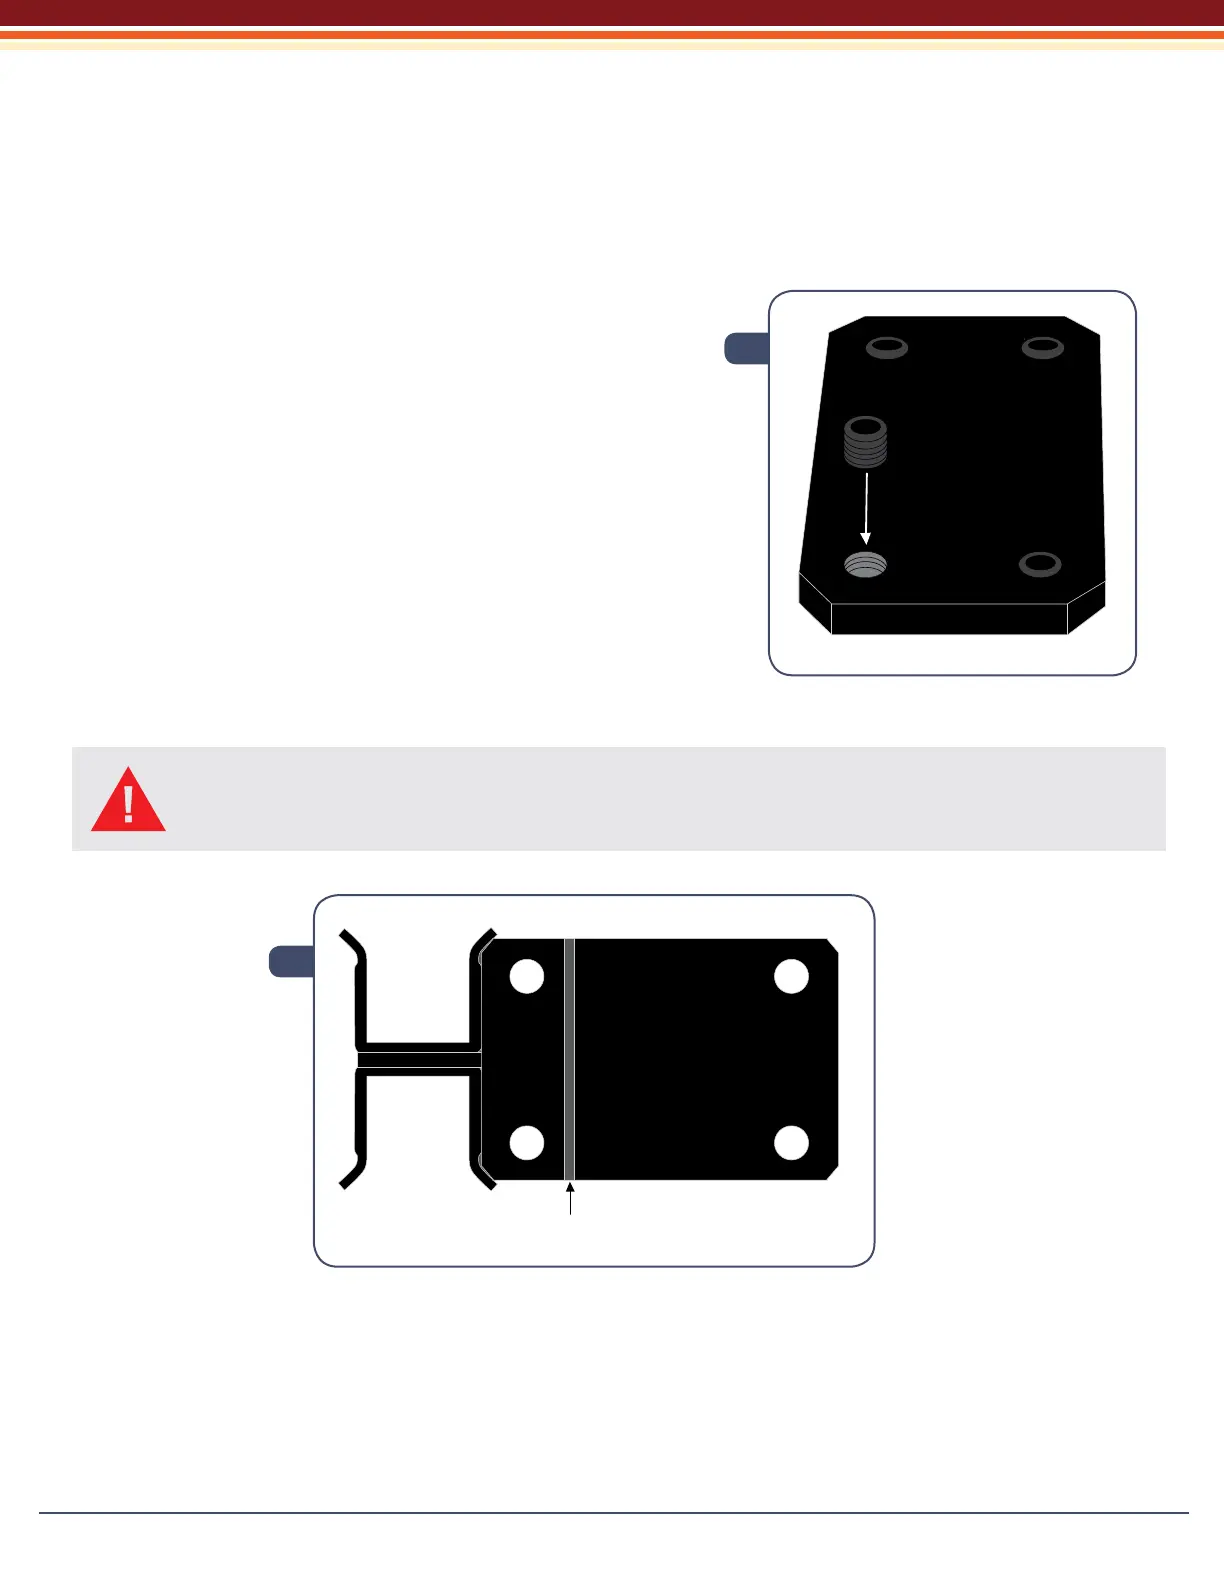
Maintaining the Base
1. There are (4) 1/2 in. - grub screws with every Stanchion.
These must be coated with a waterproof grease or anti-seize
compound and screwed into the holes on each plate. This will
protect the threads in the plate and allow trafc to move
across the anchor plate without damaging the threads
(See illustration Q).
2. These plugs should be ush with the top of the Base and no
deeper. They should also be re-greased periodically and after
every use to ensure they will come out when needed.
Before Installing the Stanchion
IMPORTANT: To prevent any leaking between the top of the Base and the bottom of the
Stanchionthereisamachined3/16”groovewhichshouldbelledwithsiliconecaulkto
add additional sealing (See illustration R).
Maintaining the sealing surfaces
Always keep the top of the Base and the bottom of the Stanchion clean and free of nicks and dents
as these are critical sealing surfaces.
Q
R