Operating Instructions: Charging Battery Outside Vehicle
WARNING
WARNING
!
!
A spark near the battery may cause a battery explosion. To reduce the risk of a spark
near the battery read and follow these instructions
When removing the battery from a vehicle or boat, disconnect the grounded post rst.
When disconnecting, make sure all accessories are off, to avoid arcing. When reinstalling
the battery, attach the ground post rst.
IMPORTANT: A MARINE BATTERY MUST BE REMOVED AND CHARGED ON SHORE. (TO CHARGE
ON-BOARD REQUIRES SPECIAL EQUIPMENT DESIGNED SPECIFICALLY FOR MARINE USE.)
IMPORTANT: BE SURE AREA AROUND BATTERY IS WELL VENTILATED WHILE BATTERY IS BEING CHARGED.
• Identify the polarity of the battery posts. The positive post will be marked with a “P”, “+”,
“POS”, or the color RED. The negative post will be marked with an “N”, “-“, “NEG”, or the
color BLACK
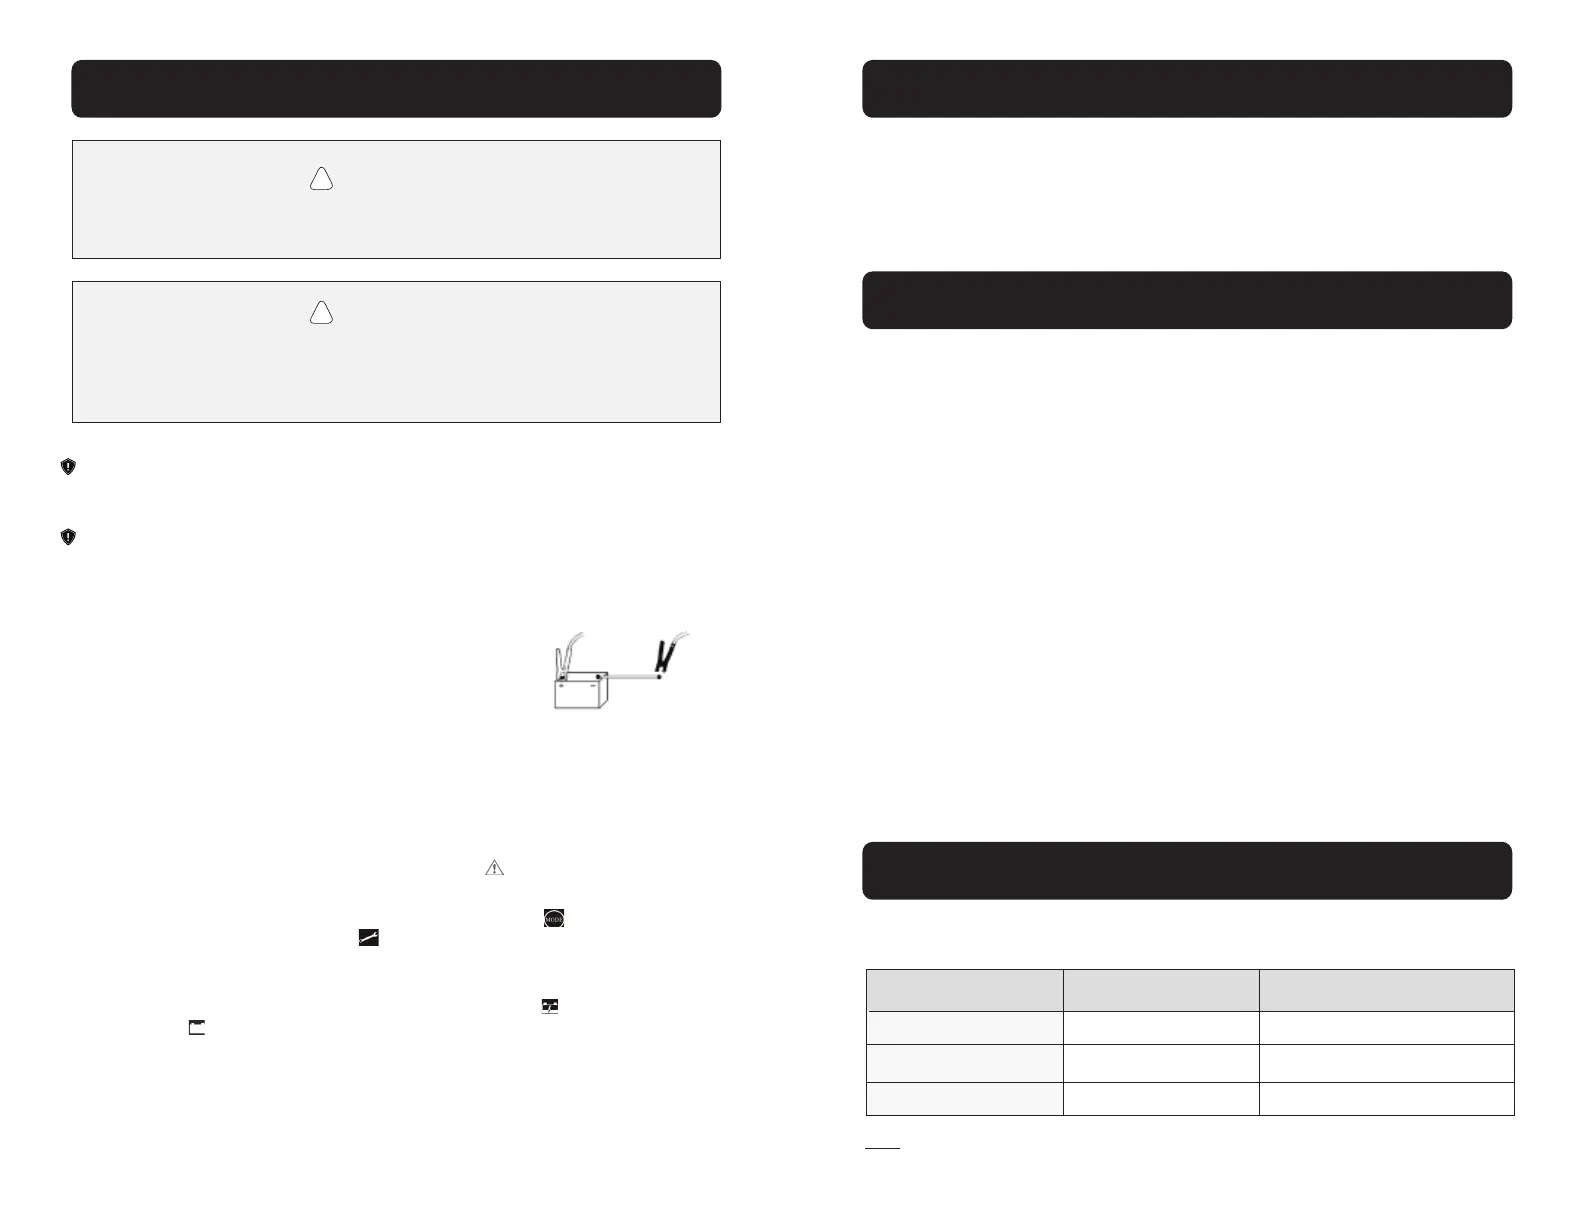
• Attach at least a 24inch long, 6 AWG insulated battery cable
to the Negative (NEG, -, N) battery post
• Connect the Positive (RED) charger clamp to Positive battery post
• Position yourself and the free end of the cable as far away from the battery as possible,
then connect Negative (BLACK) charger clamp to the free end of the cable
• Do not face battery when making nal connection
• Connect the charger into a grounded AC electrical outlet. The charger is now activated.
The “Power” light will illuminate.
• If the connection is reversed, the Fault light will illuminate. Unplug the battery charger
from the AC electrical outlet and correct the connections
• Set the charger to the desired mode by pressing the mode button until the mode light
you want illuminates. The “repair” light will activate as it checks or “qualies” the cur-
rent state of the battery. There may be an audible “click” sound as this stage is checking
the battery
• The charger will either stay in “repair” status or the “charge” light will illuminate
• The “full” light will illuminate when the battery is at optimum levels and the battery is
being maintained
• When disconnecting the battery charger, disconnect the charger from the AC electrical out-
let rst. Then remove the battery clamp from Negative post and remove the battery clamp
from Positive battery post.
• Clean and store your Rescue
®
Battery Charger
Assembly Instructions
Care / Maintenance / Storage
Calculate Charging Time
• Y our Rescue
®
Battery Charger needs very limited assembly
• Unwrap the battery clamp cable assembly and/or the ring terminal cable assembly cord
and connect one of the assemblies to the output cord using the quick-connect plug
• When not in use, cover the open quick-connect plugs using the connection cover on the cable
Your Rescue
®
Battery Charger needs only minimal maintenance to deliver years of
dependable service. Follow these simple steps to maintain the charger in optimum condition.
The chart below will assist with estimating the time it will take to bring your battery to an
optimum charge. Identify where your battery ts into the chart.
Note: The times given are estimated for batteries with a 50% charge prior to recharging.
Times will vary depending on severity of discharge, age and condition of battery.
• Before performing maintenance, unplug and disconnect the battery charger
• After each use, clean the battery charger clamps with an acid neutralizing wipe or similar
cleaner to be sure to remove any battery uid that will cause corrosion of the metal clamp
and other surfaces
• Clean the outside case of the charger with a soft dry cloth and, if necessary, mild soap
solution. DO NOT SUBMERGE THE BATTERY CHARGER IN WATER
• Keep the charger cords loosely coiled during storage to prevent damage
• Maintenance does not require opening the unit. There are no serviceable parts. Opening
the unit could cause damage and possible injury. Opening the unit will void all warranty
• Do not use the charger if cords or clamps have been damaged in any way
• If the AC power supply cord is cut or damaged, do not use the charger
• Store your battery charger unplugged, in an upright position. The AC input cord will
conduct electricity until it is unplugged from the electrical outlet
• Store inside in a cool, dry place
• Do not store the battery clamps, clamped together, on or around metal, or clipped to the cables
Application
Powersports
Automotive
Marine
Battery Size
6Ah - 32Ah
300 CCA - 1000 CCA
50 Ah - 105 Ah
4 Amp Charging Time
2 - 8 hours
6 - 16 hours
13 - 26 hours
9 10
 Loading...