109
ENGLISH (109-501)
32
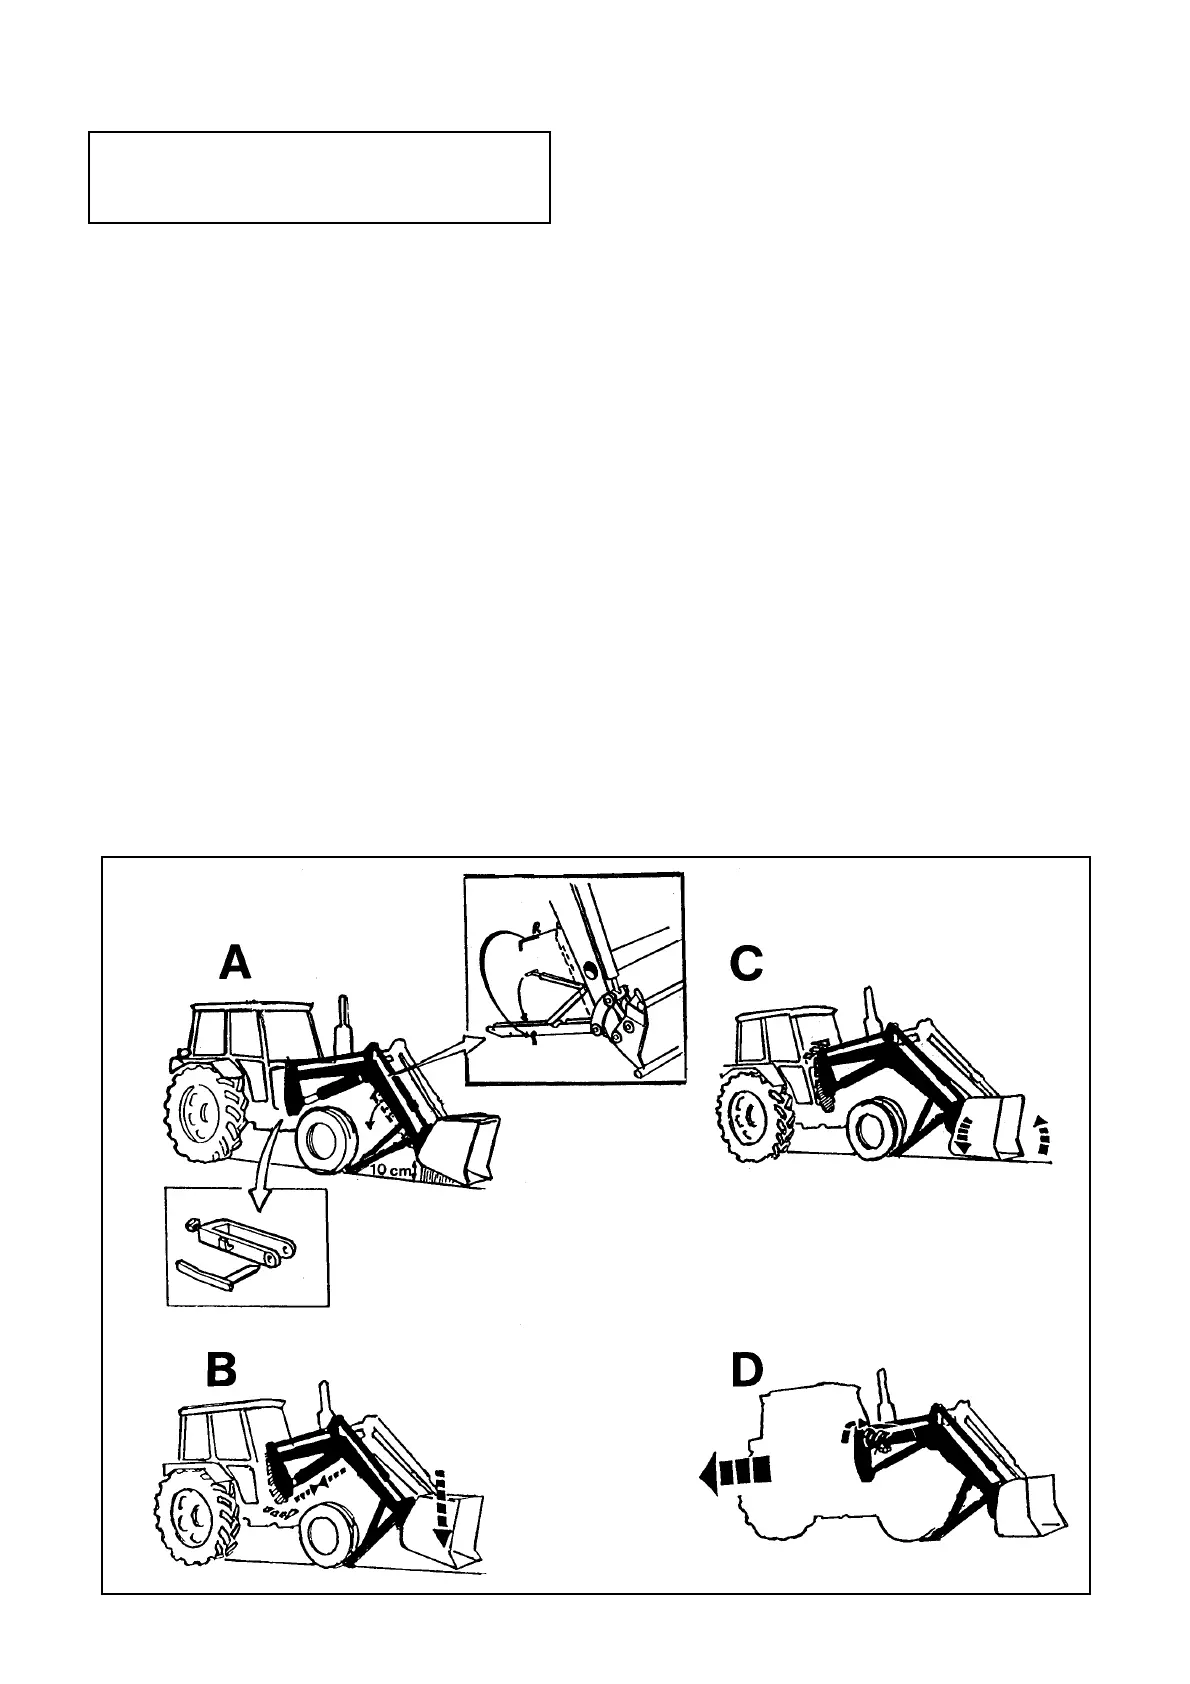
ATTACHING / DETACHING OF LOADER
Place tractor and loader on plane and solid
ground.
Attach an implement to the loader.
Illustr. 32 A.
- Dump the implement and lower the beam so that the
rear part of the implement is about 10 cms above the
ground.
- Lower the parking legs, which are placed under the
front part of the loader beam.
- Secure the stay to the parking leg (in one of the holes)
by the aid of a pin and a locking pin.
- Release the retaining forks and remove the pins (one
at each side).
Illustr. 32 B
- Lower the loader beam so that the lift rams get
completely compressed.
Illus. 32 C
- Crowd implement carefully. The back of the loader will
then raise and get released from the subframe.
Illustr. 32 D
- Turn off the engine and release the oil pressure to the
loader rams by the aid of the control valve. Use the
float function, if required.
- Disconnect hoses and put dust caps on quick-coup-
lings.
- Reverse the tractor carefully until it is completely
detached from the loader.
NOTE !! make sure that the hoses don't get hooked up
on the tractor.
- These instructions shall be carried out in reverse
order when the loader is attached. Difficulties to
connect the quick couplings are caused by a not
released oil pressure.
WARNING: Never use force on valve cone. The quick-
coupling may be damaged in such a way that it won't
open up properly when compressed (there will be oil flow
in one direction only). Make sure that there is no mix-up
of hoses - note the colour marking.
 Loading...