5.2 The quLD Module
5.2 The quLD Module
The quLD module has two dierent tabs:
1. User Parameters
2. Settings
1
5.2.1 User Parameters
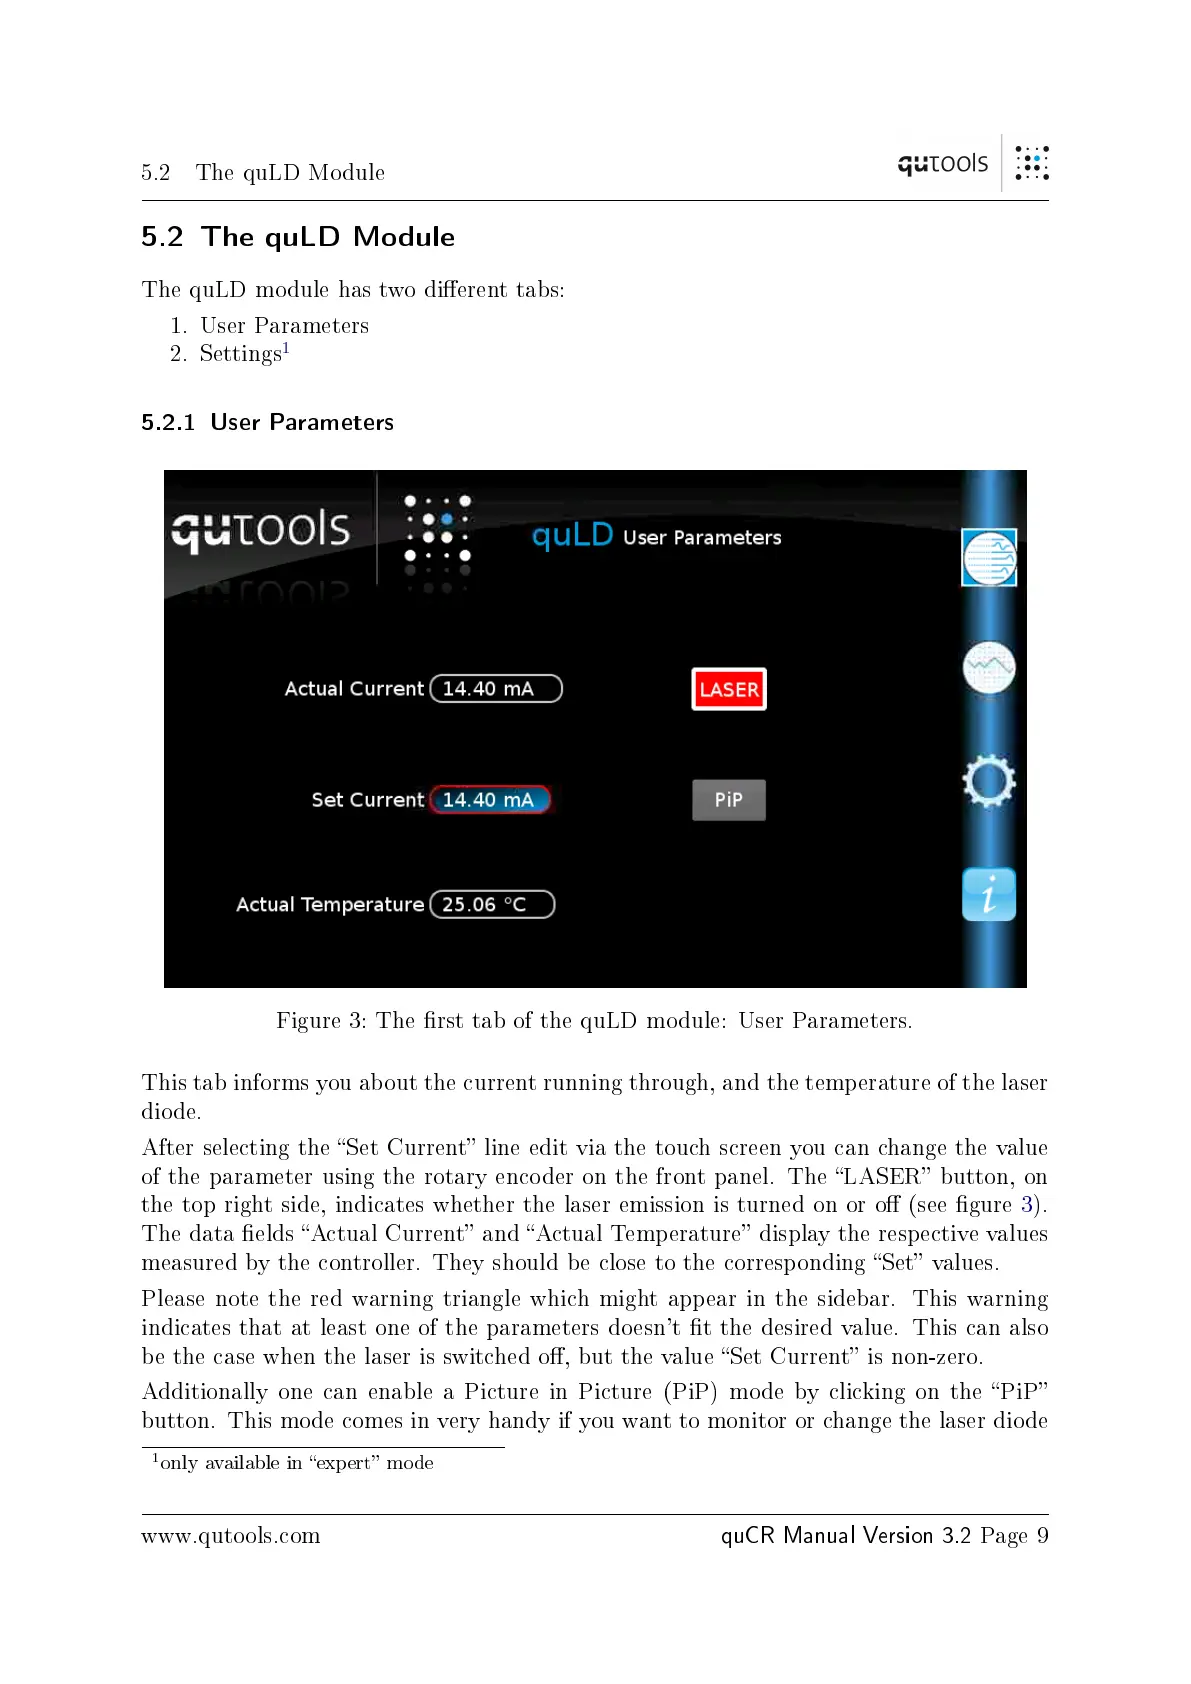
Figure 3: The rst tab of the quLD module: User Parameters.
This tab informs you about the current running through, and the temperature of the laser
diode.
After selecting the Set Current line edit via the touch screen you can change the value
of the parameter using the rotary encoder on the front panel. The LASER button, on
the top right side, indicates whether the laser emission is turned on or o (see gure 3).
The data elds Actual Current and Actual Temperature display the respective values
measured by the controller. They should be close to the corresponding Set values.
Please note the red warning triangle which might appear in the sidebar. This warning
indicates that at least one of the parameters doesn't t the desired value. This can also
be the case when the laser is switched o, but the value Set Current is non-zero.
Additionally one can enable a Picture in Picture (PiP) mode by clicking on the PiP
button. This mode comes in very handy if you want to monitor or change the laser diode
1
only available in expert mode
www.qutools.com
quCR Manual Version 3.2
Page 9
 Loading...