Do you have a question about the Rachio 3 and is the answer not in the manual?
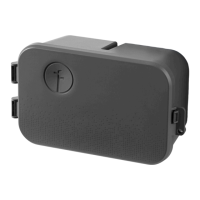
Lists the essential parts included in the Rachio 3 package, such as the controller, faceplate, screws, and power adapter.
Specifies the necessary prerequisites for installation, including Wi-Fi access and a compatible smartphone or tablet.
Details the tools required for mounting the controller, such as a Phillips screwdriver, hammer, and drill bit.
Instructions for testing the existing sprinkler system, photographing wiring, and removing the old controller from the wall.
Guide to connecting common wires, zone wires, master valve wires, and sensor wires to the controller's terminals.
Instructions on how to connect the power adapter to the controller and a power outlet.
| Weight | 1.1 lbs |
|---|---|
| Warranty | 2-year limited warranty |
| Water Usage Reports | Yes |
| Zones | 8 or 16 zones |
| Wi-Fi Connectivity | 2.4 GHz |
| Weather Intelligence | Yes |
| Mobile App | iOS and Android |
| Voice Control | Amazon Alexa, Google Assistant |
| Power Source | Plug-in transformer |