EasyManua.ls Logo

radiance TARG-6B24RG - User Manual

radiance TARG-6B24RG
14 pages
Print Icon
To Next Page IconTo Next Page
Loading...
OWNER & OPERATOR
INSTRUCTION MANUAL
For service contact:
German Knife Inc.
1-800-500-3519
www.turboairinc.com
Model No.
www.turboairinc.com
IMPORTANT SAFETY NOTICE
THIS MANUAL HAS BEEN PREPARED FOR PERSONNEL QUALIFIED TO INSTALL GAS EQUIPMENT, WHO SHOULD
PERFORM THE INITIAL FIELD START-UP AND ADJUSTMENTS OF THE EQUIPMENT COVERED BY THIS MANUAL.
POST IN A PROMINENT LOCATION THE INSTRUCTIONS TO BE FOLLOWED IN THE EVENT THE SMELL OF GAS IS
DETECTED. THIS INFORMATION CAN BE OBTAINED FROM THE LOCAL GAS SUPPLIER.
IMPORTANT
In the event a gas odor is detected, shut down units at main shutoff valve and contact the local gas company or gas supplier for service.
FOR YOUR SAFETY
Do not store or use gasoline or other flammable vapors or liquids in the vicinity of this or any other appliance.
WARNING
Improper installation, adjustment, alteration, service or maintenance can cause property damage, injury or death. Read the installation,
operating and maintenance instructions thoroughly before installing or servicing this equipment.
TAR-6 / TAR-36G / TAR-36RB
TAR-4 / TAR-24G / TAR-24RB
TARG-2B24G / TARG-24G2B
TARG-4B12G / TARG-12G4B
TARG-6B12G / TARG-12G6B
TAR-8
TARG-2B36G / TARG-36G2B
TARG-4B24G / TARG-24G4B
TARG-8B12G / TARG-12G8B
TAR-10
TARG-6B24G / TARG-24G6B
TARG-4B36G / TARG-36G4B
TARG-2B48G / TARG-48G2B
TARG-6B24RG / TARG-24RG6B
Question and Answer IconNeed help?

Do you have a question about the radiance TARG-6B24RG and is the answer not in the manual?

Overview

This document is the Owner & Operator Instruction Manual for Radiance cooking appliances, manufactured by German Knife Inc. It provides comprehensive information for the installation, operation, and maintenance of various Radiance range and countertop cooking series models, as well as other German Knife and Radiance products.

Function Description

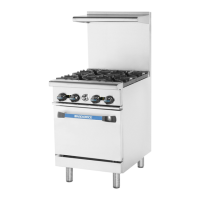
The manual covers a range of commercial cooking equipment, primarily focusing on gas-powered ranges and countertop units. These appliances are designed for heavy-duty commercial kitchen use, offering features such as top burners, griddles, hot tops, and ovens. The manual emphasizes safe and efficient operation, proper installation procedures, and routine maintenance to ensure longevity and optimal performance.

Important Technical Specifications

Gas Connection and Pressure:

  • Inlet Size: Radiance ranges and ovens use a 3/4" NPT inlet.
  • Sealant: All pipe joint sealant must be resistive to LP gas.
  • Pressure Regulator: A pressure regulator is supplied with each Radiance Range and must be installed on the appliance. Failure to install it voids the warranty.
  • Regulator Settings (Factory Adjusted):
    • Natural Gas: 5" WC (Water Column) manifold gas pressure.
    • Propane Gas: 10" WC manifold gas pressure.
  • Maximum Inlet Pressure: Regulators can withstand a maximum inlet pressure of 1/2 PSI (14" WC). Exceeding this pressure will damage them.
  • Gas Flow Direction: An arrow forged into the bottom of the regulator body indicates gas flow direction, which should point downstream to the appliance.
  • 60" Ranges: Require two gas connections, each with an individual, dedicated line to the main gas supply and its own pressure regulator.
  • Shut-off Valve: A manual gas shut-off valve must be installed in the gas supply line ahead of the appliance and regulator.
  • Pressure Testing: The appliance and its individual shut-off valve must be disconnected from the gas supply piping system during pressure testing exceeding 1/2 PSI. For testing at or below 1/2 PSI, the individual shut-off valve should be closed.
  • Gas Type: Radiance cooking appliances must only be connected to the type of gas identified on the rating plate.

Clearances (from combustible and non-combustible construction):

  • Back: 8" (combustible), 0" (non-combustible).
  • Sides: 12" (combustible), 0" (non-combustible).
  • Floor: Non-combustible, with the unit extending 2" beyond the front edge of a non-combustible curb or platform if legs or casters are not used.

Leveling:

  • Units should be leveled front-to-back and side-to-side using a spirit level.
  • Legs offer up to 1-1/4" adjustment. Shims may be required for greater adjustments or with casters.

Ventilation:

  • The area around the appliance must be kept clear for combustion and ventilation air flow.
  • An exhaust hood is typically required to vent combustion waste products outside the building. Filters and drip troughs are recommended.
  • Strong exhaust fans or air conditioning systems can cause drafts that interfere with pilot or burner performance, potentially requiring make-up air openings or baffles.

Power Failure:

  • The appliance is not capable of being operated during a power failure. No attempt should be made to operate it under such conditions.

Flexible Couplings, Connectors, and Casters:

  • Flexible Connector: Must be a heavy-duty, AGA design certified commercial flexible connector of at least 3/4" NPT with suitable strain reliefs, complying with ANSI Z21.69 and addendum Z21.69a.
  • Quick-Disconnect Device: Must comply with ANSI Z21.41 and addendum Z21.41a.
  • Restraint: If disconnected, the restraint must be reconnected after the appliance is returned to its original position.
  • Casters: If installed, a flexible connector must be used, and locking front casters are provided to limit movement. A suitable strain relief must be installed.
  • Sealant: All connections must be sealed with a joint compound suitable for LP gas and tested with a soapy water solution before lighting pilots.

Usage Features

Pilot Lighting:

  • General: All burner valves and thermostats must be turned "off" before lighting pilots. Gas connections must be checked for leaks with a soapy water solution (never an open flame).
  • Top Burners / Raised Griddle-Broiler: Equipped with constant-burning pilots, manually lighted after gas is turned on. Pilot adjustments can be made with a screwdriver to the brass pilot valve.
  • Hot Top: Pilot lighted with a long match through the valve cover or by lifting the plate. Pilot flame adjustment is possible with a screwdriver.
  • Griddles: Pilot ignited similarly to hot top, through the front control panel opening. Pilot valve accessible for adjustment with a screwdriver.
  • Standard Oven:
    1. Turn thermostat knob to "off" and wait 5 minutes.
    2. Remove lower kick plate to expose pilot safety valve and burner.
    3. Ensure accumulated gas has dispersed (check for propane gas odor near floor).
    4. Depress and hold the button on the safety valve throughout lighting.
    5. Light the pilot; continue holding the button until the pilot remains lit when released.
    6. If extinguished, repeat steps 4 & 5.
    7. Turn thermostat knob "on" to desired temperature; ensure oven burner ignites from pilot with no yellow flames.
    8. Turn thermostat to "off" and replace kick plate.
    • Note: May require several relights to purge air and attain constant gas flow.

Initial Preparation:

  • Top Section: Wipe clean with solvents at the factory. Food preparation surfaces and top grates should be thoroughly washed with hot, soapy water before use. Remove plastic tie cords holding burners in place.
  • Griddle Seasoning:
    1. Clean surface with hot, soapy water to remove protective oil coating.
    2. Rinse with 1/4 cup vinegar to one quart water mixture.
    3. Spread unsalted solid shortening or liquid frying compound evenly.
    4. Turn burners to "medium" or thermostats to 350°F; wait for smoke, then turn off.
    5. Rub melted shortening into the surface with burlap, following polish marks.
    6. Let cool, then repeat steps 3-5.
    7. After second seasoning, wipe with a thin film of shortening or cooking oil.
  • Hot Top: Wash in place to remove solvent and oil films, then lightly coat with cooking oil. A flat tip screwdriver can be used as a lever to remove the hot top.
  • Ovens: On initial installation, operate at 250°F for 1 hour, then at maximum for another hour to drive off solvents. Turn off, open door to cool, then wash thoroughly with hot, soapy water.

Maintenance Features

Daily Cleaning:

  • Open Burners: Lift grates, then lift off burner heads and venturies (raise slightly, slide to rear, lift upwards). Wash all parts in hot, soapy water. Reinstall in reverse order.
  • Griddles:
    1. Scrape cooked spills with a nylon griddle scraper (use fine-grained stone only when necessary).
    2. Wipe away dust/food particles with burlap.
    3. Wash with hot, soapy water, then rinse with vinegar and water.
    4. Rinse again with clear water.
    5. Re-oil with shortening or liquid frying compound.
    • Caution: Do not flood a hot griddle with cold water, as this can cause cracking.
  • Hot Tops: Scrape off food spills. Wash with hot, soapy water, then rinse and lightly oil.
  • All Ovens and Salamander Broilers:
    1. Remove baking racks; wash in hot, soapy water, then replace.
    2. Remove oven bottom (lift from front, slide forward).
    3. Scrape food particles with a nylon griddle scraper (be careful not to scratch porcelain finish).
    4. Wash all parts with hot, soapy water, then reassemble.
    5. Loosen baked-on spills with ordinary household ammonia and scrub with a nylon pad (in a cold oven only).
    6. Do not allow spray-type oven cleaners to contact the temperature probe.
    7. After cleaning, rinse well with 1/4 cup vinegar to quart of clear water solution to neutralize caustic residue. Wipe dry.
    8. Infra-red burners (on cheesemelters/salamanders) require monthly cleaning.
    • Caution: Never use ammonia in an oven warmer than room temperature. Always ensure direct ventilation. Solvents or wire brushes may damage tiles.

Periodic Cleaning:

  • Ventilation System: Check stub back, high riser, or high shelf exhaust vents for obstructions.
  • Oven Door Hinge: Lubricate pivot pins of oven door hinge where lever arms connect to the door with multi-purpose lubricating oil (sparingly).
  • Annual Check-up: Radiance range should be checked at least yearly by a qualified service company for safe and efficient operation.

Stainless Steel:

  • Daily: Wipe body parts regularly with hot soapy water and a liquid cleaner designed for stainless steel.
  • Caution: DO NOT USE steel wool, abrasive cloths, cleansers, or powders.
  • Encrusted Materials: Soak in hot water to loosen, then use a wood or nylon scraper. DO NOT USE a metal knife, spatula, or any other metal to scrape. Scratches are almost impossible to remove.

Warranty Information:

  • One Year Warranty: Covers Radiance Medium Duty Microwaves (ER/MR series), Radiance Ranges & Countertop cooking series (TAR-, TARG-, TAHP-, TARB-, TAMG-, TATG-, TASP-, TAWR-), Radiance Cheesemelters, Salamanders, Steam Tables, Hand Wrappers, Food Warmers (TACM-, TASM-, RST-, RHW-, RFW-), and German Knife Light Duty Slicer (GS-10LD, GS-12LD).
  • Two Year Warranty: Covers German Knife Heavy Duty Meat Slicer (GS-12A, GS-12M, GS-13A, GS-13M), German Knife Meat Grinder (All GG-), and German Knife Band Saw (All GBS-).
  • Three Year Warranty: Covers Radiance Heavy Duty Microwaves (TMW-1200HD, TMW-1800HD).
  • Coverage: Limited to repair or replacement of defective parts or assemblies, including standard straight-time labor charges and reasonable travel time as determined by German Knife / Radiance.
  • Exclusions: Improper installation (e.g., wrong utility connection), lack of maintenance (e.g., calibration, adjustment to pilots/burners, improper cleaning), improper use (e.g., alteration, neglect, abuse, misuse, accident, transit damage, fire, food, acts of God), non-transferable warranty (applies only to original purchaser), equipment failure due to electrical power issues (e.g., extension cords, low voltage), and products sold or used outside the U.S.
  • Disclaimer: Warranties are exclusive and in lieu of all other warranties, including implied warranty and merchantability or fitness for a particular purpose. No consequential damages are covered.

radiance TARG-6B24RG Specifications

General IconGeneral
Brandradiance
ModelTARG-6B24RG
CategoryStove
LanguageEnglish

Related product manuals