INSTALLATION INSTRUCTIONS
24
Twin pipe flue kit system
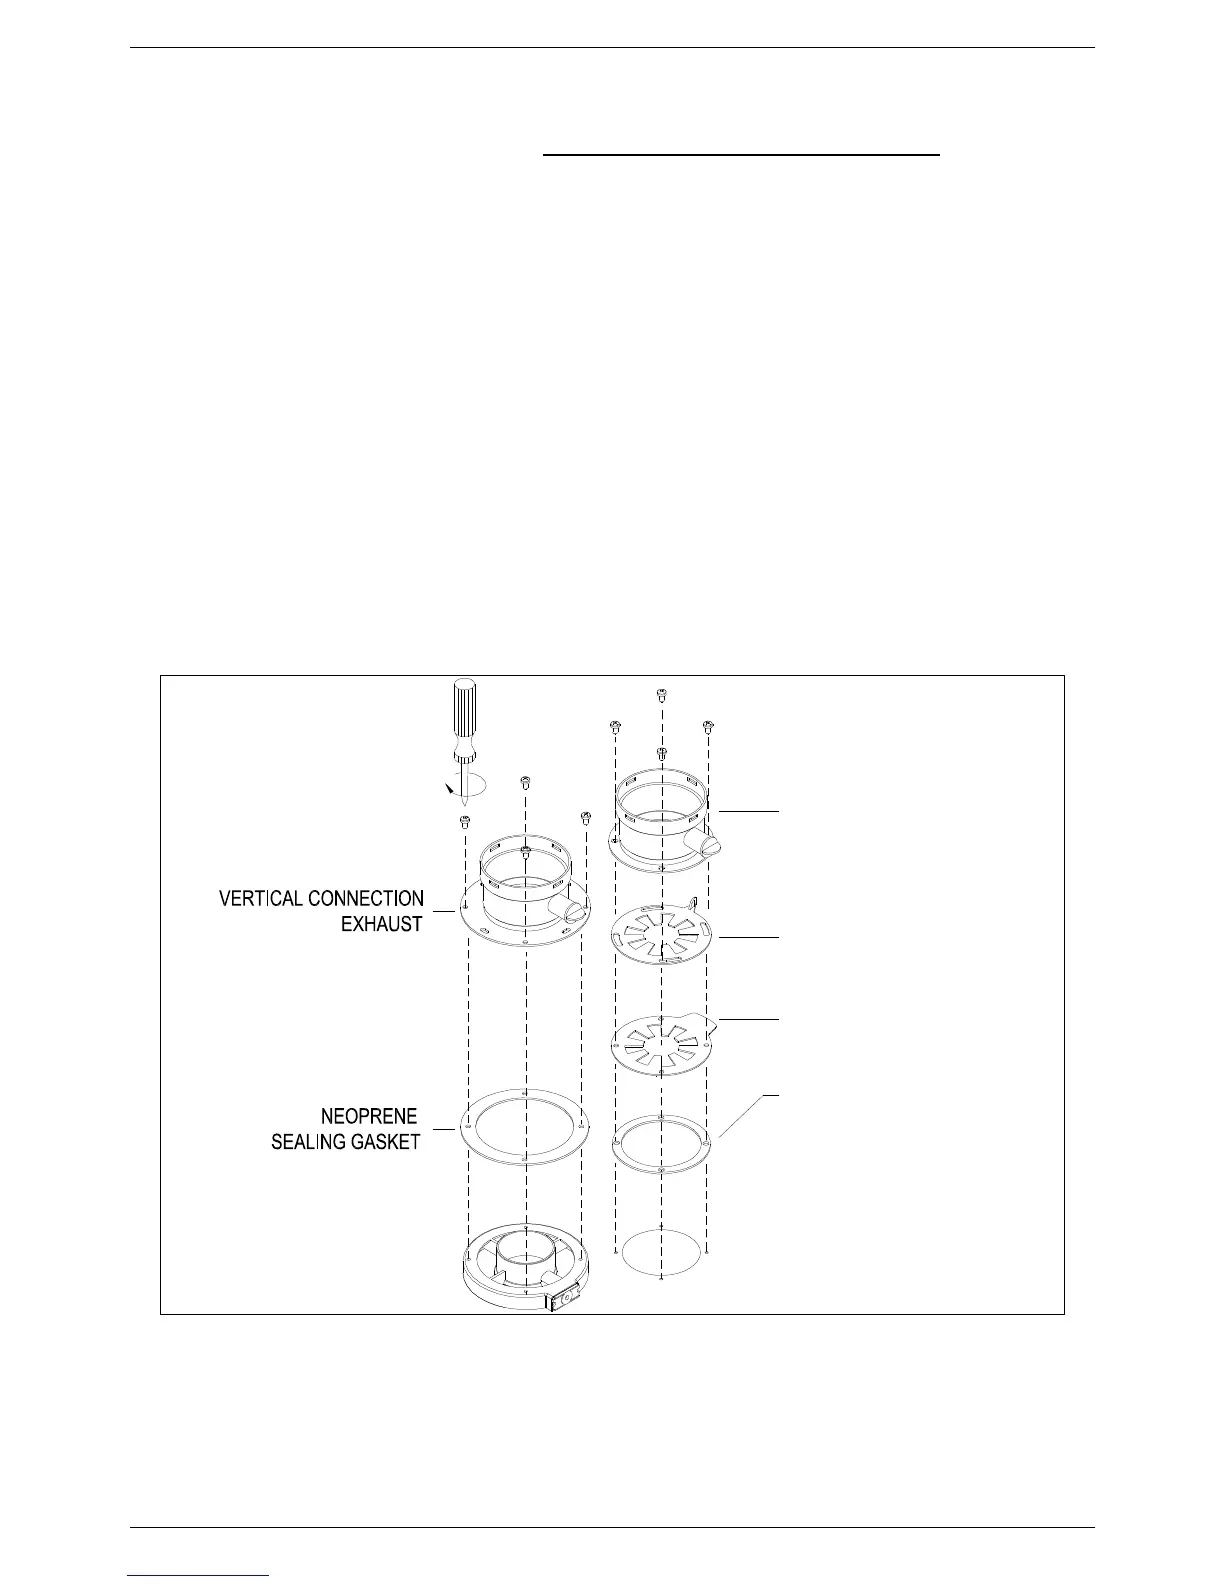
Adjustable flue diaphragms have to be installed on the air intake hole on the top of the boiler.
Installation Instructions: (see fig. 1):
−
Install the Ø60mm. aluminium collar onto the flue exhaust vertical connector and fit it on the top of boiler, central
hole (flue exhaust) after having positioned the neoprene washer.
−
Remove the air intake hole cover;
−
Clean the seal chamber surface in the area of the air intake hole;
−
Stick the neoprene washer paying attention to centre holes of the washer with those on the air intake opening;
−
Position flue diaphragms respecting this order: lower disc first with graduated numbers then the upper disc;
−
Install the flue connector or other accessory according to the chosen type of twin pipe flue kit system;
−
Fix the system with self tapping screws provided with the flue kit;
−
Complete the flue kit installation;
Important! Make the final tightening of screws only after the diaphragms have been set.
Fig. 1
 Loading...