Connection
of
a Cassette Recorder
The
following instructions use the
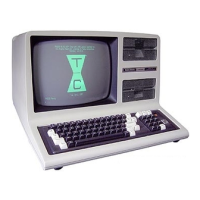
CTR-80A
recorder (Radio Shack Catalog Number
26-1206)
as an example.
If
you use a differentrecorder, connectionand operation
may
vary.
Note:
You
do notneed to connectthe Cassette Recorderunless you plan to record
programs
or
to load taped programs into the
TRS-80.
A
TRS-80
to Cassette Recorderconnection cable is included with the
CTR,80A;
we
suggestthat you use this specially designed cable.
1.
Connect
the shortcable
(DIN
plug
on
one
end
and three plugs on the other) to the
T
APE
jack
on
the
back
of
the Computer. Be
sure
you getthe plug to mate
correctly.
2.
The
three plugs
on
the otherend
of
this cable are for connecting to the recorder.
3.
A.
Connect
the black plug into the EARjack
on
the side
ofthe
recorder. This
connectionprovides the output signal from the recorder to
TRS-80
(for
loading
Tape
programs into
TRS-80).
B.
Connect
the larger
gray
pluginto the
Auxjack
on
the recorder. This
connectionprovides the recording signal to record programs from the
TRS-80
onto the tape.
Leave
the
AUX
plugin whetheryou
are
recording
or
playing
back
cassette
data.
C.
Connect
the smallergray plug into the smaller
MIC
jack
on
the recorder.
This allows the
TRS-80
to automatically control the recorder motor (turn
tape motion
on
and
off
for recording and playing tapes.)
Note:
Do
not plug a remote microphone
or
a
dummy
plug into the larger
MIC
jack.
Connectionto
an
AC
Power Source
Make
sure the
Computer
and
all peripherals are off.
The
AC
Power
Cord
exits from the rear
of
the Computer. Connectitand all
peripherals to an appropriate
power
source.
Power
requirements for Radio Shack
products are specified
on
the units and in the
Owner's
Manual Specifications.
For
convenience, you
may
connectall components to a
single'
'power
strip" such
as
Radio
Shack's
26-1451
Line Filter. This will allowyou to turn
on
the entire system
with a single switch.
Take
care notto exceedthe currentcapacity
of
the
power
strip.
2/3
 Loading...