62
• The operation is performed by two people. Lift the upper steel bar to release the machine (Fig. 3).
• Release the machine from the metal fasteners that hold the four wheels to the base.
CC To prevent damage to the deck and blade and blade, move them to their maximum height
during travel down the main platform. Be very careful when performing this delicate unpacking
operation.
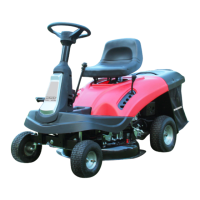
PACKAGE CONTENTS
1x Mower Body, 1x Seat, 1x Grass Catcher, 1x Steering Wheel, 1x Lever, 1x Fastener Kit, 1x Battery,
1x charger, 1x user manual
Standard accessories are subject to change without notice.
This product requires assembly. The device must be properly assembled before use.
INSTALLATION
Due to storage and transportation, some machine components are not installed at the factory and
must be assembled after unpacking.
Unpacking and completing assembly must be done on a level and stable surface with enough
space to handle the machine and its packaging, always using the appropriate tools.
Follow the instructions below.
STEERING WHEEL ASSEMBLY
1. Place the machine on a level surface and straighten the front wheels.
2. Place the steering wheel (g. 4A) on the protruding shaft (g. 4B) and tighten it with the supplied
screws (g. 4C) and nuts (g. 4D).
3. Tighten. Pull on the steering wheel to make sure it is locked in place.
INSTALLATION AND ADJUSTMENT OF THE SEAT
1. Place the seat (g. 5A) on the deck (g. 5B) with the screws (g. 5C).
2. Before tightening the four screws, adjust the fore/aft position of the seat to best t the rider.
SEAT ADJUSTMENT
1. To change the position of the seat, loosen the four xing bolts and slide them along the
the slits.
2. Once you have found the correct position, tighten the four screws.
INSTALLATION OF THE BLADE ACTIVATION LEVER
1. Place the end of the lever (g. 6A) on the projecting part of the pin (g. 6B) in the front
part of the machine.
2. Fix it by tightening the screw (g.6C) and nut (g.6D). Tighten up.
OPENING THE ENGINE HOOD
1. To open the engine cover, it is necessary to unscrew the handle of the throttle lever (g. 7A).
2. Place the height adjustment lever (g. 7B) in the highest position “5” and insert
the gear shift lever (g.7C) in the “R” position.
3. Lift the cover by pulling the front part upwards (g.8).
4. Close in reverse order.
INSTALLING THE BATTERY
1. Place the battery (g. 9A) in the housing under the engine cover.
2. Connect the battery connectors to the connecting cables of the machine (g. 10A).
3. Charge the battery by following the instructions in “Battery Maintenance”.
Never start the engine until the battery is fully charged.
DANGER: Never dispose of the battery in the environment. If the battery needs to be replaced,
follow the disposal procedures set by your local authorities.