B
H152
H152
H131
H11
H3
H30
37
57
58
17
17
51
76
NOTE:
Rail Uprights not
shown for clarity
of installation
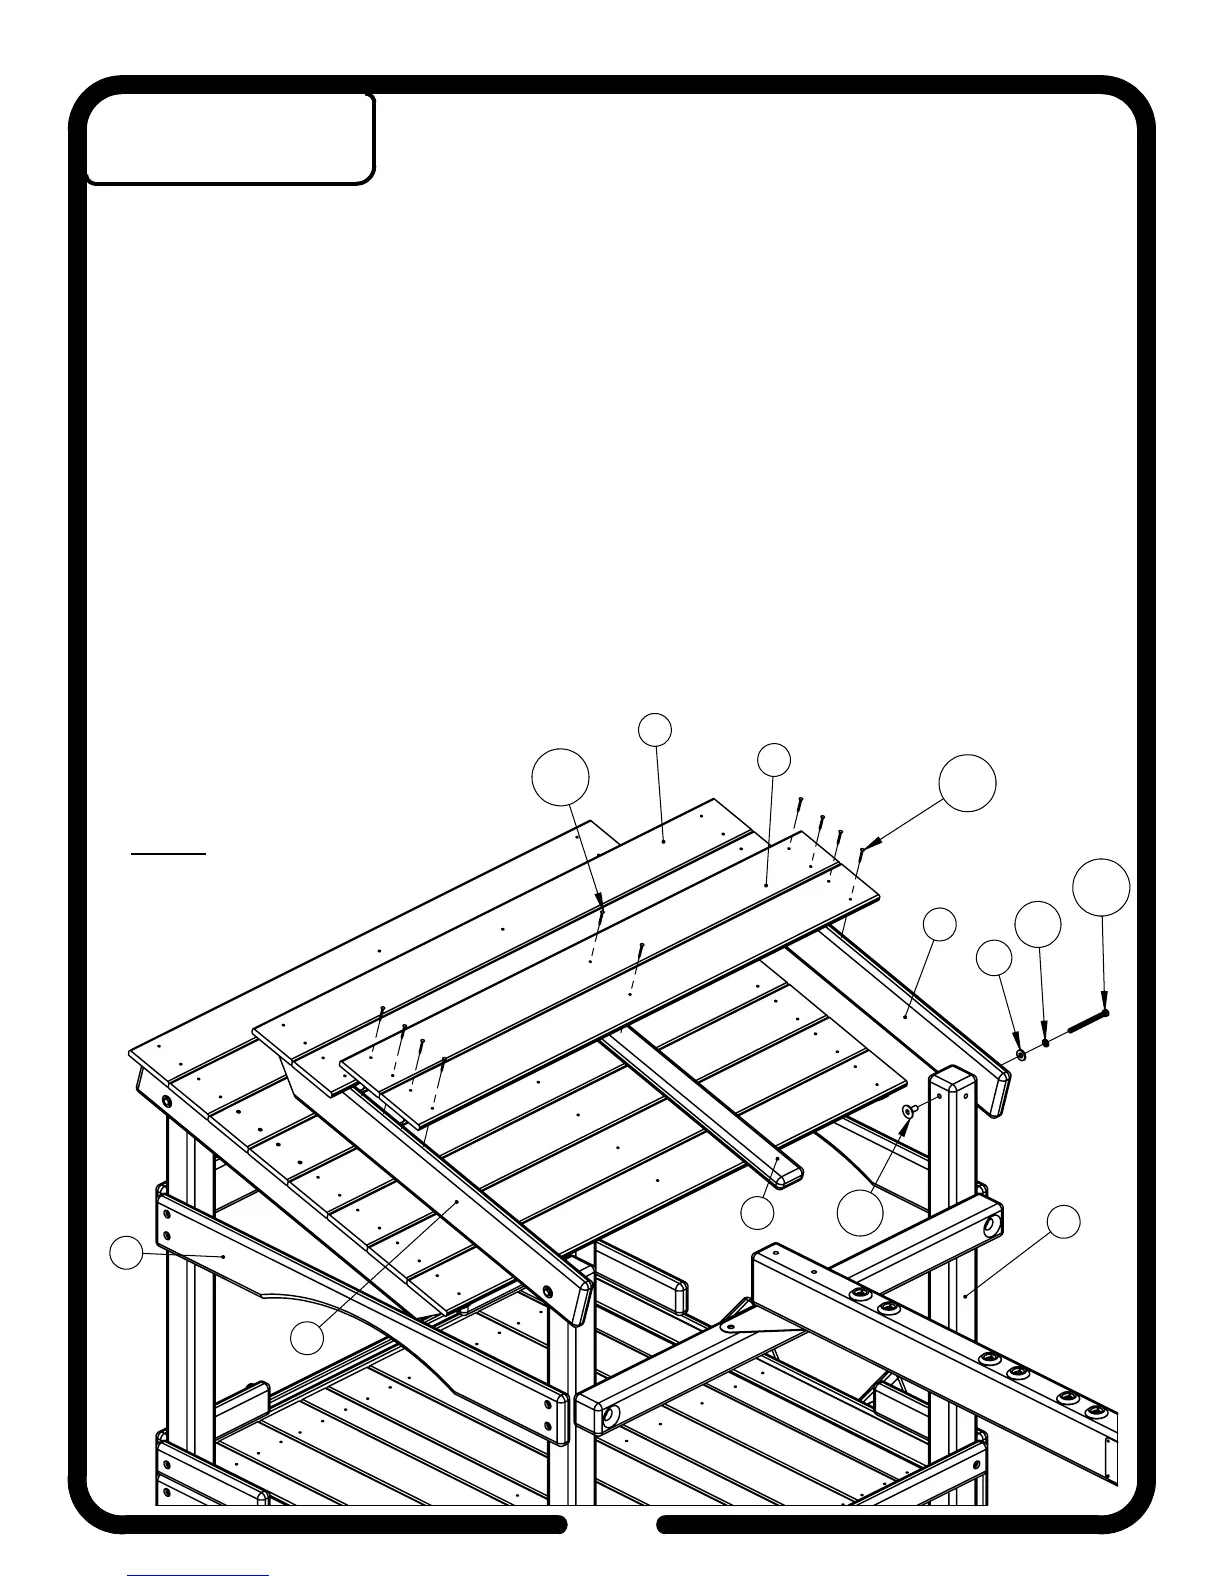
1. Lay first Roof Assembly down against Arched Facias
(51)
.
2. Attach second set of Roof Supports
(57) (58)
to Corner Uprights
(75) (76)
using 3/8" Hardware
(H3)
(H11)
(H30) (H131)
.
*NOTE: Tighten Hardware in Roof Supports until the Roof Supports can barely move.
3. Attach top Roof Board
(17)
to Roof Supports
(57) (58)
using #8 Hardware
(H152)
. The top edge of
the Roof Board
(17)
should be flush with the edge of the Roof Supports.
*NOTE: Roof Supports (57) (58) must be 52" apart, and pilot holes in Roof Boards (17) should
line up with the center of the Roof Supports.
*NOTE: It may be necessary to stand on a ladder beside the set while attaching Roof Boards.
4. Continue attaching Roof Boards
(17)
to Roof Supports with #8 Hardware
(H152)
.
5. After four Roof Boards are installed, center and begin attaching Roof Runner
(37)
to the bottom side
of the Roof Boards using #8 Hardware
(H152)
. Roof Runner must be
1 1/2"
down from the edge of
the top Roof Board.
6. Attach remaining Roof Boards
(17)
to Roof Supports
(57) (58)
and Roof Runner
(37)
using #8
Hardware
(H152)
.
*NOTE: Each side of the Roof should get eight Roof Boards.
41
Step 23
Roof Assembly