Basic Maintenance Checklist
DAILY (after use)
Clean harness, tees, bottle, and cap.
Clean pressure relief valve.
Clean duckbill valve if used for dosing.
Check tips for clogs.
Ensure harness connector is free from chemical residue and debris.
WEEKLY
Soak harness connector (in an isopropyl alcohol-based cleaning solution).
• For best results, soak for 8-48 hours.
• Allow components to dry completely before reassembly.
• A low to medium strength thread sealant is recommended when reassembling
metal to plastic components.
Ensure injection tees are free from obstructions or leaks.
Clean Schrader valve:
• Remove and lubricate valve core if significant debris is present.
Clean duckbill valve - soak in cleaning solution if significant chemical residue is present.
Thoroughly clean pressure relief valve. See Repair Section VII. Cleaning Pressure Relief Valve.
AFTER HEAVY USE
Check tubing ends and cut o deeply scored, kinked, or obstructed tubing with a sharp,
straight blade (such as box cutter or knife).
Separate and soak injection tees, black push-to-connect tees, tubing segments, and
harness connectors. Allow complete drying before reassembly or storage.
Recommended to lubricate O-rings on pressure relief valve and male barb of harness
connector and X-ring on bottle cap as needed and after thorough cleaning.
• Recommended: Synthetic silicone
BASIC MAINTENANCE
9
INSTRUCTIONS FOR USE
III.
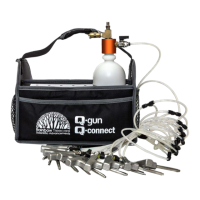
INJECTING (continued)
5. 6.
Once primed at low pressure, open
all injection tee valves.
NOTE: Inspect the tees and tubing for leaks
or blockages before continuing.
Pressurize the bottle to 35 psi. If
more pressure is needed, the bottle
can be pressurized up to 55 psi.
NOTE: The pressure relief valve will release
pressure at 60 psi.
7.
open
close
Once the harness and tees are
empty, close all injection tee
valves.
NOTE: Residual product in the tees
may need additional time to move into
the tree once the lines appear empty.
It is recommended to wait a few
minutes after the lines appear clear to
remove the injection tees.
8.
Slowly and carefully use the pressure relief valve
on the bottle cap to depressurize the bottle.
Press the quick-disconnect button to release the harness
connector (figure 1). Remove each injection tee with another
slight clockwise turn while pulling it out (figure 2).
NOTE:
For easy carrying, remove tees one-by-one around the tree, holding
every other black push-to-connect tee while coiling the harness (figure 3).
9.
1.
2.
3.
IV.
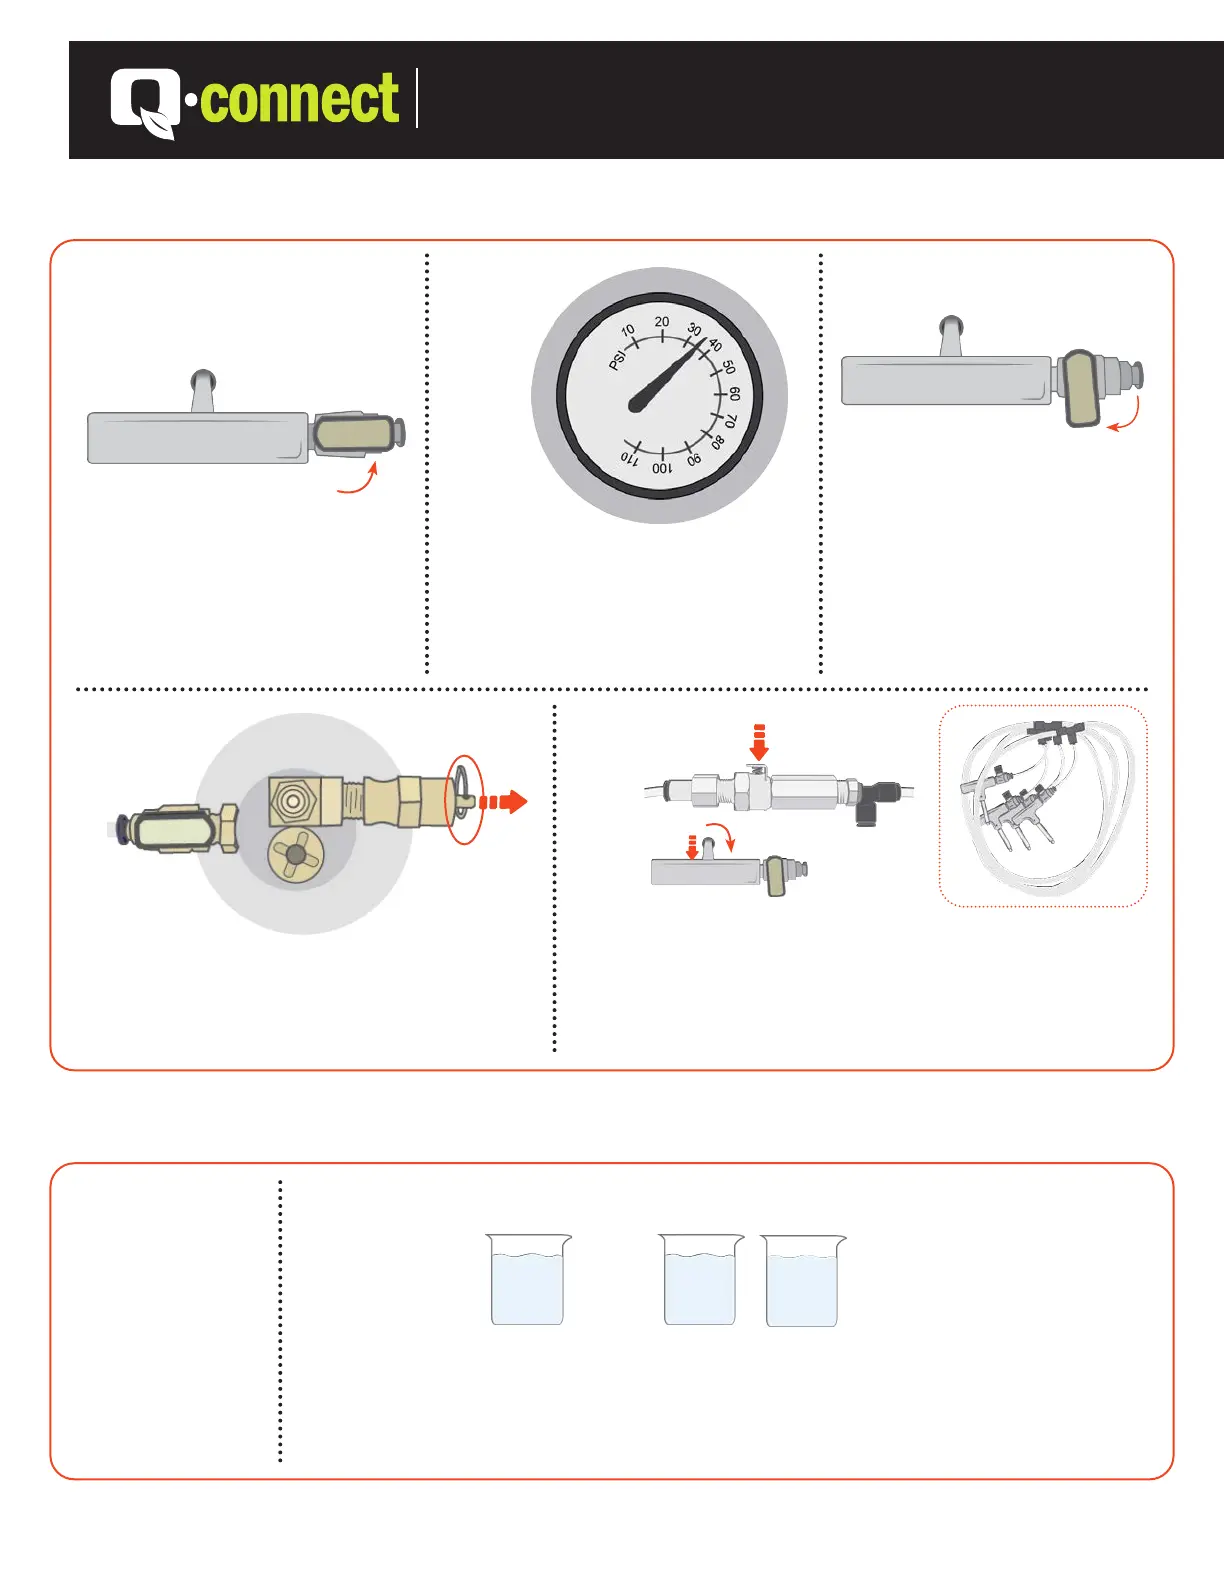
CLEANING
1.
Ensure that the
bottle and harness
lines are empty.
2.
+
70% isopropyl
alcohol
Water
=
Cleaning Solution
Fill the bottle 1/3 to 1/2 way with a dilute isopropyl alcohol cleaning solution. To make
a cleaning solution, mix ONE (1) part 70% isopropyl alcohol to TWO (2) parts water.
NOTE:
For 90% isopropyl alcohol, mix ONE (1) part alcohol to THREE (3) parts water.
ONE PART TWO PARTS
For tech support and protocols call 877-272-6747
4
 Loading...