RAINSOFT TC CONDITIONER SERIES OWNER’S MANUAL • 5
Important Note: For Massachusetts
Residents Only: The Commonwealth of
Massachusetts Plumbing Code 248 CMR
shall be adhered to. A licensed plumber
shall be used for this installation.
Important Note: Water pressure often
spikes higher at night. We recommend
adding a pressure regulator if your
daytime pressure reading is higher than
80 PSI.
Important Note: The system can only be
installed outdoors in climates that do not
reach freezing levels.
Important Note: Do not over-tighten the
valve to the tank.
INSTALLATION INSTRUCTIONS
1. Safety Precautions
• To prevent an accident and/or injury, do not hoist the unit over your shoulder. Use a
hand truck to transport the unit.
• Do not lay the unit on its side.
• Wear safety glasses and work gloves during installation
2. Test the Raw Water
•
is suggested to be installed prior to the conditioner, consult with your local dealer.
3. Check the Water Pressure
•
the water pressure exceeds this limit, install a pressure regulator on the inlet pipe
of the unit. The minimum water pressure for a conditioner is 20 psi. 60 psi is the
optimum operating pressure.
4. Locate a Site for the System
• There are three primary requirements needed for a site: the main water source, an
air-gap drain and a grounded electrical connection. Locate the system as close to
these items as practical. Drain lines over 50 feet long, may need to be increased in size
• Place the system in the desired location. The location should have a level, smooth, and
clean surface.
• If the system is located outdoors, protect the unit from direct sunlight. Direct
a box or shed. In some installation environments you may choose to partially bury
the system. This is done primarily for aesthetics, however this will add stability to the
system as well.
• We recommend all systems installed outdoors include the valve weather cover.
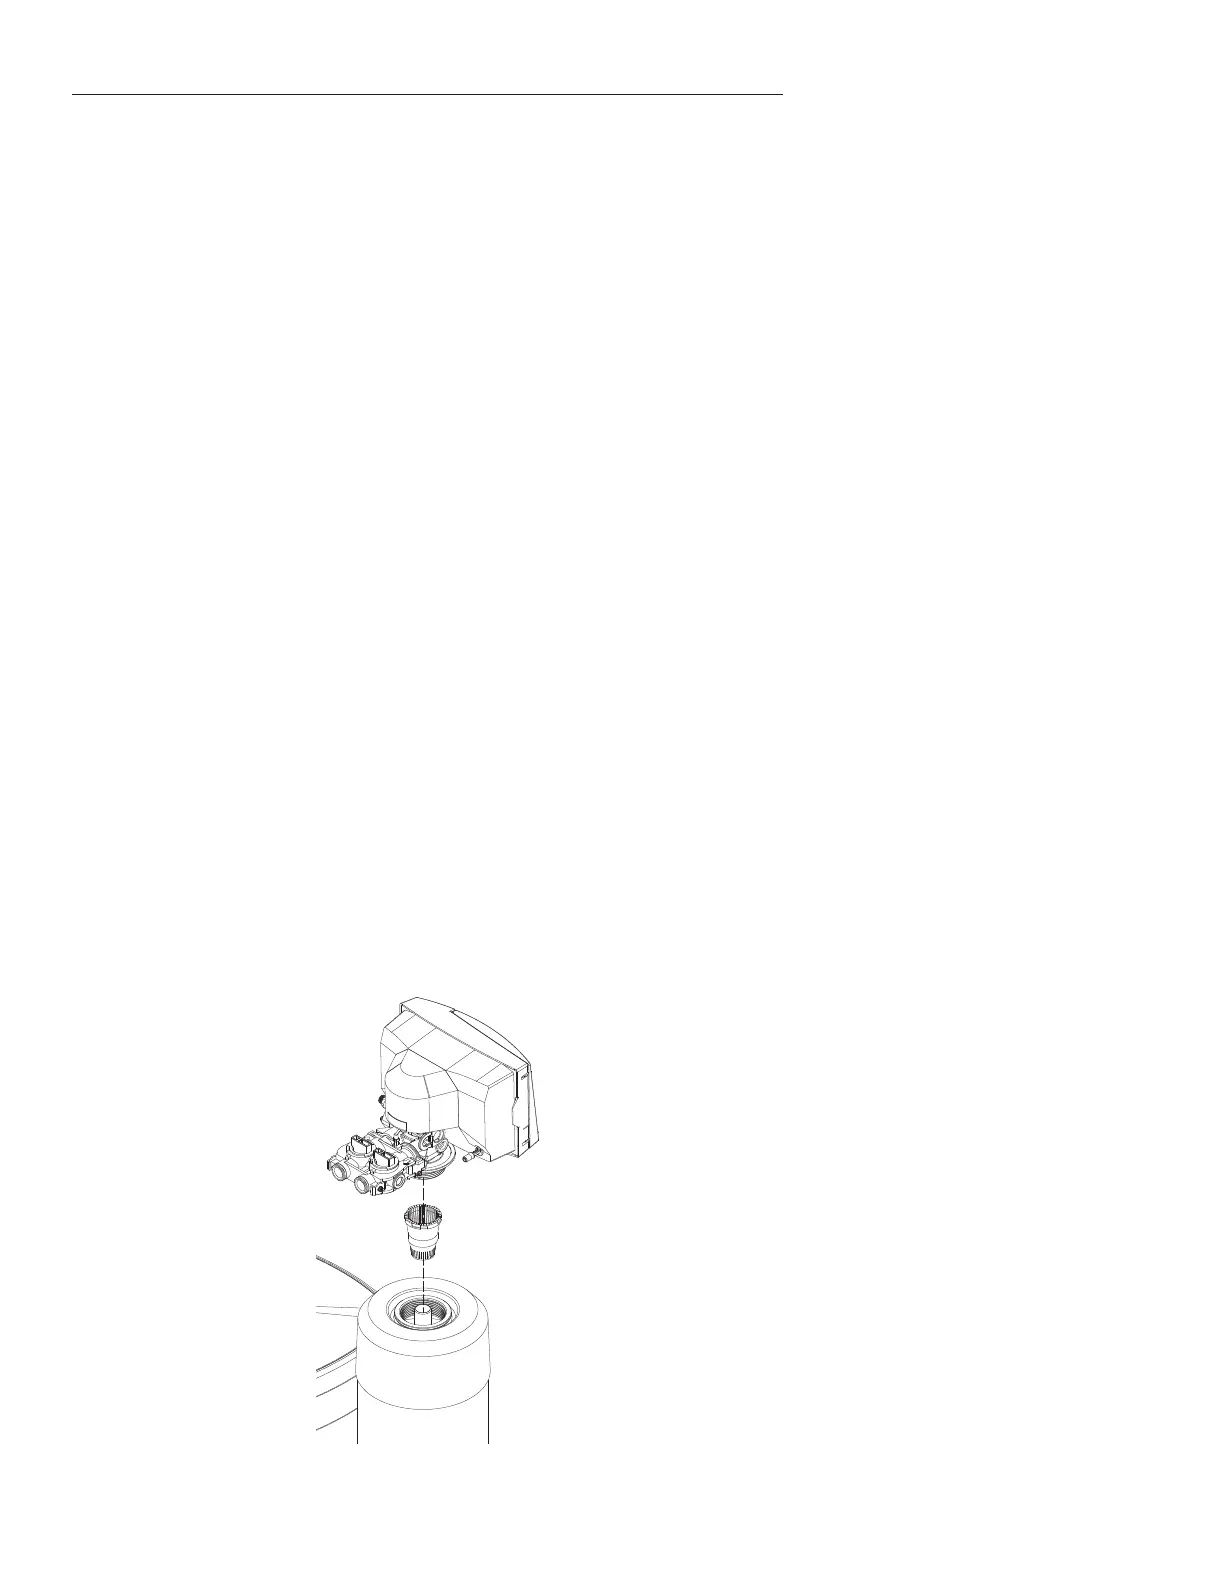
5. Install the Valve Head
• Remove the cap plug from the tank.
•
lubricant or equivalent.
• Attach the supplied upper basket to the bottom of the control valve; twist to lock in
place. Do not use if water contains any amount of iron.
• Align the upper basket with the riser pipe and slowly lower the control valve onto the
riser pipe, using a twisting motion.
• Align the control valve with the tank. Push down on the control valve and continue to
Figure 1
Helpful Tip:
drain, a sewer trap, utility sink, vent
stack, dry well, etc., depending on local
plumbing codes.
 Loading...