This document provides comprehensive instructions for the installation, programming, and troubleshooting of the OrangeIOT RZ smart lock. It is designed to guide users through every step, from preparing the door to setting up advanced features, ensuring a secure and functional installation.
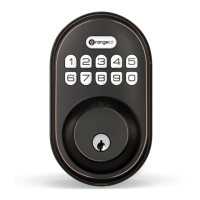
The OrangeIOT RZ smart lock is a sophisticated security device designed to enhance the safety and convenience of your home or property. It integrates modern technology with robust construction to provide reliable access control. The lock operates using a keypad for PIN code entry, offering a keyless solution for daily use. For added security and convenience, it also includes a backup key option. The device is powered by AA alkaline batteries, ensuring portability and ease of installation without the need for complex wiring.
Installation Guide
The installation process begins with preparing the door and checking its dimensions to ensure compatibility with the OrangeIOT RZ lock. This involves measuring the door hole (2-1/8" or 54 mm), the backset (either 2-3/8" or 2-3/4", 60 or 70 mm), the door edge hole (1" or 25 mm), and the door thickness (1-3/8" to 2" or 35 to 50 mm). These measurements are crucial for a proper fit.
Next, the latch and strike are installed. The latch must be held flush against the door edge, and its backset adjusted if necessary (from 2-3/8" to 2-3/4" or vice versa). If the door edge is chiseled, the latch is installed with supplied screws. If not, a flathead screwdriver is used to remove the rectangular face from the latch, and a drive-in collar is installed, followed by installing the latch with a wood block and hammer. After installation, a screwdriver is used to test the deadbolt's smooth operation. Finally, the strike is installed on the door frame, ensuring the hole in the door frame is at least 1" (25 mm) deep.
The exterior assembly is then installed. It is critical to ensure the latch is fully retracted (in the unlocked position) before proceeding. The cable from the exterior assembly is routed below the latch and through the bottom horizontal slot in the mounting plate. The mounting plate is then secured with supplied screws, ensuring it is parallel to the door edge.
Following this, the interior assembly is installed. The cable from the exterior assembly is connected to the interior assembly, ensuring a tight connection. The turnpiece is rotated to a vertical position, and the torque blade to a horizontal position, making sure the latch remains fully retracted. The operation is tested using the backup key and thumbpiece for smooth rotation. If the turnpiece does not rotate smoothly, the previous step (4B) is repeated. The interior assembly is then secured with supplied screws.
A crucial step is detecting the left/right hand door installation, which involves resetting the lock to teach it the door's orientation. With the door open and unlocked, three AA batteries are loaded into the interior assembly (new, non-rechargeable alkaline batteries are recommended). The Reset button on the interior assembly is pressed and held using a pen or paper clip. The last battery is loaded while continuing to hold the reset button for 3 seconds until a "beep" sound is heard. The latch bolt will then extend to learn the door's orientation. After this, the battery cover is re-installed.
Programming Instructions
The OrangeIOT RZ lock comes with several programming options to customize its functionality and security.
- Protect User Codes and Master Code: Users are advised to keep their Master Code and User Codes confidential and restrict access to the lock's interior assembly. Regular checks of settings are recommended to prevent unauthorized alterations.
- Maintenance: The lockset is designed for durability. For cleaning, a soft, damp cloth should be used. Harsh chemicals like lacquer thinner, caustic soaps, abrasive cleaners, or polishes can damage the finish.
- Battery Installation: Batteries should not be loaded until the lock is completely installed.
- Master Code: The default Master Code is 12345678. It is strongly recommended to change this to a personalized code.
- User Codes: The lock supports up to 20 User Codes and one temporary one-time User Code, each ranging from 4 to 10 digits.
- PIN Code Combinations: Master and User PIN codes do not support forward number sequences (e.g., 12345), backward number sequences (e.g., 98765), repeat number sequences (e.g., 22222), or existing code sequences.
Definitions:
- Master Code: Required for programming and feature settings, it can unlock the door even in vacation mode. Property owners/managers should keep this confidential.
- Auto Lock: Automatically locks the deadbolt 30 seconds after unlocking. This feature is off by default but can be set with a time delay between 10 and 99 seconds.
- Wrong Entry Limit: After 10 unsuccessful attempts to enter a valid PIN code, the unit will shut down for 3 minutes.
- Silent Mode: Mutes the keypad beep sounds, though low battery and system alerts will still be audible.
- Vacation Mode: A security feature for extended absences. When enabled via the master mode, it restricts all user PIN codes until the master PIN code is entered on the keypad. If the lock is unlocked by the thumb turn while in vacation mode, an alarm will sound.
- One Time User Code: This code can be used only once and is automatically deleted afterward.
- Unlock with Fake PIN Code: This feature allows users to enter random digits before or after their actual PIN code to prevent exposure to onlookers, enhancing privacy.
How To Use:
- Unlock from Outside: Enter the Master/User PIN code on the keypad.
- Unlock from Inside: Rotate the thumb turn to the Unlock position.
- Lock from Outside:
- Auto Lock Mode: The bolt automatically extends in 30 seconds after unlocking.
- Manual Mode: Press any key on the keypad for 2 seconds.
- Lock from Inside:
- Auto Lock Mode: The device locks automatically.
- Manual Mode: Rotate the thumb turn to the Lock position.
Quick Set Up (Programming Steps):
- Change Master PIN Code: Enter
Orangelot + Master PIN Code + Orangelot, wait for long green lights, press 0, wait for green light flash, enter New Master PIN Code + Orangelot, wait for green light flash, then Succeed Green Light Flash.
- Add User PIN Code: Enter
Orangelot + Master PIN Code + Orangelot, wait for long green lights, press 2, wait for green light flash, enter New User PIN Code + Orangelot, wait for green light flash, then Succeed Green Light Flash.
- Delete User PIN Code: Enter
Orangelot + Master PIN Code + Orangelot, wait for long green lights, press 3, wait for green light flash, enter Unwanted User PIN Code + Orangelot, then Succeed Green Light Flash.
- Silent Mode: Enter
Orangelot + Master PIN Code + Orangelot, wait for long green lights, press 4, wait for green light flash. Press Orangelot to toggle between Silent Mode Disabled and Silent Mode Enabled.
- Auto Lock: Enter
Orangelot + Master PIN Code + Orangelot, wait for long green lights, press 6, wait for green light flash. Press Orangelot to toggle between Auto Lock Enabled and Auto Lock Disabled.
- Set Auto Lock Time Delay: Enter
Orangelot + Master PIN Code + Orangelot, wait for long green lights, press 8, wait for green light flash, enter New Duration Time (10-99) + Orangelot, then Succeed Green Light Flash.
- Add One-Time PIN Code: Enter
Orangelot + Master PIN Code + Orangelot, wait for long green lights, press 7, wait for green light flash, enter New User PIN Code + Orangelot, wait for green light flash, then Succeed Green Light Flash.
- Vacation Mode: Enter
Orangelot + Master PIN Code + Orangelot, wait for long green lights, press 9, wait for green light flash. Press Orangelot to enable Vacation Mode Enabled.
Troubleshooting
This section addresses common issues and provides solutions:
- Turnpiece cannot rotate or operate the lock: This usually indicates an installation error. The lock should be removed and re-installed, ensuring the turnpiece is in a vertical position during installation.
- Lock cannot be locked or unlocked by the keypad: This could be due to disabled codes. Users should verify that codes are active or restore the lock to its default settings if necessary.
- Keypad doesn't respond (no lights, no beeping): This suggests a power or connection issue. Users should check that cables are properly connected, and batteries are new and correctly installed.
- No response after battery installation (no beeps when pressing buttons): This points to cable connection or battery polarity problems. Users should check cable connections and battery polarity, and ensure batteries are not dead.
- Forgot Master Codes: If the Master Code is forgotten, a factory reset is required. This procedure will erase all passcodes and restore the Master Code to its default value (12345678). To perform a reset: keep the door open and unlocked, press and hold the Reset button, simultaneously remove one battery and then place it back, and continue holding the Reset button for 3 seconds until a "beep" sound is heard.
For any issues not resolved by these steps, customer service can be contacted at support@i-OrangeIOT.com.