INSTALLATION
Check the appliance is electrically safe and gas sound when you have nished.
18
Checking the Parts:You will need the following equipment to complete the
cooker installation satisfactorily:
• Stability bracket: If the cooker is to be supplied with
gas through a flexible hose, a stability bracket or chain
MUST be fitted.
These are not supplied with the cooker but are
available at most builders’ merchants.
• Gas pressure tester/manometer.
• Flexible gas hose: Must be in accordance with the
relevant standards.
• Multimeter: For electrical checks.
You will also need the following tools:
1.
Electric drill
2. Masonry drill bit (only required if tting the cooker on a
stone or concrete oor)
3. Wall plugs (only required if tting the cooker on a stone
or concrete oor)
4. Steel tape measure
5. Cross head screwdriver
6. Flat head screwdriver
7. Spirit level
8. Pencil
9. Adjustable spanner
10. Screws for tting stability bracket
11. 4 mm & 3 mm Allen keys
12. 13 mm spanner or socket wrench
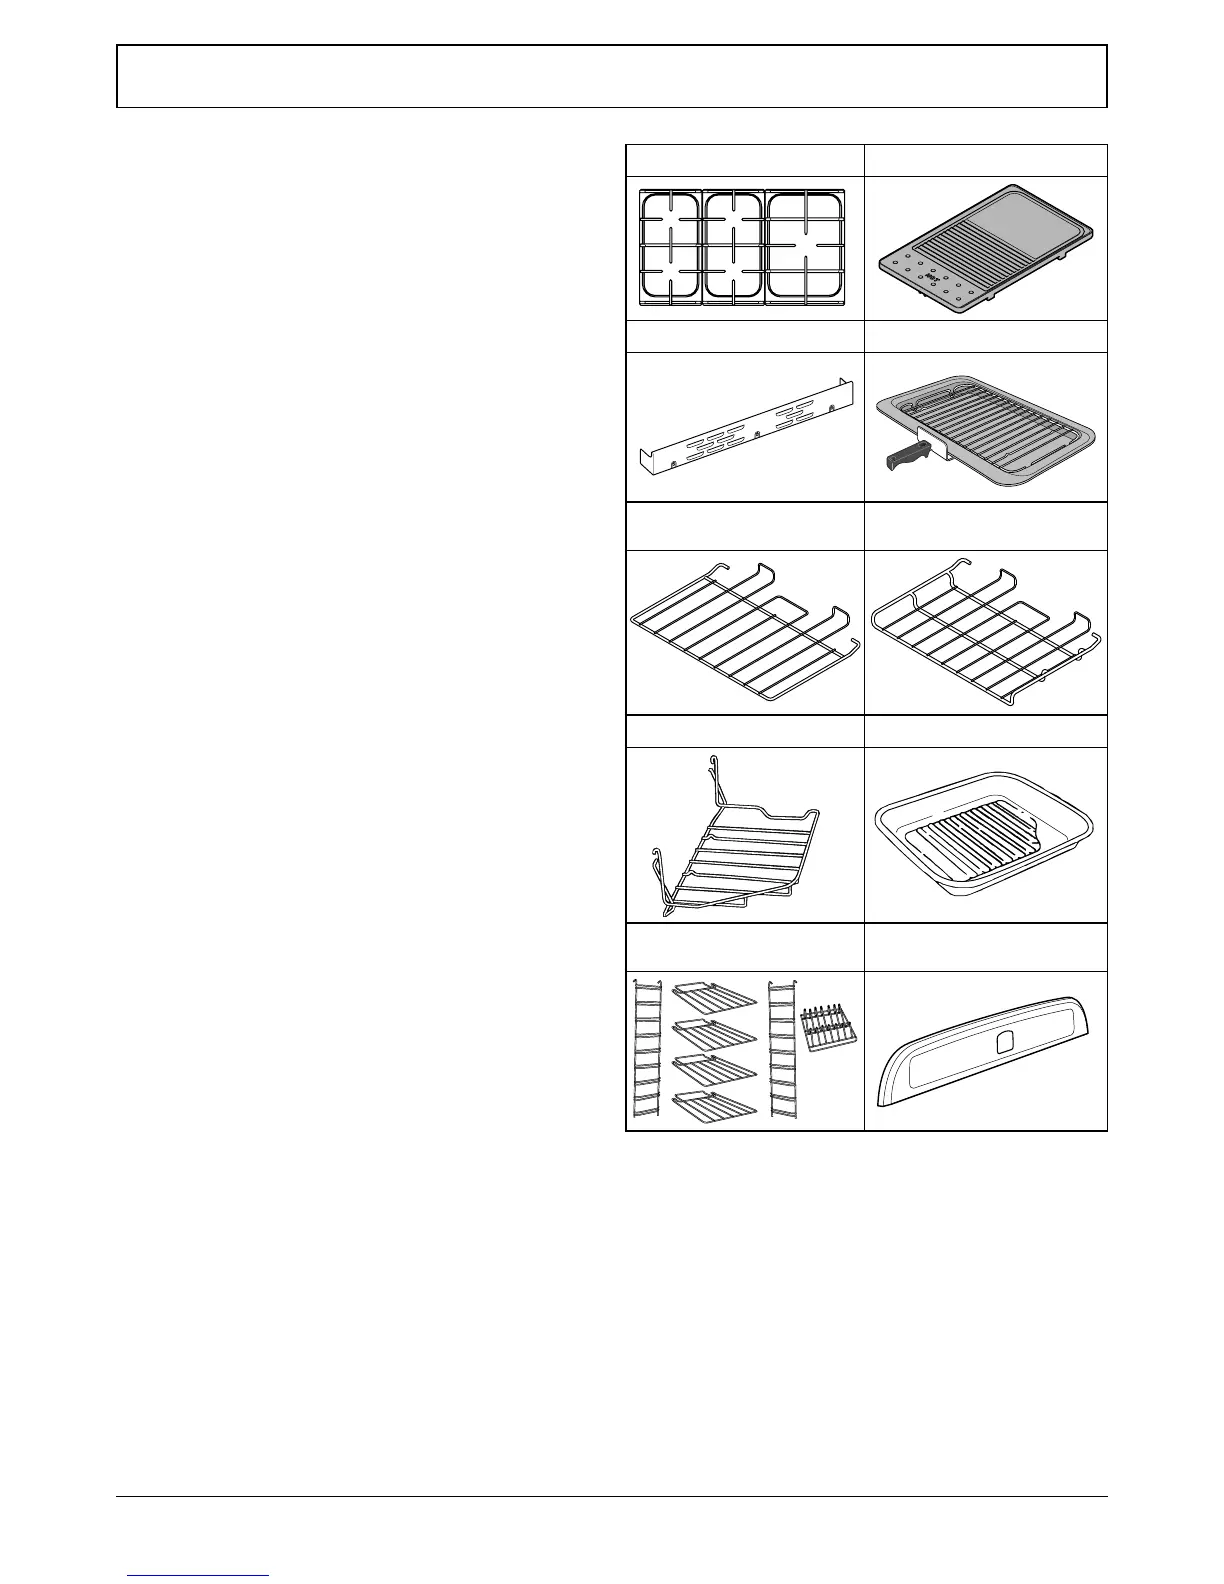
3 pan supports Griddle plate (some models)
ArtNo.000-0001 90 Pan supports
Plinth Grill pan & trivet
ArtNo.350-0005 - 90 plinth
ArtNo.330-0002 - Grill pan w handle
Flat shelves 1 drop shelf (some models)
Handyrack Roasting tin
ArtNo.324-0003 Handyrack
ArtNo.324-0004 Roasting tin
Tall oven shelves and shelf
supports
Splashback (Classic only)
ArtNo.000-0010 Tall oven shelves
ArtNo.350-0012 - splashback