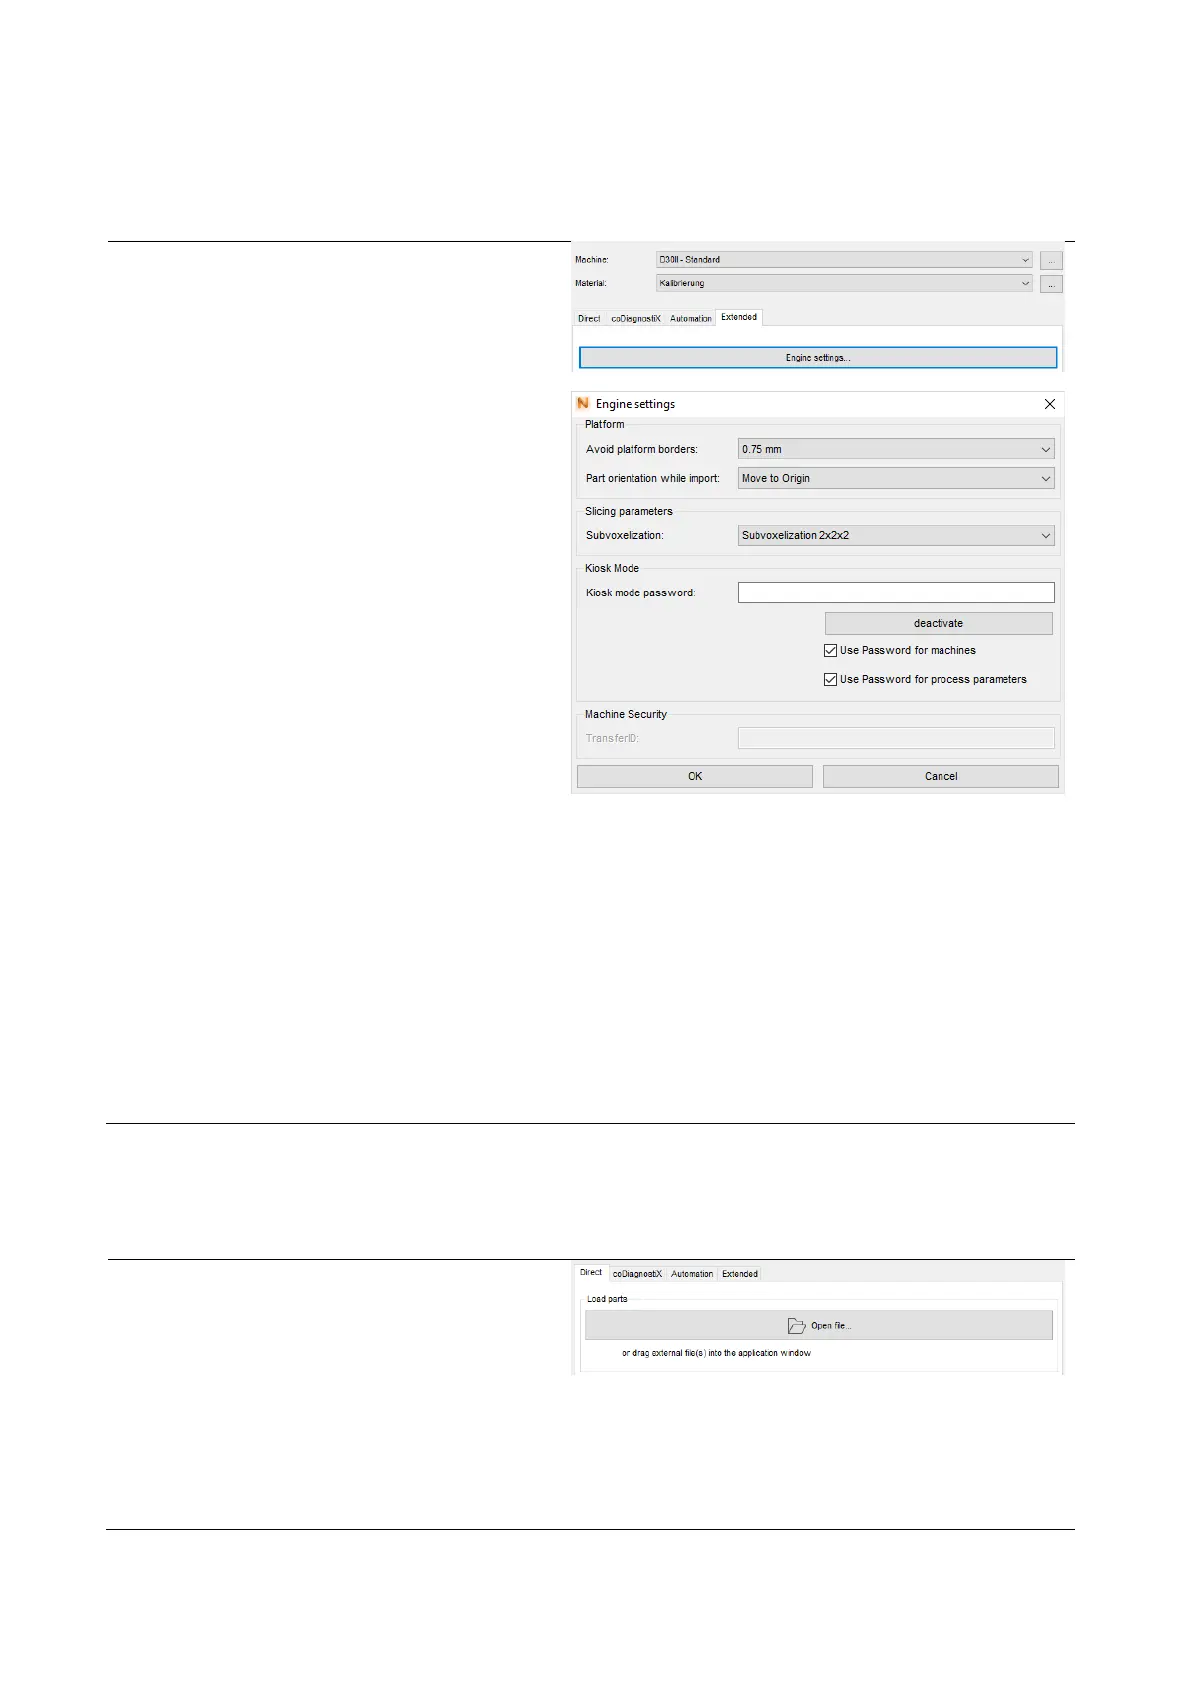
(1) Click on the tab “Extended“ below the
display area of the material.
(2) Click on the button “Engine settings“.
A window for the engine settings will be
opened. The following settings can be
adjusted:
— Avoid platform borders: increases/
decreases the building area on the
building platform (red lines)
— Part orientation while import:
selection between
• Keep part position (positions
the component onto the
marked position when loading)
• Move to origin (positions the
component to zero position)
— Subvoxelization: increases/decreases
the accurancy of calculation when
slicing
Note: A higher value prolongs the slicing- and
printing process extremely (the printing result
may not necessarily become better).
Recommended setting: Double separation
(2x2x2)
— Kiosk mode password: Password can
be entered for secured printing jobs
(optional)
— Transfer ID: Here you can enter which
netfabb will create print jobs for
which printer (helpful in environments
with more printers)
(3) Save your entries by clicking on “OK”.
(1) Click on the button “Open file…“.
(2) Open the file structure from which you
want to upload your print job as *.stl file.
(3) Click on your print job and confirm your
selection by clicking on the button
“Open”.
(4) The *.stl file will be uploaded. Depending
on the size and complexity of the job, the
uploading process may take some time.