Assembly instructions
1. Unpack the preassembled Active Cooler from its box.
2. Remove the backing paper from the thermal pads on the underside of the product.
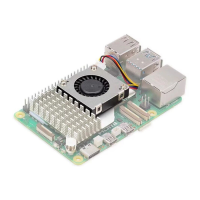
3. Make sure your Raspberry Pi 5 is powered off. Position the Active Cooler carefully in
the correct space on Raspberry Pi 5, making sure not to hit any of the connectors.
Please refer to the diagram on the front of the box which shows the correct position
and orientation of the product.
4. Align the two white push pins with the two dedicated heatsink holes.
5. When correctly positioned, press evenly on the tops of the two push pins simultaneously
until they click, indicating that they are clipped onto the board.
6. Once the Active Cooler is mounted, connect its fan cable to the connector labelled
‘FAN’ on Raspberry Pi 5. Take care to ensure the cable’s connector is the correct way
round when inserting it. If you feel any resistance, stop immediately, remove the fan
cable connector, and make sure that both it and the connector on Raspberry Pi 5 are
undamaged before proceeding. Make sure that the connector on the cable is pushed
down fully onto the connector on Raspberry Pi 5.
7.
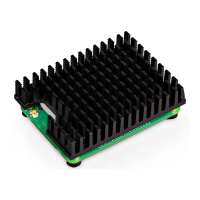
We recommend that the Active Cooler is not removed once it is tted to Raspberry Pi 5.
Removal of the Active Cooler will cause the push pins and thermal pads to degrade
and is likely to lead to product damage.
8. Ensure the push pins are undamaged and can clip on to the Raspberry Pi board
securely before use. Discontinue use of the Active Cooler and replace the push pins
if they are damaged or deformed, or if they do not clip securely.
Raspberry Pi Active Cooler for Raspberry Pi 5 – Raspberry Pi Ltd 4