39
0704-M001-0
RISERVATO AL PERSONALE AUTORIZZATO ALL'INSTALLAZIONE - ONLY FOR INSTALLATION-AUTHORIZED STAFF
IST DEM ZUR INSTALLATION AUTORISIERTEN PERSONAL VORBEHALTEN - SEULEMENT POUR LE PERSONNEL AUTORISE A L'INSTALLATION - RESERVADO AL PERSONAL ENCARGADO DE LA INSTALACION
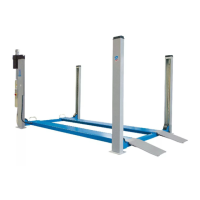
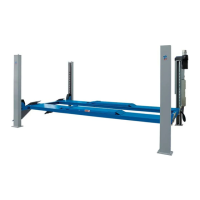
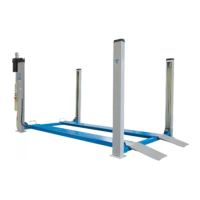
RAV4352 - RAV4356
RAV4402 - RAV4406
RAV4351T - RAV4401T - RAV4502
4.7 Collegamento impianto idraulico
Con riferimento alla figura 11:
- Effettuare la pulizia interna del tubo flessibile (1)
utilizzando aria compressa.
- La guaina (7) è comprensiva dei tubi (1) - (3) e del cavo
elettrico (4) assemblati dal costruttore; i tubi sono completi
di tappi di chiusura da rimuovere per effettuare
l'installazione.
- Collegare alla centralina il tubo (1) mediante il raccordo
(6).
4.7 Connecting the hydraulic system
With reference to figure 11:
- Clean the hose inside (1) with a jet of compressed air.
- Sheath (7) features tubes (1) - (3) and electric cable (4)
that are fitted by the manufacturer. Tubes come with
closing plugs to be removed before installation.
- Connect the hose (1) to the control unit through the fitting
(6).
4.7 Raccordement installation hydraulique
En référence à la figure 11:
- Nettoyer l’intérieur du tuyau flexible (1) avec de l’air
comprimé.
- La gaine (7) comprend les tubes (1) - (3) et le câble
électrique (4) assemblés par le fabricant ; les tubes sont
dotés de bouchons de fermeture qui doivent être retirés
avant d’effectuer l’installation.
- Relier le tuyau (1) à la centrale au moyen du raccord (6).
- Relier le tuyau (3) au raccord (8).
- Mettre de l’huile dans la centrale jusqu’à ce que le niveau
soit atteint.
4.7 Verbindung der Hydraulikanlage
Mit Bezug auf Abbildung 11:
- Den Schlauch (1) innen unter Verwendung von Druckluft
reinigen.
- Beinhaltet die Ummatelung (7) die Leitungen (1) - (3) und
das Stromkabel (4), die vom Hersteller zusammengestellt
wurden. Die Leitungen verfügen über Verschlussstopfen,
die für die Installation entfernt werden müssen.
- Den Schlauch (1) mittels des Verbindungsstücks (6) mit
dem Steuergehäuse verbinden.
- Das Rohr (3) mit dem Verbindungsstück (8) verbinden.
- Öl in das Steuergehäuse gießen, bis der Pegel erreicht
ist.
4.7 Conexión del sistema hidráulico
Con referencia a la figura 11:
- Efectuar la limpieza interior del tubo flexible (1) con aire
comprimido.
- La vaina (7) incluye también los tubos (1) – (3) y el cable
eléctrico (4) ensamblados por el fabricante. Los tubos
son suministrados con tapones de cierre que deben
quitarse para llevar a cabo la instalación.
- Conectar a la centralita el tubo (1) con el empalme (6).
- Conectar el tubo (3) con el empalme (8).
- Introducir el aceite en la centralita hasta alcanzar el nivel.
- Collegare il tubo (3) con il raccordo (8).
- Immettere olio nella centralina fino al raggiungimento del
livello.
- Connect the tube (3) to the fitting (8).
- Fill the control unit with oil up to the required level.
 Loading...