Do you have a question about the Raven Go and is the answer not in the manual?
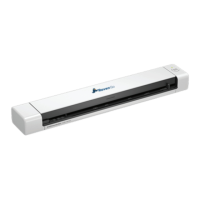
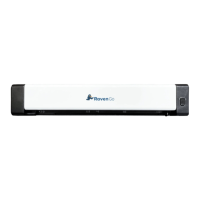
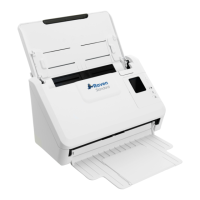
The Raven Scanner Go device included in the package.
Essential cable for connecting the scanner to your computer for power and data.
A sheet used for the initial scanner calibration process.
Remove all protective tapes from the front and back of the scanner unit.
Connect the square end to the scanner and the rectangle end to your computer's USB port.
Press the power button and wait for the LED indicator light to remain solid.
Visit Raven.com/Desktop to download the necessary software for your Mac or PC.
Choose the Go Scanner model during the installation wizard process.
Select the USB connection method and use the included USB cable.
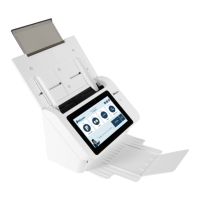
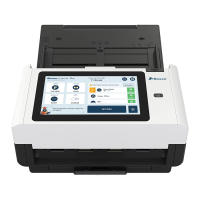
Displays workflows, scan settings, and destinations; allows custom workflow creation.
Click the ADVANCED button to configure additional scan parameters.
Set up and manage destinations, including saving scans to local computer folders.
Insert documents FACE UP, aligning them to the left edge of the feeder slot.
Use the guide lever against the document's right side to ensure straight scanning.
Gently push the document; the scanner feeds it automatically after initial contact.
Keep documents flat and level during the feeding process to avoid jamming.
Wait until the indicator light stops blinking before inserting the next document.
Insert only one page at a time to prevent potential scanner malfunction.
Do not force documents into the slot; let the scanner feed them naturally.
Remove staples, paper clips, and sticky notes before feeding to prevent damage.
The Raven Scanner Go (USB) is a portable document scanner designed for efficient and seamless digitization of various documents. It is a compact device that connects to a computer via a USB cable, making it suitable for both office and on-the-go use. The scanner is designed to integrate with Raven Desktop software, providing a comprehensive solution for scanning, organizing, and managing digital documents.
The primary function of the Raven Scanner Go is to convert physical documents into digital files. It is capable of scanning single pages at a time, ensuring high-quality output. The scanner works in conjunction with the Raven Desktop application, which serves as the central hub for managing scanning workflows, settings, and destinations. Users can create custom workflows to streamline their scanning process, tailoring it to specific needs such as saving to local folders, cloud services, or other designated destinations. The device supports various scan settings, including advanced options for compression, contrast, and other image adjustments, allowing users to optimize the digital output according to their preferences. Once a document is scanned, the Raven Desktop software facilitates its organization and storage, making it easy to retrieve and share digital copies. The scanner is designed for straightforward operation, with a focus on user-friendliness and efficiency in document digitization.
The Raven Scanner Go offers several features designed to enhance the user experience and ensure optimal scanning performance.
The initial setup involves connecting the scanner to a computer using the provided USB cable. The square end of the USB cable connects to the scanner's USB port, while the rectangular end connects to a USB port on the computer. Before connecting, users need to remove any protective tapes from the front and back of the scanner. Once connected, the scanner is powered on by pressing the Power button until the LED light remains solid, indicating it is ready for use. The next crucial step is to download and install the Raven Desktop software and scanner drivers from Raven.com/Desktop. During the installation wizard, users select the "Go Scanner" option and then choose the "USB connection" method, confirming that the scanner is connected via the USB cable.
For seamless scanning, documents should be inserted FACE UP into the feeder slot. It is important to align the document to the left edge of the feeder slot. A guide lever is provided to slide against the right side of the document, ensuring it is straight and preventing skewed scans. When inserting the document, users should gently push the original into the feed slot and release it as soon as it begins to feed. The scanner will briefly pause after the initial feed and then continue the scanning process. To prevent jamming and ensure smooth operation, it is essential to keep the document flat and level during feeding. The scanner is designed to process one page at a time. Users should wait until the indicator light stops blinking before inserting and scanning the next document to avoid malfunctions.
The Raven Desktop application provides a user-friendly interface for managing all scanning activities. The home screen displays available workflows, scan settings, and destinations. Users can create custom workflows by clicking the "+" button, allowing them to define specific actions for scanned documents, such as saving to a particular folder or uploading to a cloud service. The "ADVANCED" button provides access to additional scan settings, enabling fine-tuning of image quality, compression, and other parameters. The "MANAGE" button allows users to set up and manage various destinations for their scanned documents, including local folders on their computer and cloud storage options. This integration ensures that users have complete control over where their digital documents are stored and how they are processed.
To ensure the longevity and proper functioning of the scanner, users must adhere to specific guidelines. Only one page should be inserted at a time, and the next page should only be inserted after the previous one has completed scanning. Pushing or forcing documents into the feeding slot should be avoided, as this can lead to the top of the image being cut or damage to the scanner. Instead, documents should be gently inserted and released. Before scanning, it is crucial to remove any items that could damage the scanner or interfere with the scanning process, such as staples, paper clips, and sticky notes. These precautions help maintain the scanner's performance and prevent potential issues.
While the manual primarily focuses on usage, it implicitly suggests maintenance through best practices to ensure the device's longevity and optimal performance.
The emphasis on removing staples, paper clips, and sticky notes before scanning is a key maintenance feature. These items can scratch the scanner's glass, damage the rollers, or cause paper jams, leading to costly repairs or reduced scan quality. By adhering to this guideline, users actively prevent wear and tear on the internal components. Similarly, the instruction to avoid pushing or forcing documents into the feeder helps protect the feeding mechanism from damage. Keeping documents flat and level during feeding also contributes to the smooth operation of the rollers and prevents unnecessary strain on the internal parts.
Waiting for the indicator light to stop blinking before inserting the next document is not just about efficient scanning; it also ensures that the scanner's internal mechanisms have completed their cycle, preventing potential conflicts or damage that could arise from premature insertion. This practice helps maintain the synchronization of the scanner's components. The general advice to handle documents gently and avoid forcing them into the slot is a fundamental aspect of operational care, contributing to the overall health of the device.
Although not a physical maintenance feature, keeping the Raven Desktop software and drivers updated is crucial for the scanner's performance. Software updates often include bug fixes, performance enhancements, and compatibility improvements that can prevent issues and ensure the scanner operates smoothly with the latest operating systems. The availability of a user manual at raven.com/user-manuals and a dedicated support team (1-800-713-9009 or support@raven.com) provides resources for troubleshooting and addressing any issues that may arise, which is an indirect form of maintenance support. These resources empower users to resolve problems and ensure their scanner remains in good working condition.
In summary, the Raven Scanner Go (USB) is a user-friendly, portable document scanner designed for efficient digitization. Its integration with Raven Desktop software provides a comprehensive solution for managing scanned documents, while its usage and maintenance guidelines ensure reliable performance and longevity.
| Color Depth | 24-bit |
|---|---|
| Grayscale Depth | 8-bit |
| Connectivity | USB |
| Operating Temperature | 14°F to 122°F (-10°C to 50°C) |
| Storage Temperature | 14° to 140° F (-10° to 60° C) |