Do you have a question about the Raven Scanner Compact and is the answer not in the manual?
Guide for unpacking, connecting power, and powering on the scanner.
Instructions for connecting the scanner via USB or Wi-Fi.
Download Raven Desktop and drivers from Raven.com/Desktop for Mac or PC.
Select the Compact Scanner and choose USB or Wi-Fi connection in the wizard.
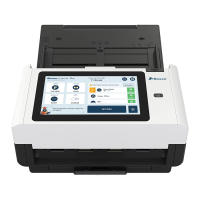
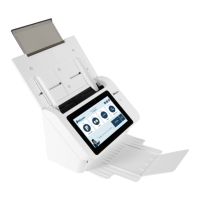
Home screen shows workflows, scan settings, and destinations. Use '+' for custom workflows.
Access additional scan settings by clicking the 'ADVANCED' button.
Set up and manage destinations by clicking 'MANAGE' and save to folders.
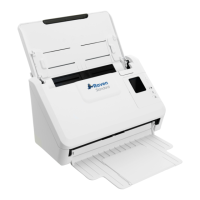
Use the Automatic Feeder for stacks of documents, facing down.
Scan single pages or ID cards using the front input tray, facing up.
Scan single pages or ID cards using the rear input tray, facing down.
Fan documents and align top edges to prevent multi-feeds or jams.
Automatic feeder supports up to 20 sheets; front tray supports one sheet.
Remove staples, paper clips, and sticky notes to prevent scanner damage.
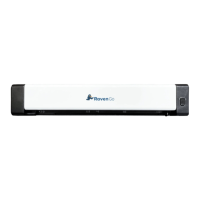
The Raven Scanner Compact is a network-enabled device designed to streamline document management through efficient scanning. It offers a user-friendly experience from setup to daily operation, catering to both individual and small office needs.
The primary function of the Raven Scanner Compact is to digitize physical documents, converting them into digital files that can be easily stored, organized, and shared. It integrates seamlessly with the Raven Desktop software, providing a comprehensive platform for managing scanned content. The scanner supports various scanning methods, including automatic document feeding, single-page scanning via a front input tray, and a rear input tray for specific document types. This versatility allows users to process a wide range of materials, from multi-page reports to ID cards. Once documents are scanned, the Raven Desktop software enables users to define workflows, adjust scan settings, and direct files to various destinations, such as cloud storage or local folders on a computer. The device is designed for both USB and wireless (WiFi) connectivity, offering flexibility in how it integrates into an existing network environment.
The Raven Scanner Compact is engineered for ease of use, with several features that enhance the scanning experience:
The Raven Scanner Compact is designed with simple maintenance in mind to ensure consistent performance and longevity:
| Duplex Scanning | Yes |
|---|---|
| Resolution | 600 dpi |
| Color Depth | 24-bit |
| Grayscale Depth | 8-bit |
| Dimensions | 11.8 x 6.3 x 5.1 inches |
| Automatic Document Feeder (ADF) | Yes |
| Weight | 5.5 lbs |
| Connectivity | USB 3.0 |
| Supported Operating Systems | Windows, macOS |
| Scan Resolution | 600 dpi |