27
NO
SE
FI
GB
DE
DK
PL
ET
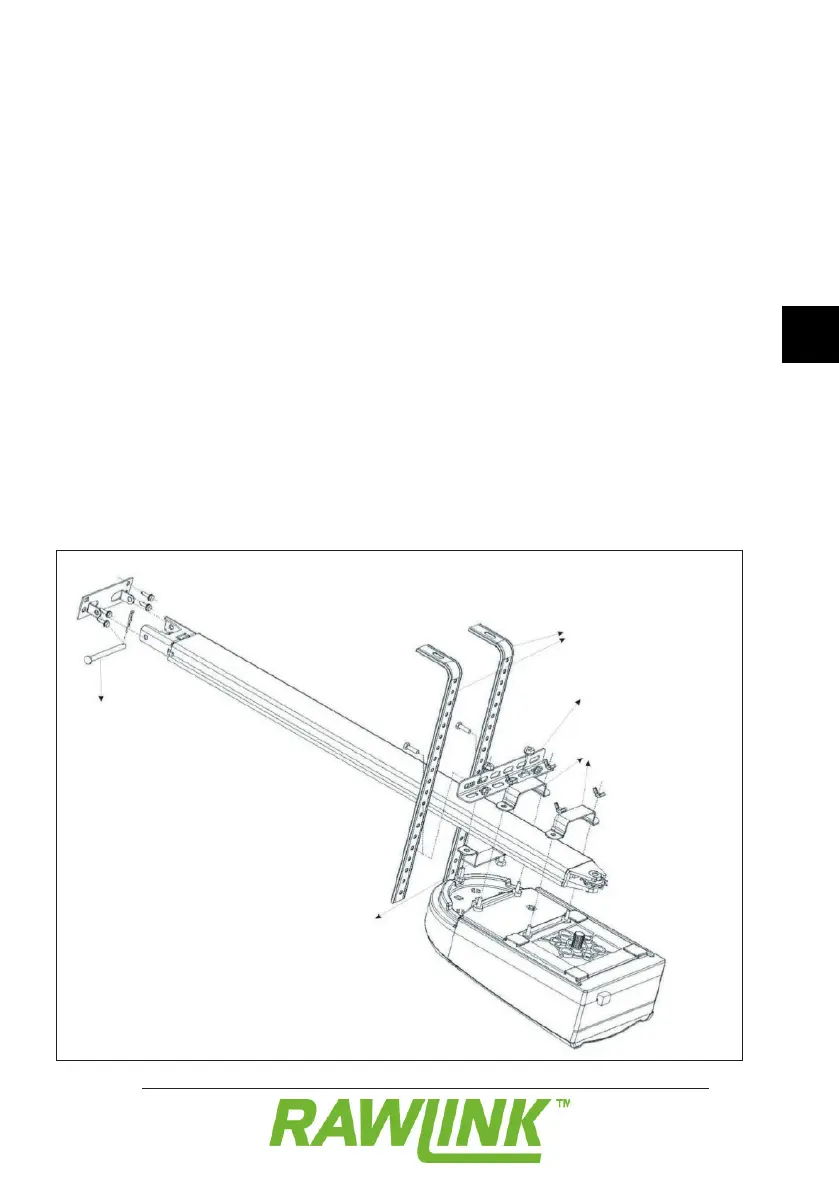
1. Door bracket
2. Lifting arm
3. Wall bracket
4. Rail
5. Rider
6. Ceiling bracket
7. U bracket
8. Motor housing
9. Light
Fit the wall bracket (3) to the wall using
suitable screws and rawlplugs, if necessary.
Secure the rail to the wall bracket by tipping
the pin in through the holes and securing it
with a split pin.
Fit the motor housing (8) to the rail (4) using
the U brackets.
Screw the ceiling brackets (6) securely to the
ceiling using suitable screws and rawlplugs,
if necessary.
Screw the horizontal steel profile to the
ceiling brackets.
Lift the rear of the rail upwards and
secure the rail to the ceiling brackets by
connecting together the U bracket and the
horizontal steel profile.
Fit the door bracket (1) in the centre at the
top of the door using screws.
Pin
Ceiling bracket
Steel profile
U bracket
U bracket