3.3 FUNCTIONAL TEST
PROCEDURES
The following functional tests and set up
-
procedures must be carried out before sea trials
al-e
attempted.
3.3.1
SETTING UP
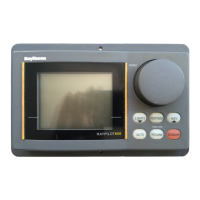
Switch On
Switch on the electrical supply from the main
panel. All control units will emit a short beep tone
to
indicate that the computer is now active. The
alJtopilot will start up in ‘Stand By’ mode and
indicating control units will dis,play the current
hlaading.
Course Computer Gain Setting
Tl-re
gain control on the course computer should
irlitially be switched to the setting number
irrdicated on the following table:-
LOA
GAIN SETTING
Planing Displacement
12-l 5m
(40
-
49ft.) 0
1
15-l
8m (50
-
60ft.)
1
2
The above setting recommendations will
provide stable control for initial sea trials and
may be increased if necessary later.
Operating Sense
The operating sense of the autopilot can be
checked by switching to ‘Auto’ mode and
depressing the
‘+lO’
key which should initiate
rudder movement to starboard. If movement to
con
occurs, the operating sense of the autopilot
must be reversed by reversing the motor
connections between the course computer and
the drive unit. The connection reversal should be
permanently made at one of the main terminal
blocks and not by reversing the Spade connector
flying leads to the course Computer.
Fluxgate Setting
The fluxgate should have been approximately
aligned with the ship’s head during installation
(see section 2.1.3). If an indicating control unit is
fitted, the fluxgate should be more accurately
aligned as follows, so that the digital course
display agrees with the main steering compass.
Switch to ‘Stand By’ mode and gently rotate
the fluxgate body until the digital display on the
control unit agrees with the vessel’s main steering
compass on the current heading. If the fluxgate is
free of deviation, the autopilot’s digital display will
agree with a corrected steering compass on all
headings.’ It is, however, unlikely that both
compasses are entirely free from deviation and
that perfect agreement will be obtained on all
headings. If significant differences in readings
occur on other headings, a compass adjuster may
be consulted to correct the source of deviation. In
any event the main steering compass should
always be used for basic navigation.
Windvane Setting
The windvane must be accurately aligned to the
yacht’s head to provide equal apparent wind
angles on opposite tacks when using the
Automatic Tacking system.
The windvane head should initially be aligned
by rotating the mounting mast in its friction
bearing until the vertical line on its body faces the
yachts bows. Then align the windvane parallel to
the yachts centre line using adhesive backed
tape to temporarily fix it in position as shown.
/’
/
To check correct alignment select windvane
mode (depress Auto and Stand-by together).
Then depress ‘-1’ and
‘+l
’
keys together to
initiate a tack (see section 3.2.3).
If the head is correctly aligned no
rudder/wheel movement will occur. If movement
is observed note the directions (Port or
Starboard) and move the vane head by a small
amount
(lo
or 2”) in the same direction. Select
‘Stand-by’ and then repeat the sequence above
until no rudder/wheel movement is observed.
Remove the adhesive tape on completion.
 Loading...