5.Unscrewthecableretentionnutandremovefromthebase
.
6.Unscrewthebasefixingscrews.
7.Removethebaseleavingthecableinplace.
8.Removethecablewasherfromtheendofthecableconnector.
9.Replacethecablewasherwiththenewonesupplied.
10.Fitthenewbasetothecable,ensuringthelocatedtagatthetopofthecableconnectoris
engagedinthegrooveinthenewbase.
11.Re-assemblefollowingtheaboveinstructionsinreverseorderfromstep6tostep1.
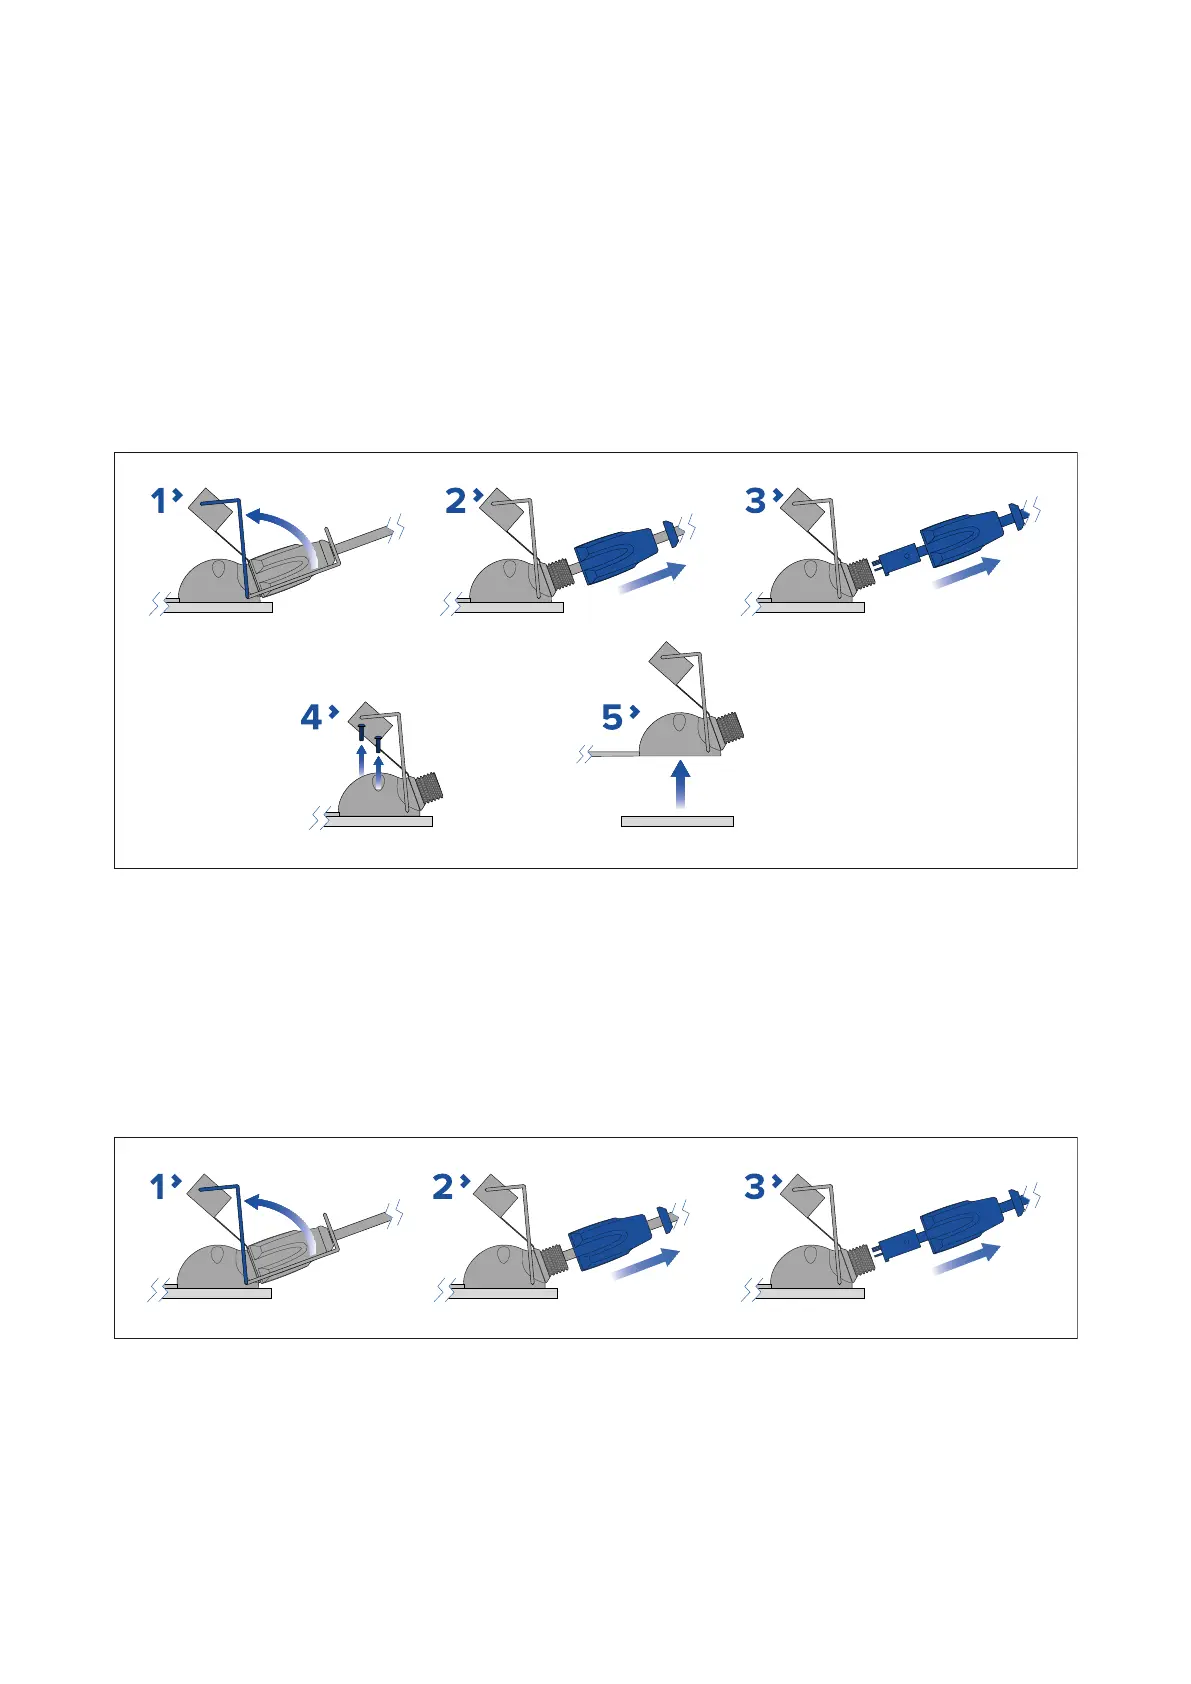
Replacingwindvaneandcable
Whenreplacinganexistingwindvaneyoucaneitherfitthenewwindvaneincludingthenewcable,
oryoucankeeptheexistinginstalledcable.Itisrecommendedthatthewindvanebaseischanged.
Themethodbelowdescribesreplacingthewindvane,baseandcable.
1.R eleasethearmfromtheretainingclip.
2.Pushtheplasticsleeveupthearmandunscrewthelockingcollar
3.Pullthewindvanearmawayfromitsbase.
4.Unscrewthebasefixingscrews.
5.Removethebaseandcable.
6.Installthenewwindvaneandcable,utilizingtheexistingbasefixingholesandfollowingthe
stepsaboveinreverseorder.
Replacingthewindvanearm
1.R eleasethearmfromtheretainingclip.
2.Pushtheplasticsleeveupthearmandunscrewthelockingcollar.
3.Pullthewindvanearmawayfromitsbase.
4.Usingthenewwindvanereassemblefollowingtheabovestepsinreverseorder.
Protectivecap
Theprotectivecapprovidesprotectionagainstwateranddustingresstothecableconnectorwhen
servicing,maintainingorreplacingyourwindvane.
Ifthearmisbeingremovedforservicing,maintenanceorreplacement,usetheprotectivecap.
Installation23
 Loading...