Do you have a question about the Raynor Airman II 8155RGD and is the answer not in the manual?
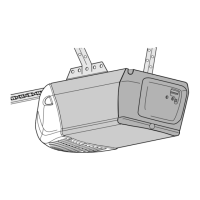
| Type | Residential Garage Door Opener |
|---|---|
| Horsepower | 1/2 HP |
| Remote Control | Yes |
| Remote Controls | 2 |
| Safety Features | Safety Sensors |
| Warranty | 1 year limited |
| Lift Capacity | Up to 7 feet standard |
| Voltage | 120V AC |
| Drive System | Chain Drive |
Explains safety symbols and signal words used in the manual.
Instructions for checking door balance, balance, and operation before installation.
Lists the tools required for installation and setup.
Lists all parts included in the garage door opener package.
Lists hardware required for the installation process.
Lists hardware specifically for the door control installation.
Steps to attach the rail assembly to the opener motor unit.
Guide to properly tensioning the drive belt for optimal performance.
Critical safety and installation guidelines to prevent severe injury or death.
Guidance on selecting the correct position for the header bracket installation.
Detailed steps for installing the header bracket to the wall or ceiling.
Instructions for connecting the rail assembly to the header bracket.
Guidance on placing the opener unit correctly before hanging.
Steps for securely mounting the opener unit to ceiling or wall supports.
Instructions for installing the light bulbs in the garage door opener.
Procedure for attaching the manual release rope and handle for safety.
Steps for attaching the door bracket to the garage door.
How to connect the door arms to the opener's trolley mechanism.
Steps to mount and wire the wall-mounted door control unit.
Instructions for connecting the door control wiring to the opener.
Placement instructions for safety warning labels on the wall and door.
Explains the function and importance of the safety reversing sensors.
Detailed steps for attaching safety sensors to door track, wall, or floor.
Instructions for mounting sensors on the garage door track.
Instructions for mounting sensors on the garage wall.
Instructions for mounting sensors on the garage floor.
Steps for connecting the safety sensor wires to the opener unit.
Instructions for connecting pre-wired safety reversing sensors.
Options for connecting the garage door opener to a power source.
How to align safety sensors and check LED indicators for proper operation.
Verifying door control wiring and checking the command LED status.
Explains how electronic controls adjust door travel and force settings.
Identifies the buttons used for programming travel limits and settings.
Step-by-step guide to setting the door's open and close travel limits.
How to test the safety reversal system using an obstruction.
Testing the safety reversing sensors' obstruction detection functionality.
Comprehensive safety warnings and instructions for operating the opener.
Overview of opener features like Alert2Close, Timer-to-Close, and MyQ technology.
Explains the opener's sleep mode and energy saving functions.
Details about the opener's light bulb usage and automatic activation.
How to operate the opener using various controls and sensors.
How to use the wall-mounted door control buttons and features.
How to configure LOCK and LIGHT features on the control panel.
Instructions for programming remote controls and keyless entry devices.
Steps for manually operating the garage door using the emergency release.
Recommended maintenance tasks and their frequency for the opener.
Instructions for replacing the battery in the remote control.
Table correlating diagnostic codes with symptoms and solutions.
Addresses common problems like opener beeping, remote not working, or door not closing.
Lists compatible accessories for the garage door opener system.
Lists individual parts for the rail assembly of the garage door opener.
Lists parts used during the installation process.
Lists individual components of the garage door opener motor unit.
Provides contact details for ordering parts and seeking service assistance.
 Loading...