Do you have a question about the Raynor PILOT 2265RGD and is the answer not in the manual?
Explains hazard symbols and signal words used in the manual to alert users to potential dangers.
Instructions for checking door balance, disabling locks, and removing ropes before installation.
Lists all required hand tools for the assembly and installation process.
Guidance on surveying the garage area and identifying conditions for opener installation.
Lists all parts included in the packaging and installation hardware.
Covers attaching the rail to the motor unit and the chain to the sprocket.
Adjusts chain tension for proper slack and secure operation.
Guides on finding the correct mounting position for the header bracket.
Attaches the header bracket to the wall or ceiling structural support.
Connects the opener rail to the installed header bracket using a clevis pin.
Places the motor unit correctly relative to the door and rail height.
Mounts the opener unit securely to structural supports via hanging brackets.
Wires and mounts the wall control panel and interior light assembly.
Connects the emergency release handle and rope to the trolley.
Guidelines for connecting the opener to the power supply, including wiring options.
Mounts and wires the safety reversing sensors to detect obstacles.
Details on different mounting options and connecting sensor wires.
Adjusts sensors for proper beam detection and addresses common issues.
Attaches the bracket to the garage door panel for arm connection.
Specific instructions for installing the opener on one-piece garage doors.
Links the door arm to the opener's trolley mechanism for door movement.
Continues specific steps for connecting the door arm on one-piece doors.
Sets the door's full open and close positions to ensure proper travel.
Calibrates the opener's force to safely open and close the door.
Verifies the door reverses upon striking an obstruction for safety.
Checks the functionality of the safety reversing sensors.
Overview of activating the opener with remote controls and wall buttons.
Details on operating the opener, lights, and lock feature via the control panel.
Instructions for opening the garage door manually using the emergency release.
Notes on how weather affects settings and references for adjustments.
Recommended monthly and bi-annual checks for door and opener.
Guide for safely replacing the battery in the remote transmitter.
Addresses issues like door not closing, remotes not activating, or reversing unexpectedly.
Interprets LED flash codes for identifying specific opener faults and symptoms.
Teaches the opener new remote codes or erases existing ones.
Resets all programmed remotes and keyless entry codes from the motor unit.
Sets up or changes the Personal Identification Number (PIN) for the keyless entry system.
Lists and illustrates components for the opener's rail system and installation hardware.
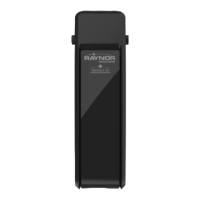
Details internal components of the opener's motor housing and related assemblies.
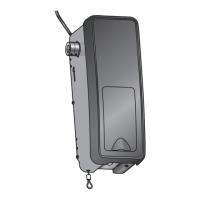
Accessory for manual exterior door access by disengaging the trolley.
Accessory for manual exterior door access without a remote control.
Different rail lengths available for accommodating various door heights.
Brackets for mounting safety sensors onto walls or floors.
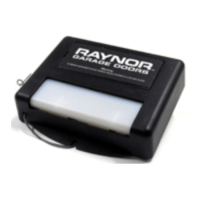
System for operating the opener via a keypad, allowing temporary codes.
Various remote control models available for operating the opener.
Wall control with motion sensor for automatic light activation.
Toll-free number and hours for installation and service support.
Information required for ordering replacement parts from the manufacturer.
Details on the one-year product and lifetime motor warranty terms.
| Manufacturer | Raynor |
|---|---|
| Model | PILOT 2265RGD |
| Horsepower | 1/2 HP |
| Voltage | 120V |
| Maximum Door Weight | 500 lbs |
| Remote Controls Included | 2 |
| Speed | 7 inches per second |
| Warranty | 5-Year Limited (Motor) |