5973130-7
Caution: If clutch does not slip, cables will
unwind from drum and cause door to drop when
obstruction is removed. After the final adjustment,
make sure 1st nut and jamb nut are locked together.
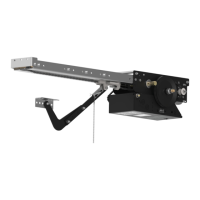
FIG. 8
CLUTCH ADJUSTMENT
DANGER: To avoid serious injury or death
always disconnect electrical power before
adjusting clutch.
The clutch must slip to prevent door damage
or injury if the door hits an obstruction while
moving.
To adjust the clutch sensitivity, tighten the 1st nut until the
operator will start to lift the door. If the clutch begins to
slip, press the "stop" button and tighten nut again. Repeat
this procedure until door travels smoothly in both directions
to the fully open and closed positions. See Fig. 8.
After final adjustment,
make sure jamb nut is locked to
1st nut. Using a wrench to hold the 1st nut, use a second
wrench to tighten the jamb nut to the 1st nut, making
sure nuts are locked together. See fig. 7
Additional adjustments may be required after a short
breaking in period.
WARNING: Do NOT over tension the clutch.
Note: The clutch is set loose at the factory and must be
adjusted in the field for proper sensitivity.
1ST NUT
CLUTCH SPRING
WASHER
LARGE PULLEY
CLUTCH DISK
CLUTCH PLATE
JAMB NUT
FIG. 7
Use wrench
to hold 1st nut.
Torque jamb nut
in direction shown.
 Loading...