
EasyManua.ls Logo

Raynor ControlHoist CMT - User Manual

Raynor ControlHoist CMT
44 pages
Print Icon
To Next Page IconTo Next Page
Loading...
Installation & Instruction Manual
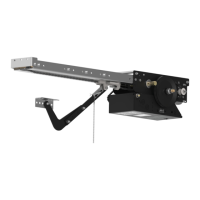
Commercial & Industrial Medium Duty Trolley Operator
(For standard lift sectional doors)
CMT
CMT
Electronic control for
monitored
monitored
external entrapment protection devices
(BOARD 070M)
(BOARD 070M)
READ AND FOLLOW ALL INSTRUCTIONS.
SAVE THESE INSTRUCTIONS.
GIVE TO END-USER.
Serial #
Model #
Wiring Diagram #
Project #/Name
Door #/Name
For technical support, please call 1-800-4-Raynor (1-800-472-9667) or visit www.raynor.com

Questions and Answers

  • J
    Jessica WrightAug 17, 2025
    What to do if Raynor Door Opening System door doesn't respond to any command?
    • Q
      quinnlauraAug 17, 2025
      If your Raynor Door Opening System door isn't responding to any command, here's what you can check: * Ensure the “Stop” button isn't stuck by pressing and releasing it. * Verify that the control station is correctly connected and wired. * Confirm that the system has power by checking the incoming power line from the main breaker to ensure it hasn't tripped or blown a fuse.
  • D
    Dennis HooverAug 20, 2025
    How to fix Raynor Door Opening System door when it doesn't respond to any radio command?
    • B
      Brian OconnellAug 20, 2025
      If your Raynor Door Opening System door doesn't respond to any radio command, start by replacing the transmitter's battery. If that doesn't work, reprogram the transmitter. Also, ensure that the photo cells are properly aligned and not obstructed; clear any obstructions or realign them.
  • D
    donald75Aug 22, 2025
    What to do if Raynor Door Opening System door doesn't respond to “Open” command?
    • G
      greercodyAug 22, 2025
      If your Raynor Door Opening System door doesn't respond to the “Open” command but responds to the “Close” command, the issue might be a defective “Open” push-button or “Open” limit switch, which would need to be replaced. Another possibility is a loose wire on the “Open” push-button or “Open” limit switch, so verify and correct the wiring.
  • D
    Douglas RogersAug 25, 2025
    Why does my Raynor Door Opening System door close only by constant pressure?
    • L
      Logan DavisAug 26, 2025
      If your Raynor Door Opening System door only closes when you're constantly applying pressure, it could be due to a few reasons: * Check if the selector switch is set to C2 mode; if so, switch it to B2 mode (B2=1). * Make sure the photo cells are properly aligned and not obstructed. Clear any obstructions or realign them if necessary. * Inspect for faulty monitored photo cells or loose wires, and verify, tighten, or replace them as needed. * Ensure the reversing device is connected with monitored photo cells as per UL325 for momentary contact to close. * Check for any obstructions in the loop, such as metal, and clear them.
  • M
    Matthew BairdAug 27, 2025
    Why does my Raynor Door Opening System motor hum when “Open” or “Close” buttons are pressed?
    • B
      Brian RiveraAug 27, 2025
      If your Raynor Door Opening System motor hums when you press the “Open” or “Close” buttons, it could be due to loose motor wires. In this case, verify and correct the wiring. Alternatively, the capacitor might be defective, requiring a replacement.
  • M
    Michelle CisnerosAug 30, 2025
    What to do if the “Stop” button doesn’t stop the Raynor Door Opening System door?
    • J
      Jose HarmonAug 30, 2025
      If the “Stop” button on your Raynor Door Opening System isn’t stopping the door, it might be because you have two or more 3-push button stations connected in parallel. To fix this, verify and correct the wiring, ensuring stop buttons are in series, and only open and close buttons are in parallel.
  • M
    Marissa MooreSep 1, 2025
    Why does the motor turn but Raynor Door Opening System door does not move?
    • E
      Emily JonesSep 1, 2025
      If the Raynor Door Opening System motor turns but the door doesn't move, it could be due to a missing sprocket key, a broken drive chain, or a slipping clutch. Replace the sprocket key or the drive chain if either is the issue. If the clutch is slipping, adjust it to the proper tension.
  • T
    Timothy FrazierSep 4, 2025
    Why does Raynor Door Opening System door reverse to fully open position?
    • J
      Jessica HooverSep 4, 2025
      If your Raynor Door Opening System door reverses to the fully open position after closing and reaching the floor, it could be because the “Close” limit switch is not being engaged by the traveling cam. The close limit switch needs to be adjusted properly at the end of travel. Alternatively, an “Open” command might be given, so verify the “Open” push-button or any opening device for a short-circuit.
  • P
    patrick46Sep 6, 2025
    What causes Raynor Door Opening System door not to open or close?
    • K
      Kathleen WatsonSep 6, 2025
      If your Raynor Door Opening System door doesn't open or close, and the motor hums or blows the main breaker, it could be due to several reasons: * The mechanical door lock might be engaged, so release it. * The door might be jammed, so verify the manual operation of the door. * The brake might not be releasing (if applicable), so verify and adjust the brake tension. * There might be a loose wire on the solenoid brake (if applicable), so verify and correct the wiring. * The solenoid brake might be faulty (if applicable), so replace it.
  • T
    Tom BerrySep 8, 2025
    Why don't Raynor Door Opening System limit switches hold their settings?
    • J
      Jordan LevySep 9, 2025
      If the limit switches on your Raynor Door Opening System do not hold their settings, it could be due to a loose drive or limit chain, which needs to be adjusted to the proper tension. Also, ensure that the limit cam retaining bracket is engaging in the slots of both limit cams. Check if the limit cams are binding on the shaft threads; if so, lubricate the shaft threads so the limit cams turn freely. Finally, verify and adjust if the limit shaft has a slight “play”.

Summary

General Specifications and Dimensions

Door & Operator Hardware

2.1 Delivery of Operator

Instructions for inspecting the operator unit upon delivery for shipping damages.

2.2 Hardware Supplied

List of standard hardware parts supplied with the operator, including part numbers.

Operator Installation

3.1 Assembly Instructions

Step-by-step guide for assembling the operator components before mounting.

3.2 Installation

Procedures for mounting the operator tracks and brackets to the door opening.

Disconnect Mechanism

Limit Switches & Limit Cams: Adjustment & Functionality

5.1 Limit Switch Adjustments: Open and Close Cam Settings

Guide to adjusting the ACCU-CAM® feature for precise limit setting.

5.2 Limit Switch Functionality

Explanation of how the Open and Close Limit Switches function.

5.3 Limit Switch Adjustment

Detailed procedures for adjusting open, close, and fine limit switches.

Electrical Wiring

6.1 Low Voltage (Controls) and High Voltage (Power) Connections

Guidelines for routing and separating low and high voltage wiring.

6.2 Main Power Supply Connection

Instructions for connecting the main power supply to the operator.

6.3 Push-Button Control Station Connection

Details on connecting the wall-mounted push-button control station.

6.4 Monitored External Entrapment Protection Device Connection

Wiring instructions for photoelectric cells and sensing edges.

6.5 Optional Accessory Connections

Information on connecting optional accessories like reversing edges, pull cords, and loop detectors.

Electronic Control Board (ECB) - BOARD 070 M

7.1 General Layout

Diagram and identification of components on the ECB.

7.2 On-Board LED Monitoring Status

Explanation of LED indicators for diagnostics and troubleshooting.

7.3 Electronic Control Board (ECB) Programming

Guide to programming run modes and features on the ECB.

Built-in Cycle Counter

Functionality for tracking door cycles and displaying the count.

Mid Stop (MD STP)

Feature to program a mid-stop position for the door.

Operator Start-up

Clutch Adjustment

User Instructions

Quick Fix Instructions

Maintenance Instructions

1 Preventative Maintenance Schedule

Schedule for performing mechanical and electrical inspections and maintenance.

2 Troubleshooting Guide

Guidance for diagnosing and resolving common issues with the operator.

Electrical Drawings

3.1 1 Phase Operator with BOARD 070 M

Wiring diagram for a single-phase operator connected to the BOARD 070M control board.

3.2 External Wiring with BOARD 070 M

Diagram illustrating external wiring connections for the BOARD 070M operator.

Mechanical Exploded Views and Replacement Components

4.1 CMT

Exploded view and part list for the CMT operator mechanical components.

4.2 CMT Control Box with BOARD 070 M

Exploded view and part list for the CMT control box assembly.

Notes

Warranty

Raynor ControlHoist CMT Specifications

General IconGeneral
BrandRaynor
ModelControlHoist CMT
CategoryDoor Opening System
LanguageEnglish

Related product manuals