3
Need Help? Visit our web site for replacement parts, product support, a list of authorized service centers in the US and customer service contact information
at www.razor.com. Please have the product I.D. code (located on the white label of your product) available for better assistance. Additional Customer Service
contact information is listed at the back of this manual.
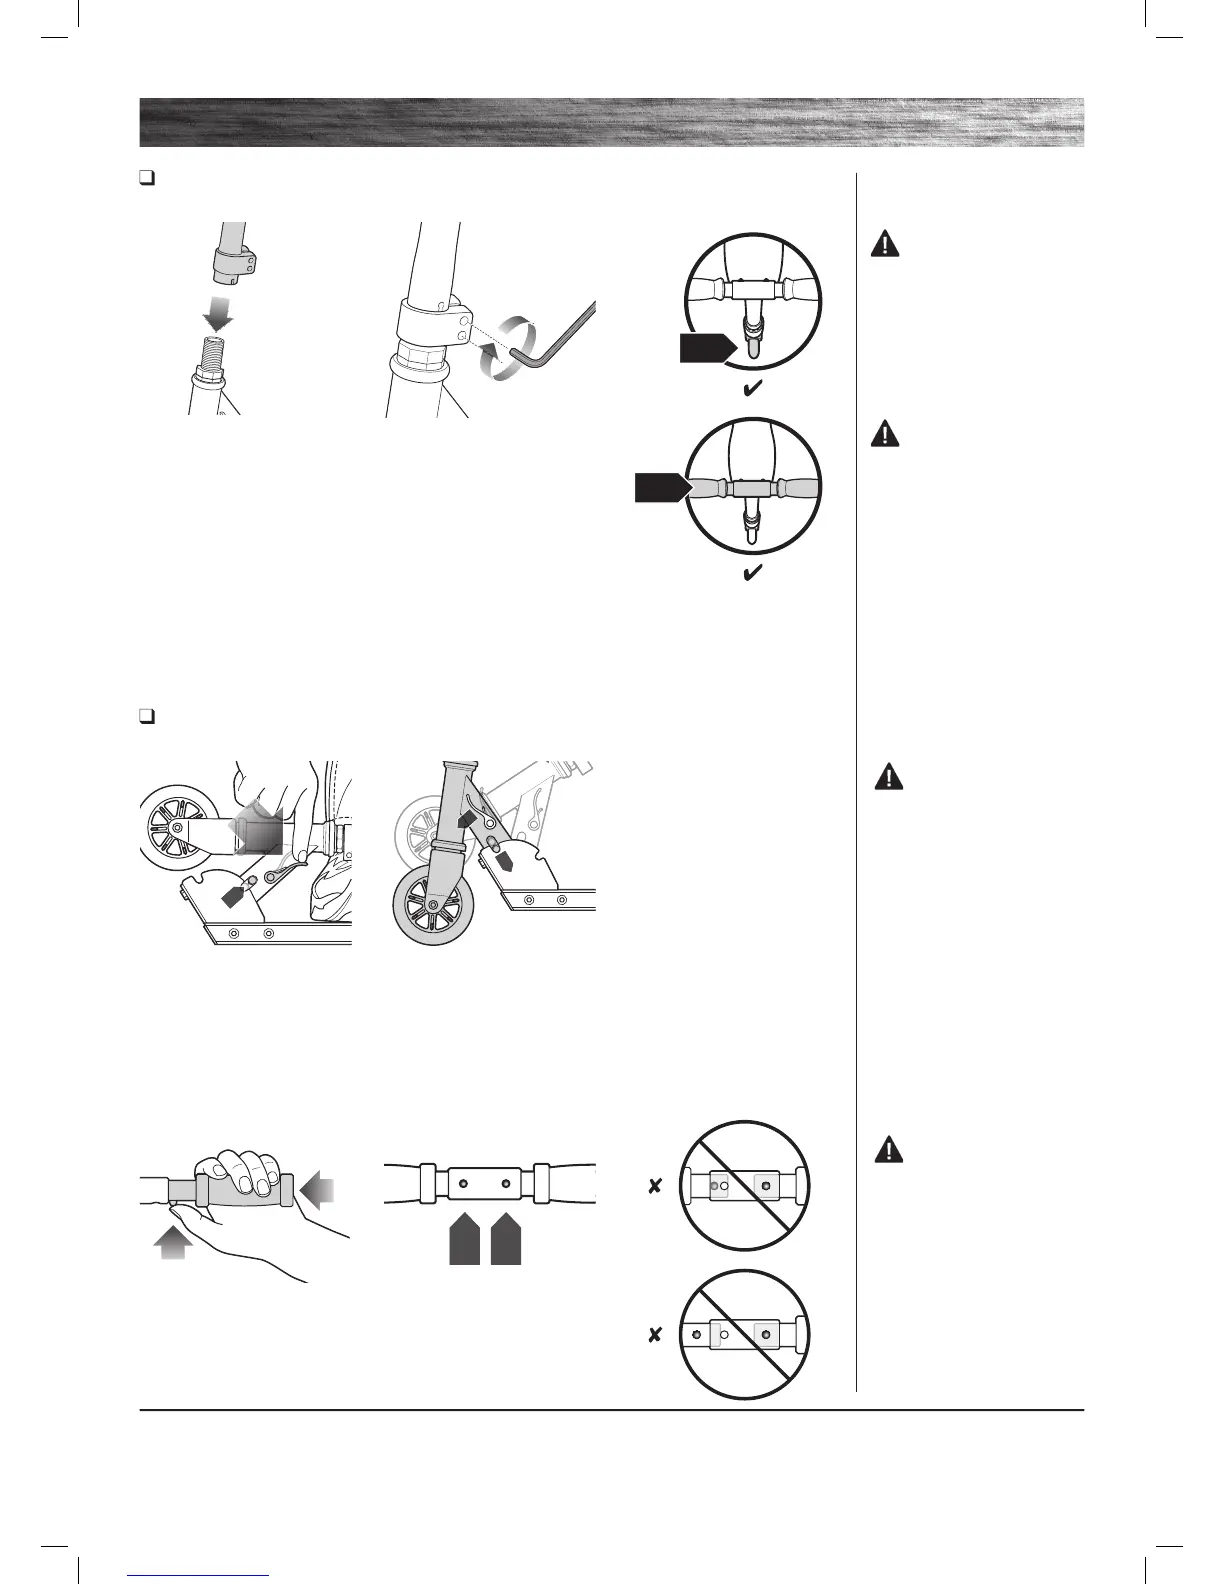
ASSEMBLY AND SET-UP
3 Make certain BOTH handlebars
are properly locked onto the T-bar.
2 Insert and secure the left
and right handlebars by pressing
the spring-loaded buttons and
inserting them into the T-bar.
1 To release the folding mechanism,
place the scooter on the ground, put
one foot on the deck plate and push
joint release lever down. Raise T-bar
up until it is securely locked in the
upright position.
Note: The joint release lever
is spring-loaded and will
automatically lock in the upright
position when fully upright.
WARNING: Failure to
properly engage the spring-loaded
buttons may cause the handlebars
to dislodge while riding and may
cause you to lose control and
fall. When correctly engaged the
handlebars will not rotate nor will
they move sideways. Note that
when properly engaged, the spring-
loaded buttons are clearly visible in
the holes on the T-bar.
WARNING:
Keep fi ngers clear of the pivoting
mechanism when folding or
unfolding the scooter. Make sure
others are standing clear.
Unfolding the Scooter for First Time Use
(Select models)
Attaching the Handlebars
(Select models)
2 With the front wheel pointed
straight ahead and the
handlebars square to the front
wheel and the Razor logo facing
the front, tighten the clamp as
shown. Tighten securely. On the
A4, alternately tighten each bolt
until securely tightened.
1 Loosen the collar clamp and
slide it upward. Insert T-bar into
the fork until it bottoms out on the
headset locknut.
Note: If necessary, carefully twist
the T-bar clock-wise while pushing
downward until T-bar bottoms out
on the headset locknut.
WARNING: Failure to
properly install and tighten the
collar clamp may cause the rider
to lose control and fall. If you are
having diffi culty understanding
these instructions, please
contact Razor Customer Service
for assistance.
WARNING: Do not
attempt to thread the handle
bar into the front fork thread.
Tighten clamp securely.