4mm
4mm
2X2X
4mm
2X
5mm
2X
5mm
4
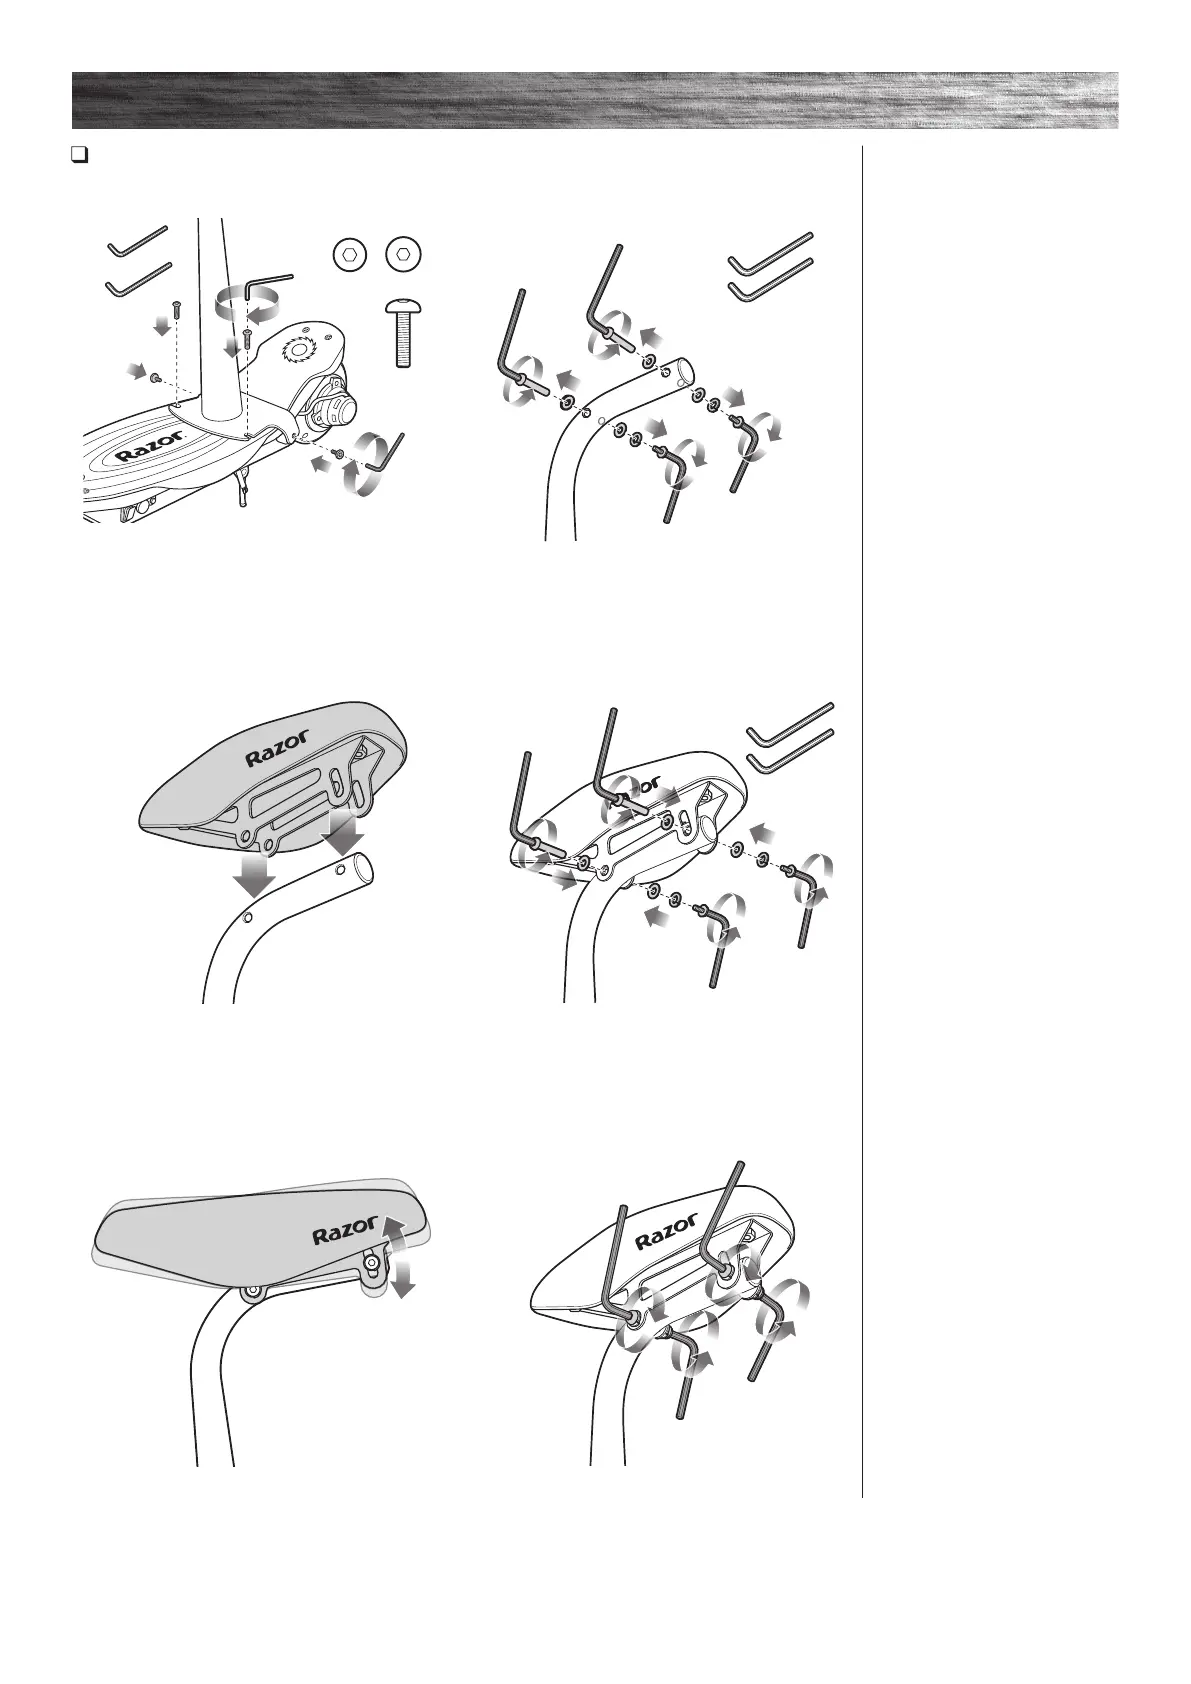
ASSEMBLY AND SET-UP
3 Using 4 mm and 5 mm Allen wrenches, secure seat
post to deck using the bolts that were removed in Step 1.
5 Align the holes on seat with the holes on the
seat post.
7 Adjust seat position.
4 Use 4 mm Allen wrenches to remove bolts and
washers from the top of the seat post.
6 Use 4 mm Allen wrenches to secure seat onto the
seat post using bolts removed in Step 4.
8 Tighten bolts after seat adjustment using 4 mm
Allen wrenches.
Seat Assembly (Power Core E100S Only – Continued)
Required Tools: Two (2) 4 mm Allen Wrenches and Two (2) 5 mm Allen Wrenches (included)
Note: Do not completely tighten
at this time. Adjust the seat tilt
approximately level to the ground,
or slightly tilted depending on
your personal preference. Tighten
securely. The seat tilt adjustment
should not move when riding.
 Loading...