Adjusting date and time display
One setting you may definitely want to
adjustbefore your first photo shoot is
date and time display.
Although it is not required to take and
save pictures, date and time information
may be useful for archiving purposes
later. The information is stored as
hidden computer information.
• Note: TimeDisplayonthiscameraisbasedonthe
24-hour clock where 0 through 12 represent a.m. times,
and 13 through 24 are pan. (to get p.m. 24-hour time, just
add 12 to the corresponding clock time.
In REC mode, press the MENU button.
Use the up (+/O) or down (-/_) button
to highlight DATE DISP. Press the
ENTER/MACRObutton to change settings.
MAIN MENU
CAPTURE: SINGLE
PRE FLASH: OFF
WHITE BAL.: AUTO
EXPOSURE: O,0
FOCUS: AUTO
SHARPNESS: NORMAL
COLOR: NORMAL
DAllE DISR: _.OFF
Use the up (+/0) or down (-/_) button
to change between OFF and ON. Press
ENTER/MACROactivate selection.
Note that you have not set the time yet.
We will handle that in the next section
dealing with Main Menu items in PLAY
mode.
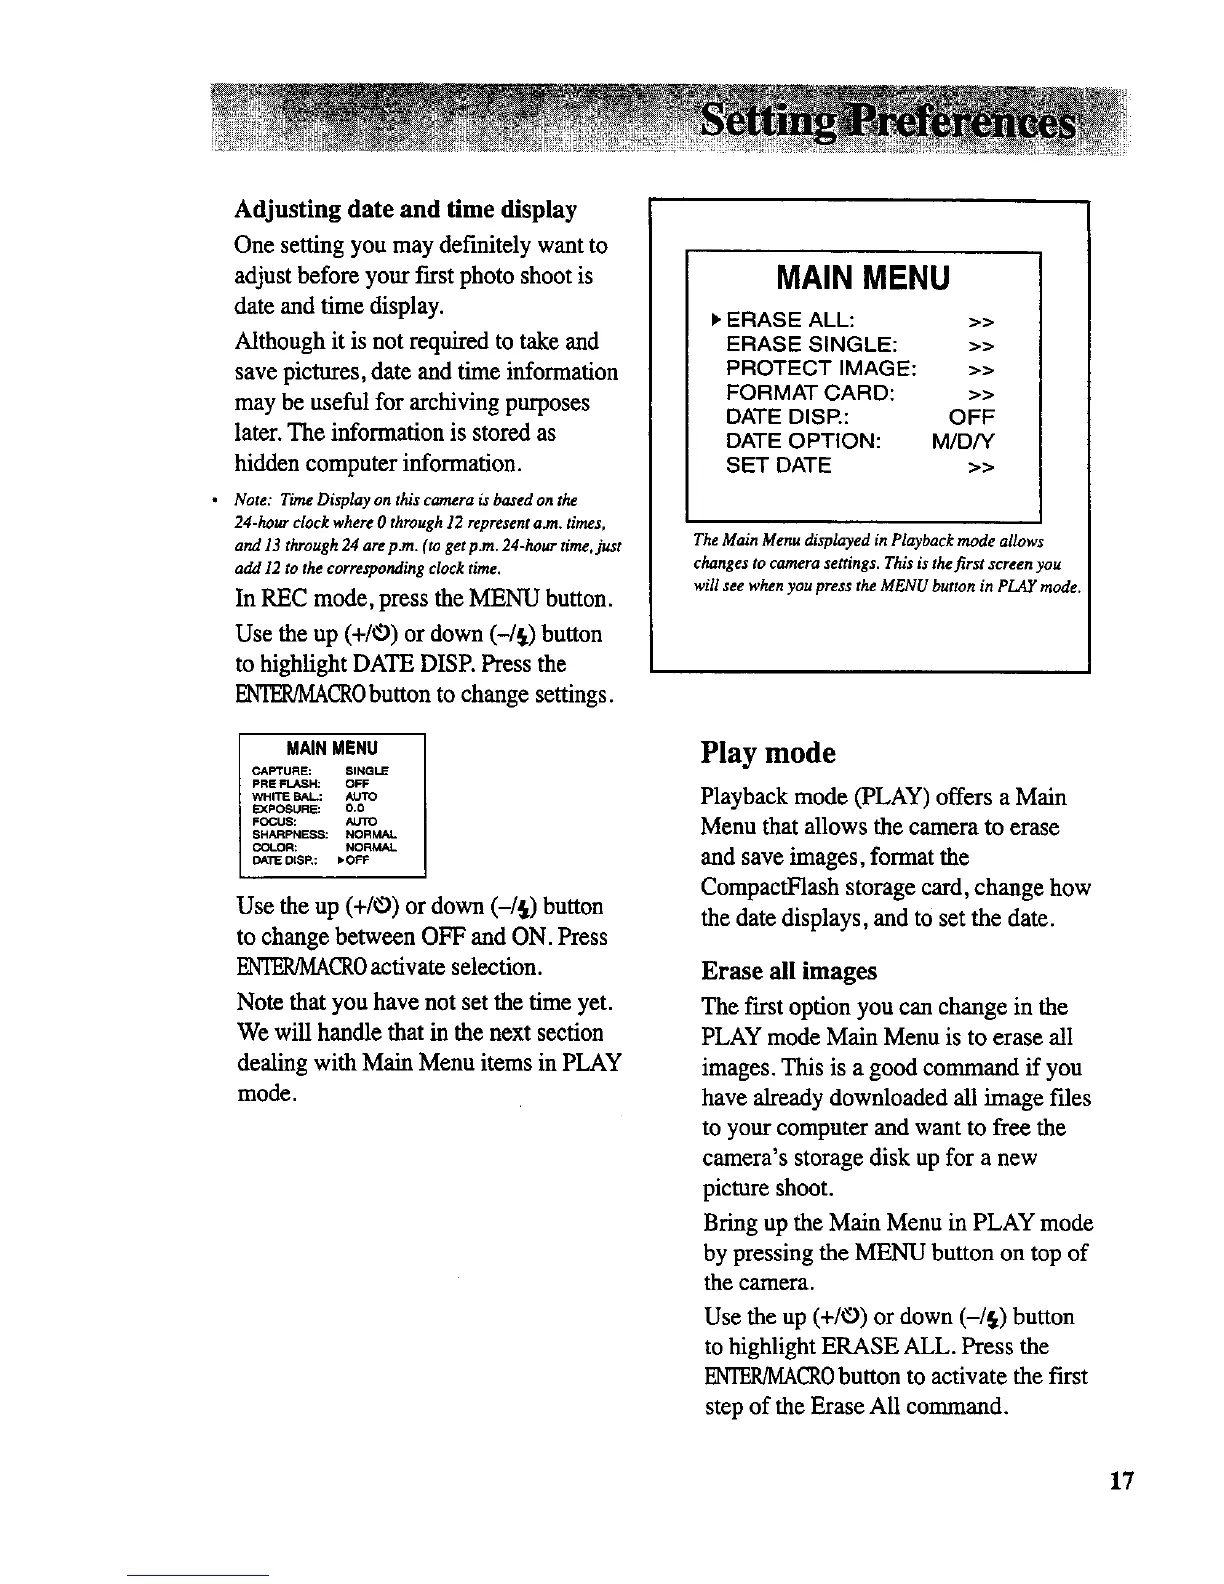
MAIN MENU
_"ERASE ALL: >>
ERASE SINGLE: >>
PROTECT IMAGE: >>
FORMAT CARD: >>
DATE DISP.: OFF
DATE OPTION: M/D/Y
SET DATE >>
The Main Menu displayed in Playback mode allows
changes to camera settings. This is thefirst screen you
will see when you press the MENU button in pLAY modt
Play mode
Playback mode (PLAY) offers a Main
Menu that allows the camera to erase
and save images, format the
CompactFlash storage card, change how
the date displays, and to set the date.
Erase all images
The f'trst option you can change in the
PLAY mode Main Menu is to erase all
images. This is a good command if you
have already downloaded all image fries
to your computer and want to free the
camera's storage disk up for a new
picture shoot.
Bring up the Main Menu in PLAY mode
by pressing the MENU button on top of
the camera.
Use the up (+/'O) or down (-/_) button
to highlight ERASE ALL. Press the
ENTER/MACR0button to activate the first
step of the Erase All command.
17