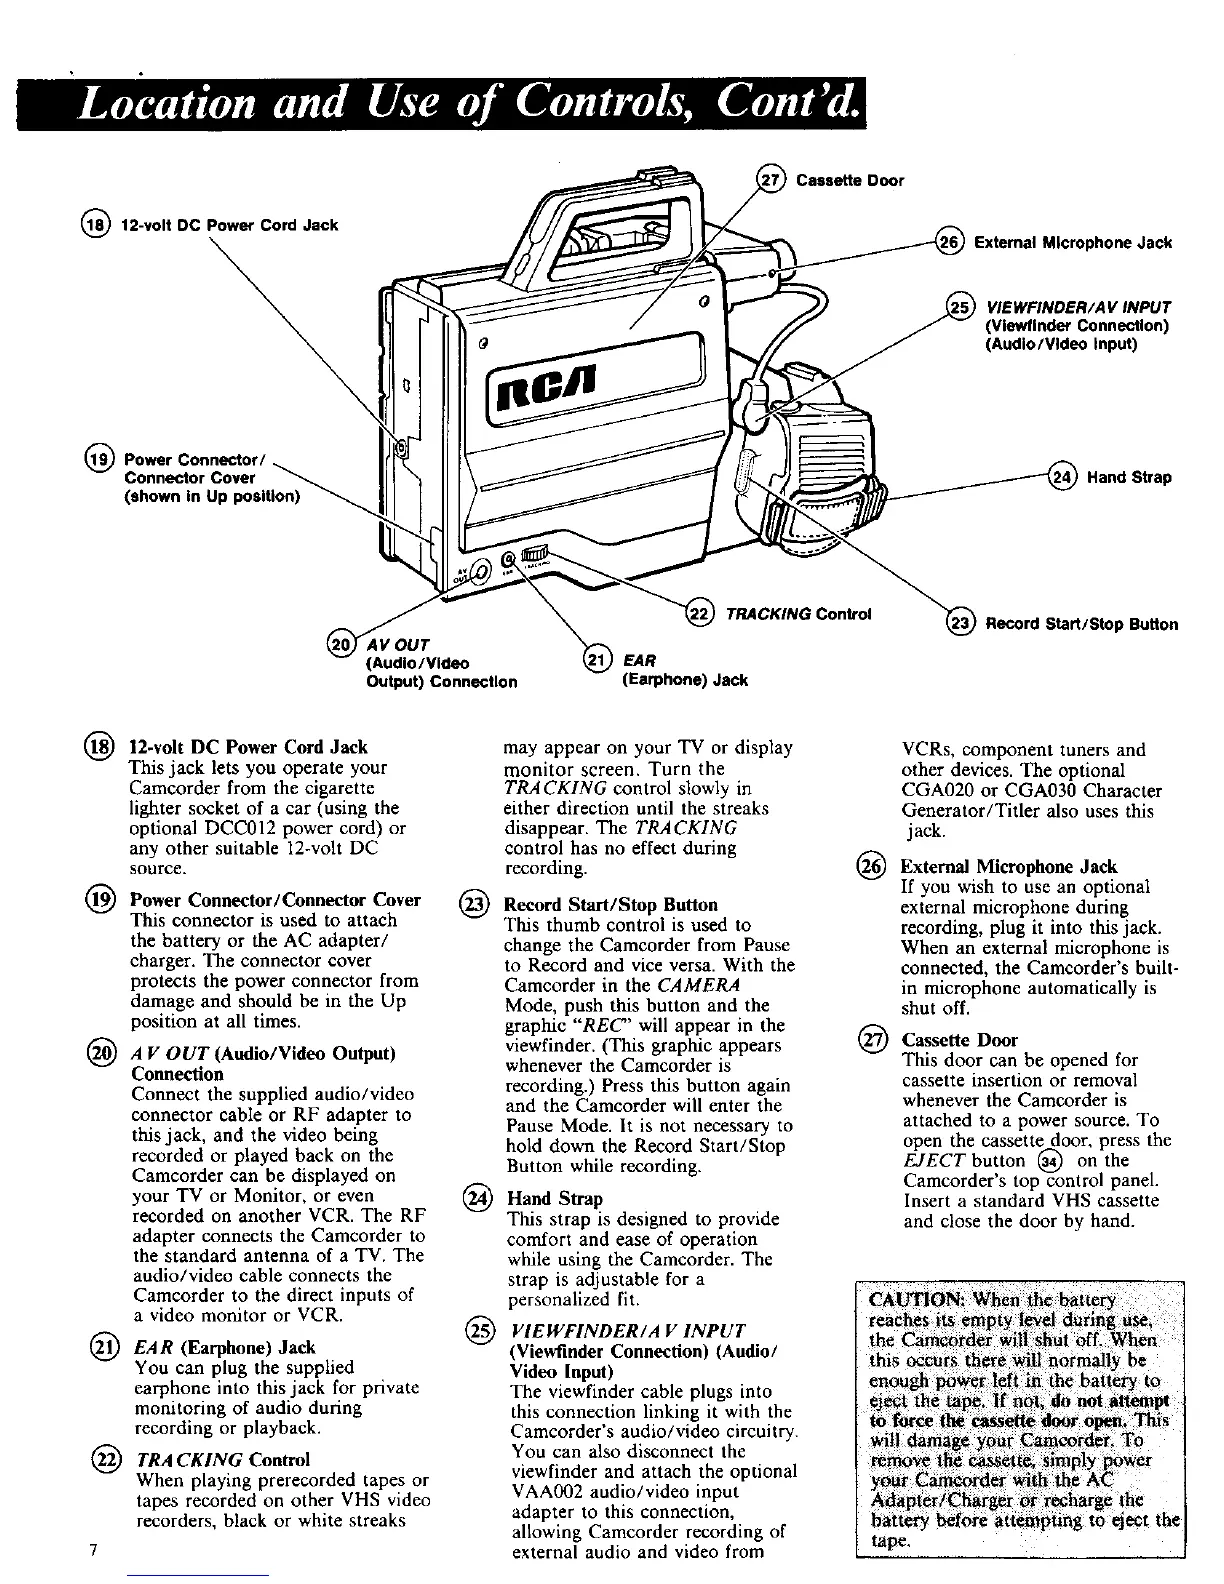
12-volt DC
Power Cord Jack
®
Connector Cover
{shown in Up position)
Cassette Door
External Microphone Jack
VI£WFINDER/A V INPUT
(Vlewflnder Connection)
(Audio/Video Input)
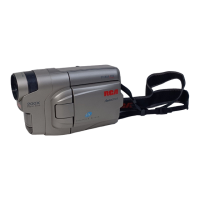
Hand Strap
(Audio/Video
Output) Connection
TRACKING Control
EAR
(Earphone) Jack
Record Start/Stop Button
12-volt DC Power Cord Jack
This jack lets you operate your
Camcorder from the cigarette
lighter socket of a car (using the
optional DCC012 power cord) or
any other suitable 12-volt DC
source.
@ Power Connector/Connector Cover @
This connector is used to attach
the battery or the AC adapter/
charger. The connector cover
protects the power connector from
damage and should be in the Up
position at all times.
A V OUT (Audio/Video Output)
Connection
Connect the supplied audio/video
connector cable or RF adapter to
this jack, and the video being
recorded or played back on the
Camcorder can be displayed on
TV or Monitor, or even (_
your
recorded on another VCR. The RF
adapter connects the Camcorder to
the standard antenna of a TV. The
audio/video cable connects the
Camcorder to the direct inputs of
a video monitor or VCR.
@ EAR (Earphone) Jack @
You can plug the supplied
earphone into this jack for private
monitoring of audio during
recording or playback.
TRA CKING Control
When playing prerecorded tapes or
tapes recorded on other VHS video
recorders, black or white streaks
may appear on your TV or display
monitor screen. Turn the
TRACKING control slowly in
either direction until the streaks
disappear. The TRACKING
control has no effect during
recording.
Record Start/Stop Button
Tiffs thumb control is used to
change the Camcorder from Pause
to Record and vice versa. With the
Camcorder in the CAMERA
Mode, push this button and the
graphic "REC" will appear in the
viewfinder. (This graphic appears
whenever the Camcorder is
recording.) Press this button again
and the Camcorder will enter the
Pause Mode. It is not necessary to
hold down the Record Start/Stop
Button while recording.
Hand Strap
This strap is designed to provide
comfort and ease of operation
while using the Camcorder. The
strap is adjustable for a
personalized fit.
VIEWFINDER/A V INPUT
(Viewfmder Connection) (Audio/
Video Input)
The viewfinder cable plugs into
this connection linking it with the
Camcorder's audio/video circuitry.
You can also disconnect the
viewfinder and attach the optional
VAA002 audio/video input
adapter to this connection,
allowing Camcorder recording of
external audio and video from
®
@
VCRs, component tuners and
other devices. The optional
CGA020 or CGA030 Character
Generator/Titler also uses this
jack.
External Microphone Jack
If you wish to use an optional
external microphone during
recording, plug it into this jack.
When an external microphone is
connected, the Camcorder's built-
in microphone automatically is
shut off.
Cassette Door
This door can be opened for
cassette insertion or removal
whenever the Camcorder is
attached to a power source. To
open the cassette door, press the
EJECT button (_) on the
Camcorder's top control panel.
Insert a standard VHS cassette
and close the door by hand.
the Camcorder _i!
this
enou_ i _@ i_fi
ej_t the _P_ i_
A_apt_r C_arg_r
hatte !Zt'o att
tape.
_ffl
_ the batte_ to
}_do not _t_em_
open
amcor t To
power
piln the