6
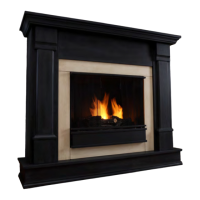
Step Three
- Slide the Center Panel (6) down between the Left and Right Front
Panel. The top edge of the Center Panel should be ush with the top
edge of the Front Panels. Attach the Center Panel with seven 1” screws
through the mounting blocks and through holes in the Upper Firebox
Trim.
- Fit one side of the rebox support into the hole on the Right Side
Panel. Slide the opposite end into the groove on the Left Side Panel.
Make sure this piece is fully seated into position.
- Set the Mantel Top on top of the Trim Panels and Side Panels so that
the trim on the top overhangs the front and sides. Attach with six 1”
screws through top of Side and Trim Panels.
You are now ready for the firebox installation.
Please refer to the instructions that are included with your firebox.
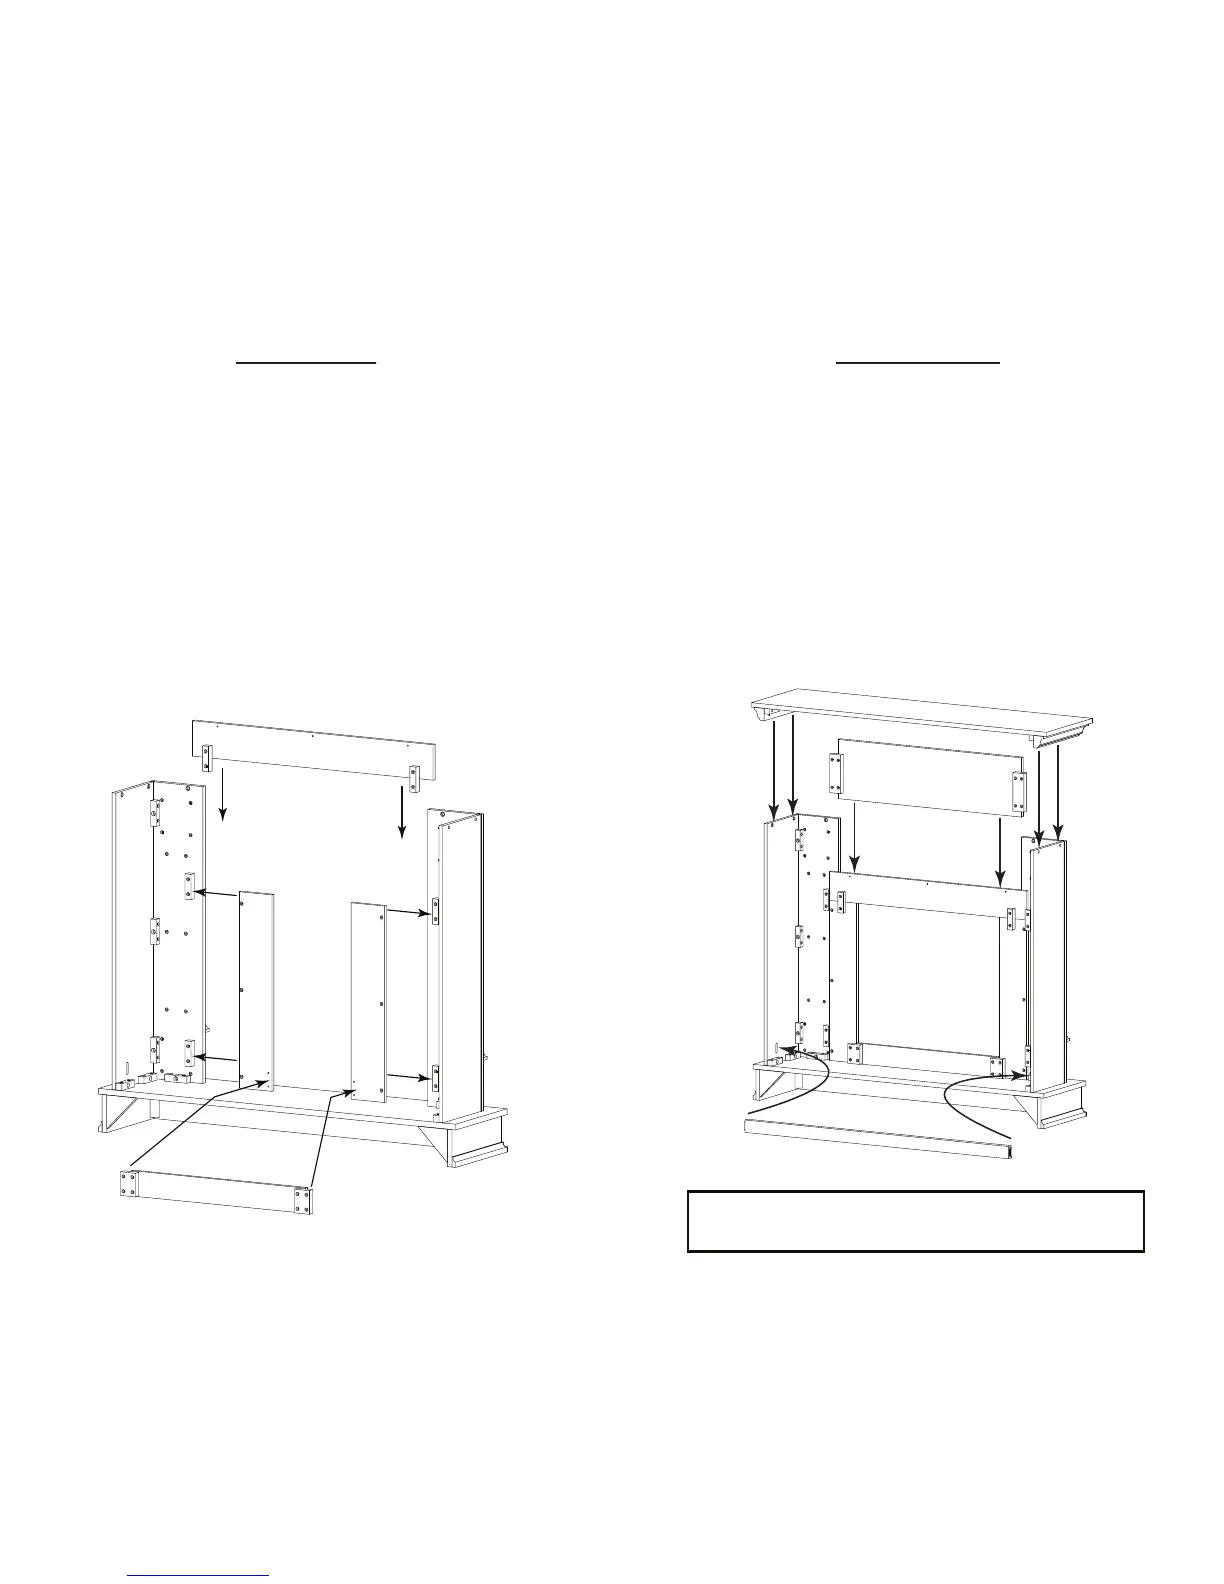
5
Step Two
- Place the Right Firebox Trim (9) against the two mounting blocks
located on the back of the Right Front Panel. Attach the trim through
the three holes in trim piece with three 1” screws.
- Repeat on opposite side with Left Firebox Trim (8).
- Place the Lower Firebox Trim (10) on the base and between the Left
and Right Firebox Trim pieces. Attach to the back of the Left and Right
Firebox Trim pieces with four 1” screws.
- Fit the Upper Firebox Trim (11) on top of the Left and Right Firebox
Trim between the mounting blocks. Attach with two 1” screws
through mounting blocks on the Upper Firebox Trim.
10
8
9
11