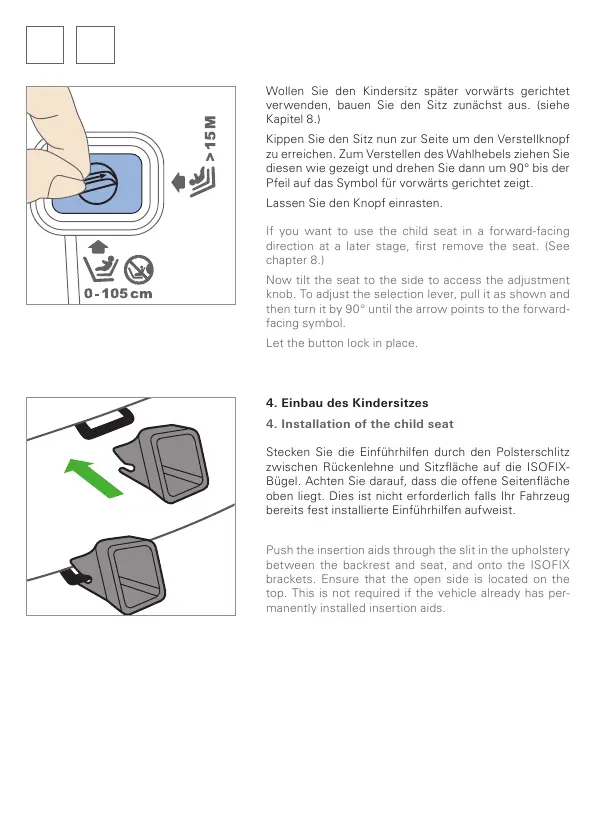
If you want to use the child seat in a forward-facing
direction at a later stage, rst remove the seat. (See
chapter 8.)
Now tilt the seat to the side to access the adjustment
knob. To adjust the selection lever, pull it as shown and
then turn it by 90° until the arrow points to the forward-
facing symbol.
Let the button lock in place.
4. Installation of the child seat
Push the insertion aids through the slit in the upholstery
between the backrest and seat, and onto the ISOFIX
brackets. Ensure that the open side is located on the
top. This is not required if the vehicle already has per-
manently installed insertion aids.
Wollen Sie den Kindersitz später vorwärts gerichtet
verwenden, bauen Sie den Sitz zunächst aus. (siehe
Kapitel 8.)
Kippen Sie den Sitz nun zur Seite um den Verstellknopf
zu erreichen. Zum Verstellen des Wahlhebels ziehen Sie
diesen wie gezeigt und drehen Sie dann um 90° bis der
Pfeil auf das Symbol für vorwärts gerichtet zeigt.
Lassen Sie den Knopf einrasten.
4. Einbau des Kindersitzes
Stecken Sie die Einführhilfen durch den Polsterschlitz
zwischen Rückenlehne und Sitzäche auf die ISOFIX-
Bügel. Achten Sie darauf, dass die offene Seitenäche
oben liegt. Dies ist nicht erforderlich falls Ihr Fahrzeug
bereits fest installierte Einführhilfen aufweist.

 Loading...