RD-2-7783 (REV. A) Page 6 SUBJECT TO CHANGE WITHOUT NOTICE
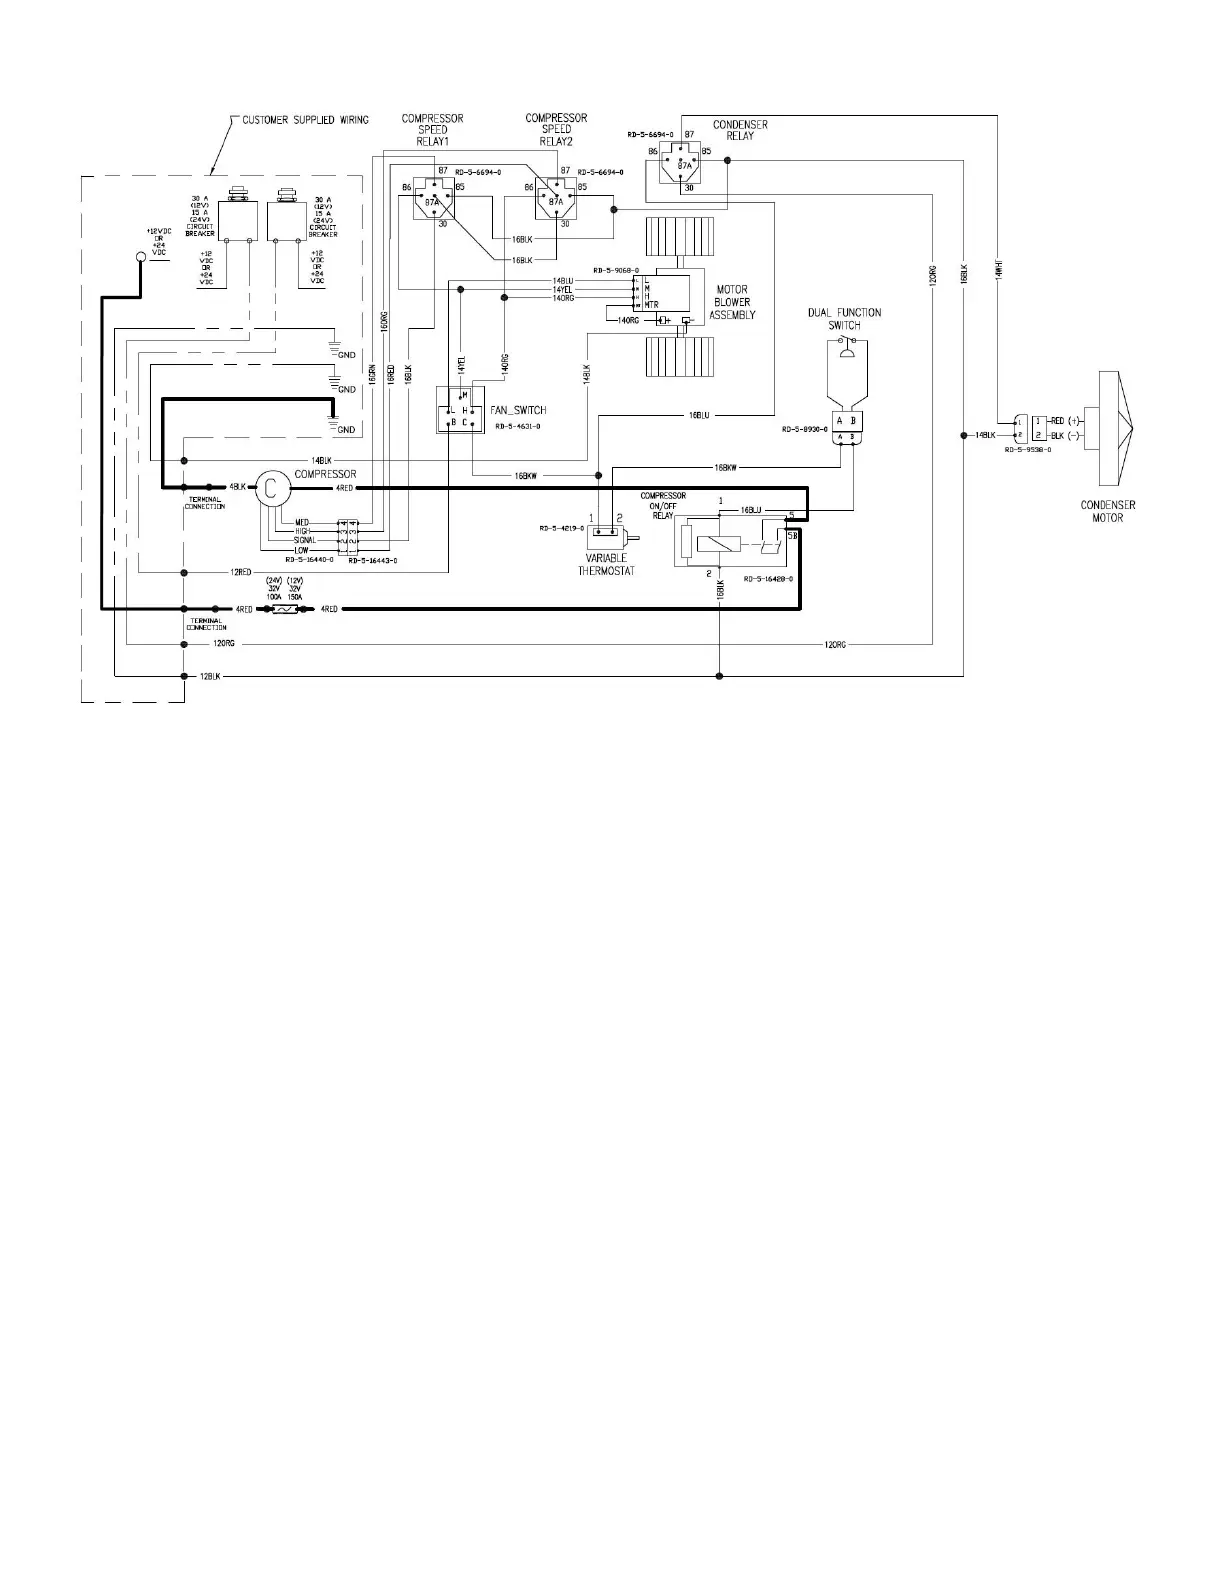
ELECTRICAL SCHEMATIC
D. Air Diffuser Plenum
1. Install headliner. Make sure that wire loom exits plenum ring properly and is not pinched.
2. Install four M5 x 0.8 x 75 screws in the plenum assembly and secure with retainers provided.
3. Place one foam gasket in plastic plenum assembly. If headliner is over 1 inch thick, glue two foam gaskets together. An
extra foam gasket may be ordered (Part #RD-2-1297-0) if required.
4. Place the plenum assembly up to the unit and start one M5 x 0.8 x 75 screw.
5. Attach the switch and thermostat to the plenum with three 7/16–28 nuts (two with switch, one with thermostat).
6. Tighten the four plenum assembly screws evenly until the plenum fits snugly against headliner. NOTE: Do not use an
impact wrench to tighten these bolts. Do not exceed 30 in-lb (3.4 Nm) torque for plenum bolts. Make sure that gasket
does not shift out of place and electrical connectors remain attached.
7. Align D-flats and push on two knobs.
E. Final Assembly And Check
1. Evacuate the system, test for leaks and charge with R-134a. The unit requires 3.0 pounds of R-134a.
2. Install cover. Check condenser fan for adequate blade clearance.
3. Connect the battery.
4. Turn the ignition switch to the “on” position, turn the thermostat to the coldest point and the fan switch to “high”.
a. The compressor should click on and be engaged.
b. The condenser fan and evaporator blower should be turning at high speed.
5. Turn the fan switch to medium and low positions and check that the evaporator blower slows down.
6. Turn the thermostat off and compressor should disengage.
7. Check thermostat to be sure compressor cycles on and off.