3
18
531 03-06-23
Fuel system
Lift up the non-return valve (C) and check
that the seals are intact.
Clean the valve housing.
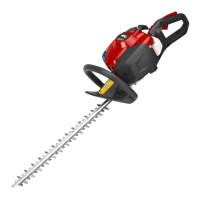
Carefully lift up non-return valve (A) using
your nails.
Clean the valve housing and check that
the channels are open.
Check that the non return valve’s seals (B)
are undamaged by carefully squeezing the
short sides together.
If the non-return valve is damaged, the
carburettor must be replaced with a new
one.
Assembling the carburettor
Clean all parts and assemble the
carburettor in the reverse order as set out
for dismantling.
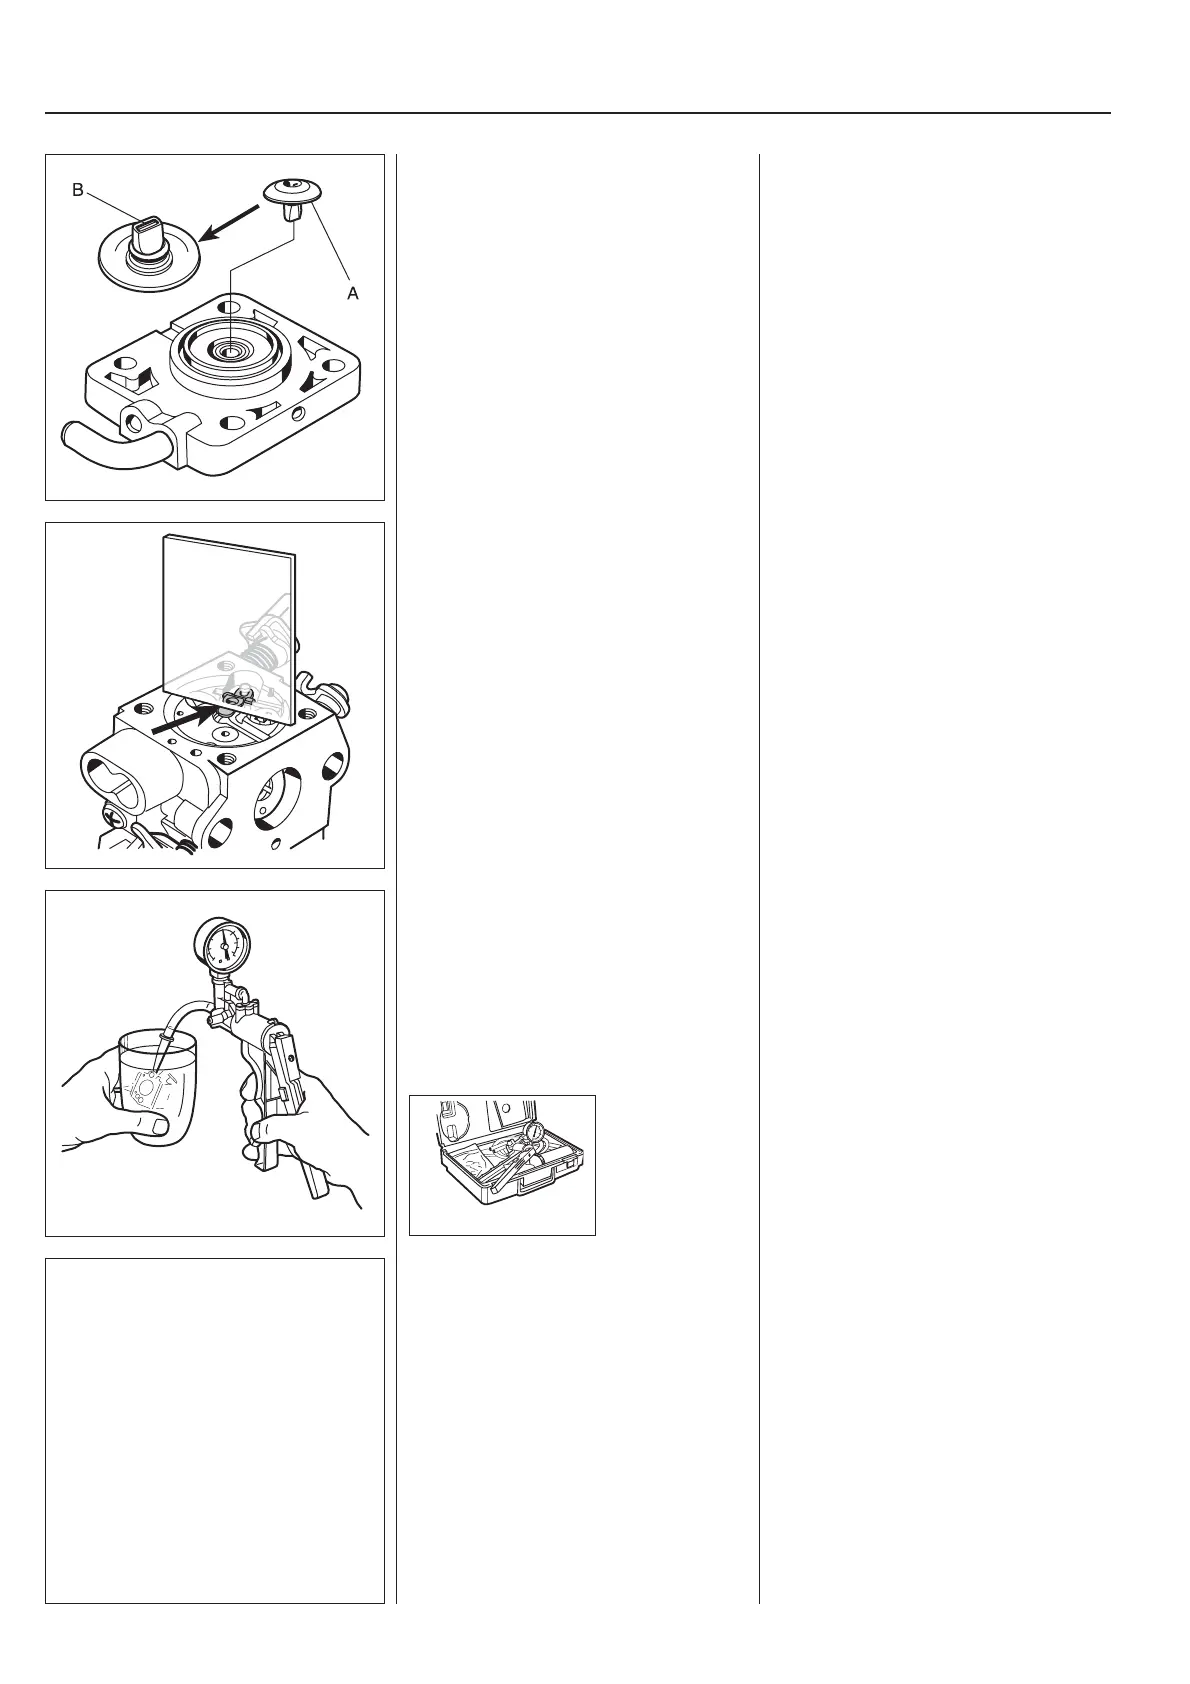
Check the position of the lever arm.
Assembling the carburettor
Carefully clean all parts before assembling
the carburettor in reverse order as set out
for dismantling. If any parts are damaged,
the entire carburettor must be replaced
with a new one.
Check that the lever arm lies fl ush with the
carburettor housing (without a gasket).
Too high setting = too much fuel.
Too low setting = too little fuel.
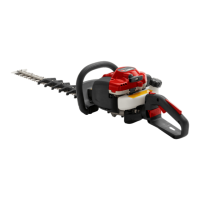
Check that the carburettor is sealed. Check that the carburettor is sealed.
Connect the pressure tester no.
531 03 06-23 to the fuel inlet on the
carburettor.
Pump up the pressure to 50 kPa.
Lower the carburettor in a vessel with
petrol in order to discover any leaks more
easily.
No leakage is permitted.