Adjustments of the OpticalTouch Chanter
These instructions refers only to the OpticalTouch Chanter
(not to the electronics in the bag of the redpipe)
The chanter is delivered with a factory set-up. This set-up is working fine and
you can start to play immediately.
It is not necessary to calibrate the redpipe each time you play. It is recommended to
recalibrate if you haven’t used the redpipes for a while or when you change
environment. Overall, if you feel that any one of the sensors is behaving erratically,
then recalibrate.
Some players like to adapt the chanter to their special wishes and this is quite simple
as we will show you now:
A. Calibrating the sensors to your fingers
This setting is used to determine the distance between the fingers and the
tonehole so that the sensor system detects a tonehole as closed.
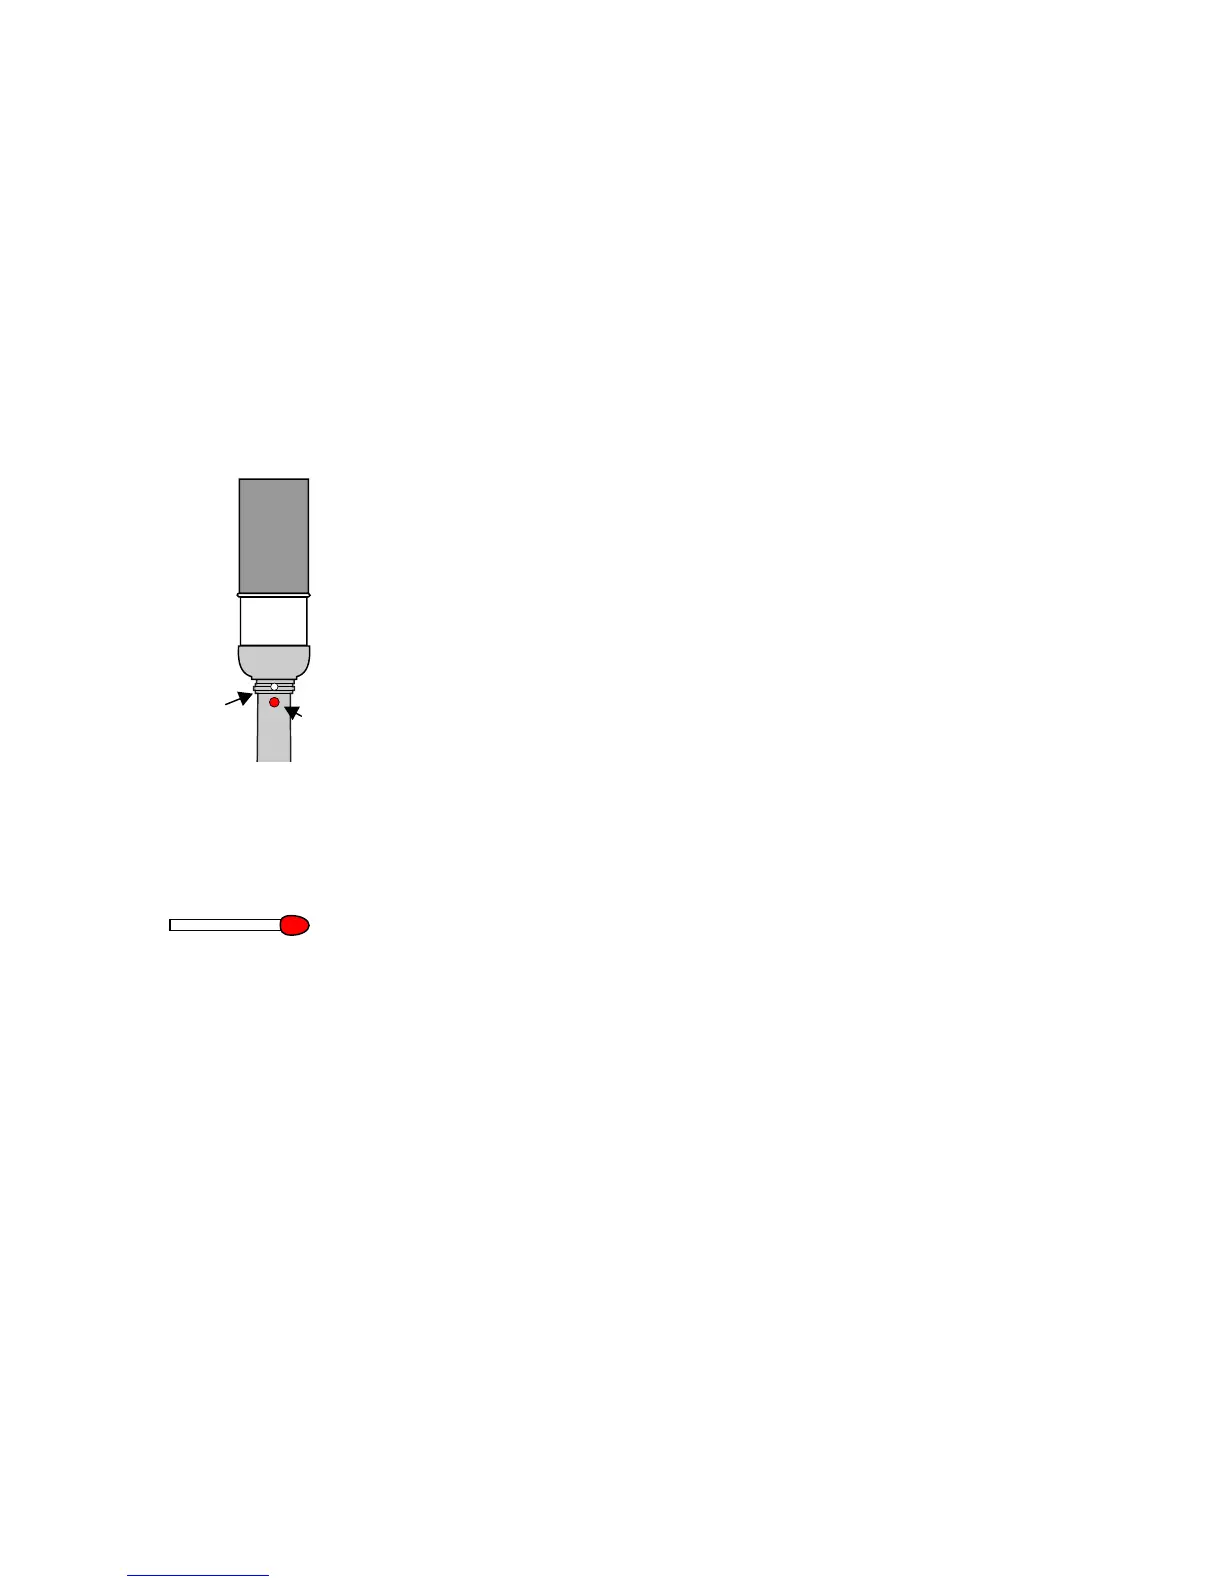
1. Turn on the redpipe
2. Take the match (picture) and press it in the small hole above the LED indicator
on the front of the Chanter
3. Push the match until the LED flashes up continuously.
4. Take away the match – the control light flashes slowly.
5. Put your fingers and your thumb within 3 seconds on the chanter holes as if you want to play.
It is important that the holes are closed completely – otherwise the calibration will fail.
6. Hold your fingers in that position until the LED flashes several times. Now the sensors have
been adjusted to the physical conditions of your fingers (i.e. character of your skin) and the
actual environment.