5
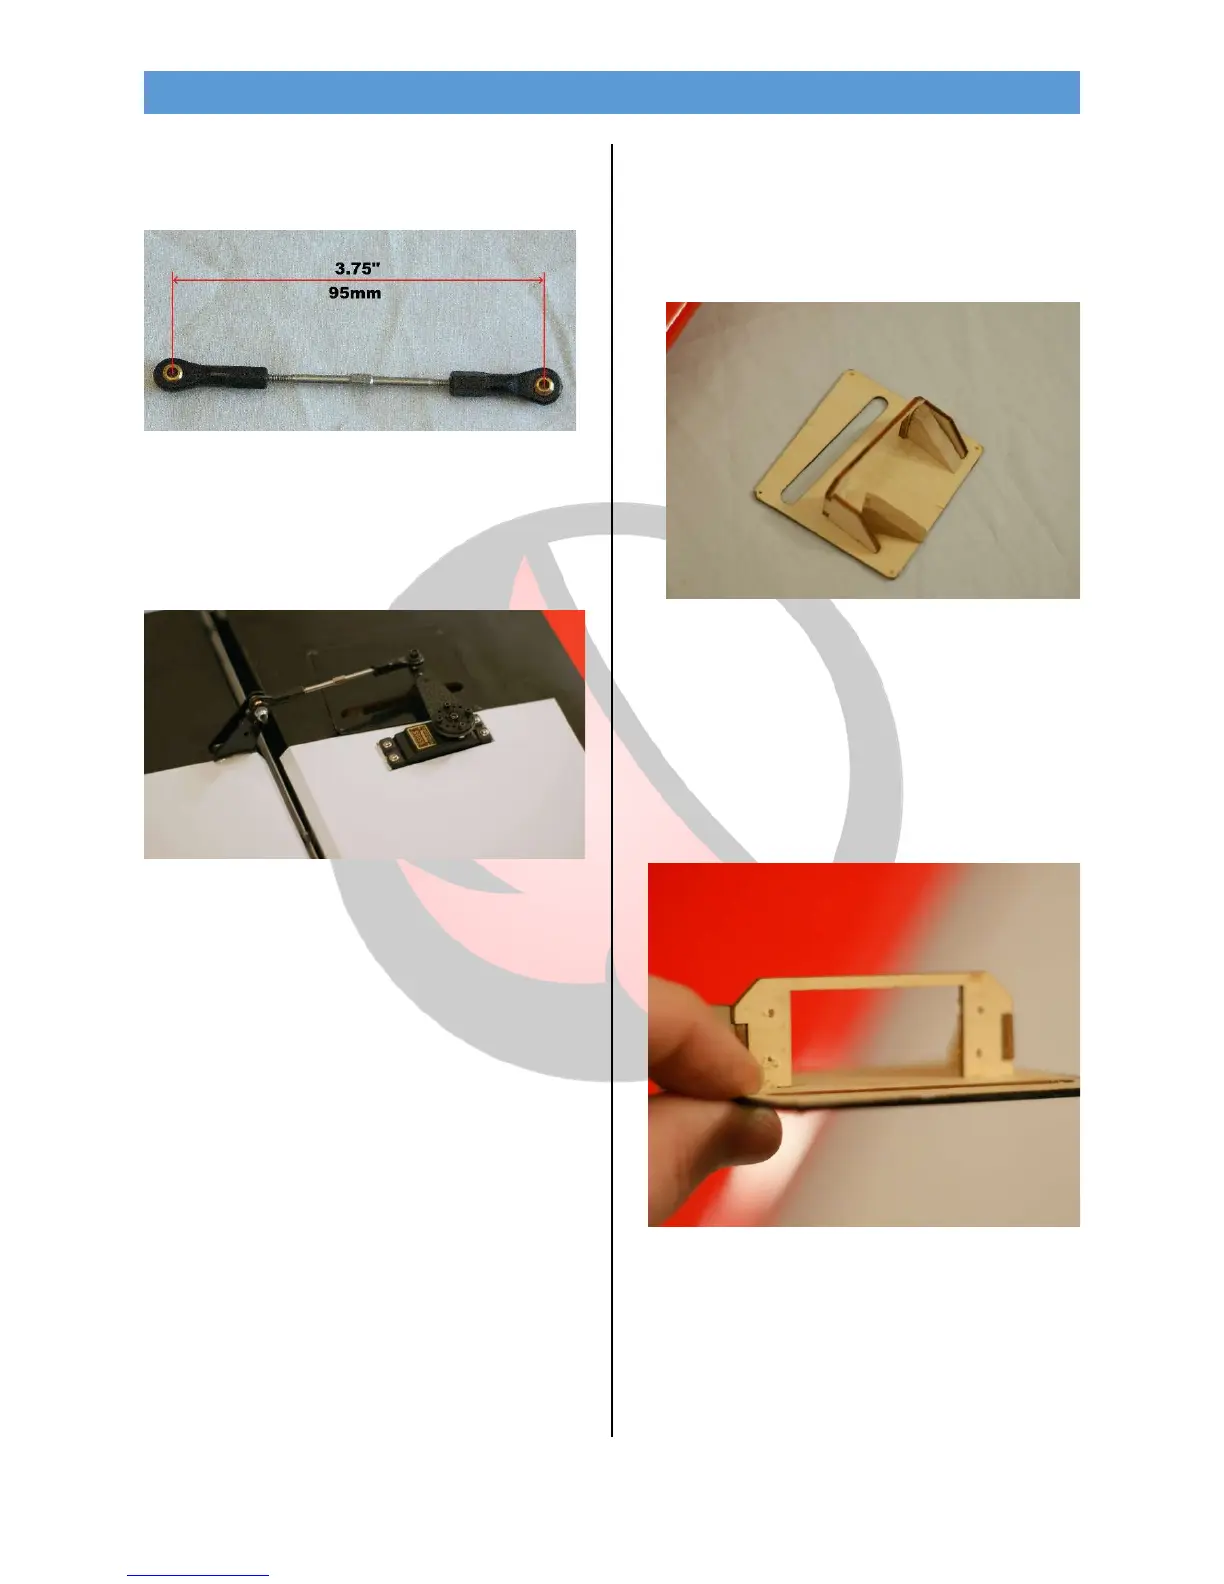
•Assemble the control rods to 3.75” length
making sure the turnbuckle is centered with
room to adjust both ends.
NOTE: These are a true turnbuckle and one end
is reverse thread.
• Install the pushrod with the included
hardware.
From the Pro: It is essential that you install the side
with the standoff toward the control horn and use a
small washer on the outside of the ball link. This will
prevent the ball joint from slipping off under load.
Aileron Servo OPTION B
•Locate and remove the servo hatch from the
wing and install the hardwood servo mounts as
shown using 15min epoxy. Use thin CA on all
the other joints of the servo mount
From the Pro: After the glue has cured, drill a 1/16”
hole from the face of the hatch into the hardwood
block. Then use a short screw to secure the block to
the plate. This will ensure that the servo cannot
break loose of the plate under load.
•Next, drop the servo into place and drill for the
servo screws with a 1/16” drill bit.
•Remove the servo and thread a servo screw in
and out of each hole. Then apply 2 drops of thin
CA to each and allow the CA to soak in and fully
cure.