6
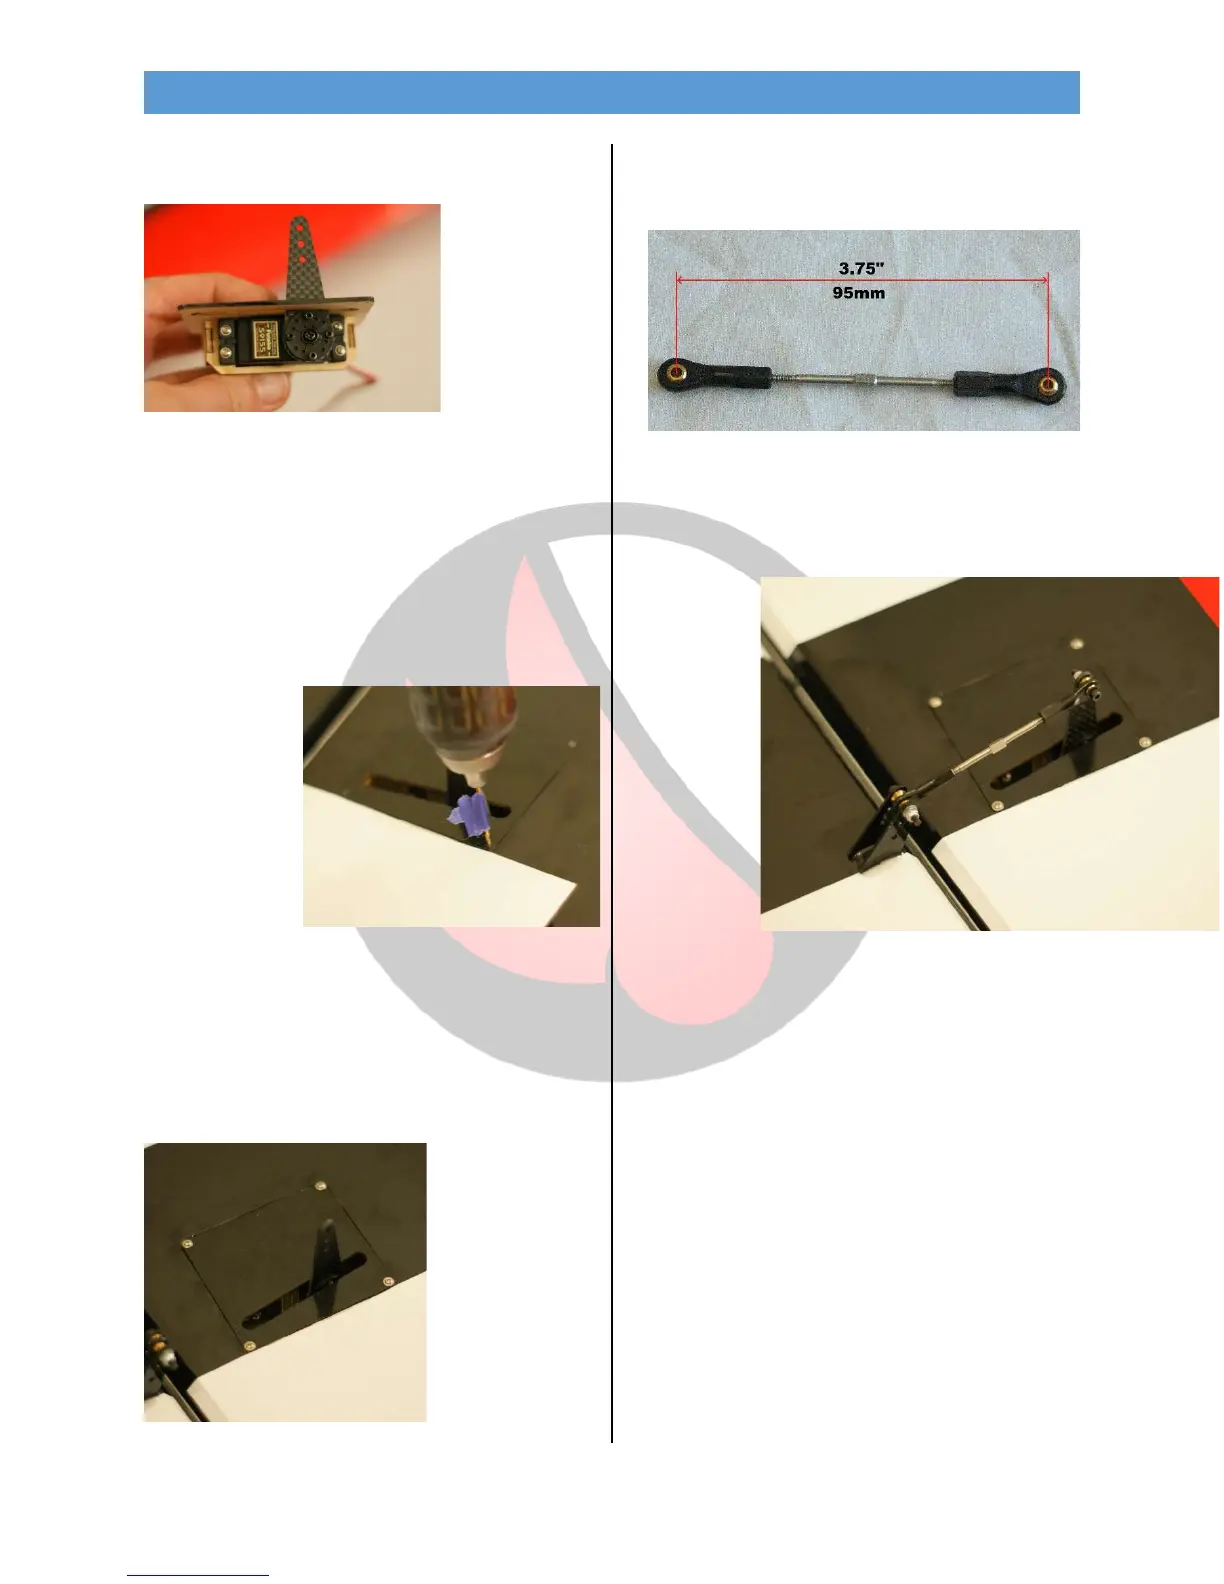
•Install the servo to the hatch with the output
to the leading edge.
Then center
the servo
and install
the servo
horn.
•Place the hatch into the wing, pulling the servo
lead out to the root of the wing. The servo horn
should be toward the leading edge of the wing
and facing the fuselage, to line up with the
aileron control horn.
•With a 1/16” drill bit, drill for the servo screws
using the pre drilled holes in the hatch as a
guide.
From the Pro:
Use a piece of
tape to mark the
drill bit to help
avoid punching
through to the
top-side of the wing.
•Remove the hatch and thread a screw in and
out of each hole. Then apply 2 drops of thin CA
to each and allow the CA to soak in and fully
cure. Once cured you can install the hatch and
servo for the
final time.
•Assemble the control rods to 3.75” length
making sure the turnbuckle is centered with
room to adjust both ends.
NOTE: These are a true turnbuckle and one end
is reverse thread.
• Install the pushrod with the included
hardware.
From the Pro: It is essential that you install the side
with the standoff toward the control horn and use a
small washer on the outside of the ball link. This will
prevent the ball joint from slipping off under load.