6
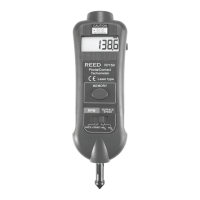
COUNT Measurement Mode
1. Applyasmallpieceofreectivetapetotheobjectbeingmeasured
(seeApplying Reflective Marking Tape sectionfordetails).
2. ToselectCOUNTmeasurementmode,pressandreleasetheMEAS
button to power the meter on and press the MODE button until REV
appears on the display.
3. Point the meter towards the target under test at a distance of
2to20"(50to500mm).
4. Press the MEAS button and align the laser light beam to the applied
reectivetape.
5. VerifythatthemeasurementindicatorappearsontheLCDwhenthe
reectivetapepassesthroughthelightbeamasindicatedby .
6. When the measurement button is released the last reading will
display for 5 to 10 seconds before the meter automatically turns off.
Note:WhenmeasuringverylowRPMvalues,itisrecommendedtoattach
morereectivetapeandtakeseveralreadings.Dividethecombinedto
total by the number of measurements to come up with an average.
Memory Recall
Themaximum,minimumandlastvaluesobtainedpriortoreleasingthe
MEAS button will automatically be stored in memory.
Press the MEMbuttonrepeatedlytoscrollthroughthemaximum,
minimum and last values taken during testing.
Note:Allstoredvalueswillbeerasedfrommemorythenexttimethe
MEAS button is pressed.
Battery Replacement
1. When the low battery symbol appears on the display, the
batteries need to be replaced.
2. Remove the Phillips screw on the back of the meter.
3. Remove the battery cover.
4. Replace the 9V battery.
5. Secure the battery cover back into place and tighten the screw.
REED Instruments
1-877-849-2127 | info@reedinstruments.com | www.reedinstruments.com
 Loading...
