k) Plug tonearm’s cables to the Phono
and Laser connectors [4a] and [4b]
(Figure 12), set tonearm’s armwand
to a rest position and gently tighten
armtube fixing screw [2].
Tonearm should not be connected to
a power supply without performing
steps 3-8 first. Doing so may
permanently damage phono cartridge
and tonearm performance.
l) Place and align your turntable to a
horizontal position.
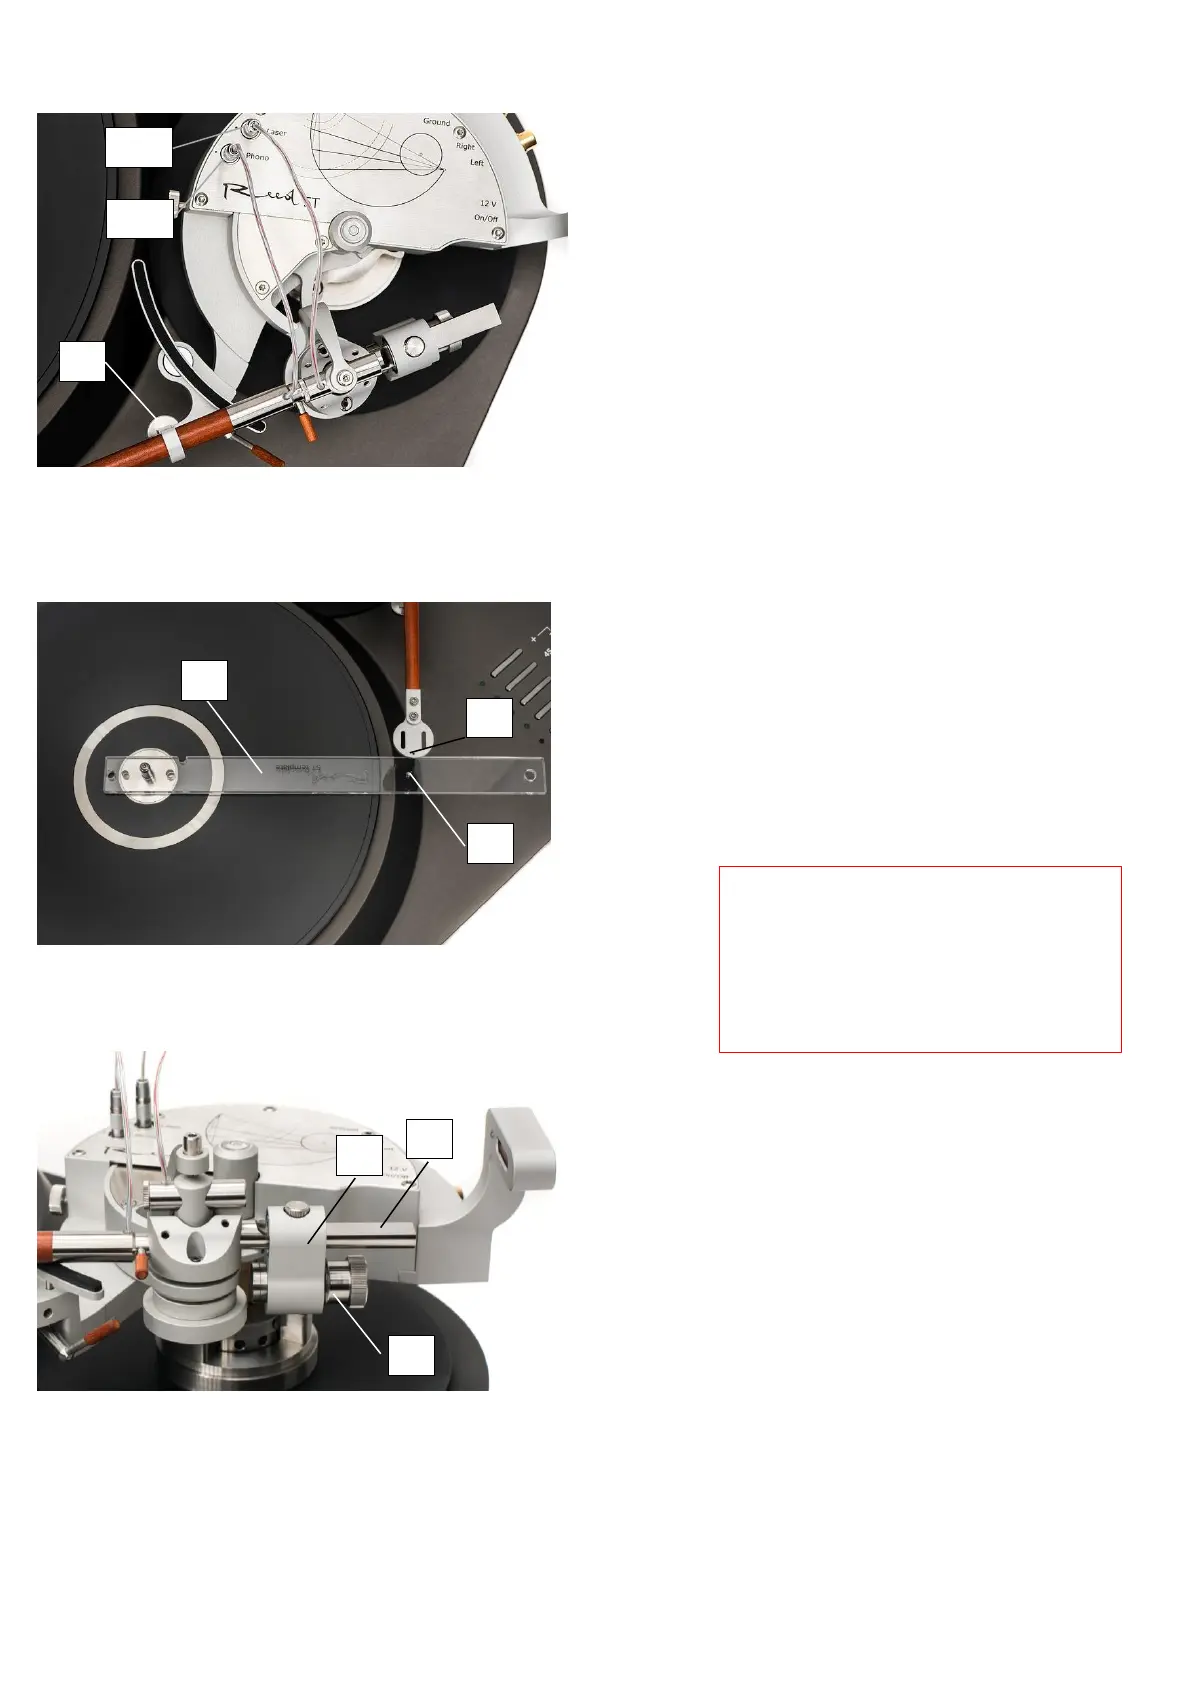
m) Check tonearm setup using Reed 5T
template ruler [1] (Figure 13).
Template’s hole [2] should be aligned
with hole in the headshell [3]; max.
allowed deviation is +/-1mm. If
deviation is bigger, please check your
setup according to steps 2-f, 2-g, and
2-j of this manual.
n) Attach a cartridge of your choice to
headshell.
o) Final adjustment of cartridge position
can be done by using Reed 5T
Protractor when tonearm is turned on
(Step 9-g).
p) Unpack the counterweight [4] (Figure
3). Take the required weight
according to the cartridge settings
(30 g or 45 g weight). Screw
counterweight weight [1] out of the
frame [2] until weight’s frontal
surface aligns with frame’s surface
(i.e. it should not stick from a frame)
(Figure 14).
r) Put counterweight frame [2] onto the
holder [3] (Figure 14).
Be careful while connecting or
disconnecting wire connectors to the
cartridge, because tonearm wiring is
very fragile. For connecting and
disconnecting wires use tweezers.
Always pull the wire by its connector
and never pull by wire itself.
 Loading...