9. Connecting Reed Source 12V power
supply:
a) Unpack Reed Source 12V power supply
(supplied with tonearm) while reading its
User Manual and prepare it for operation.
b) Connect power supply and a tonearm.
c) Turn on a power supply by pressing
Power button.
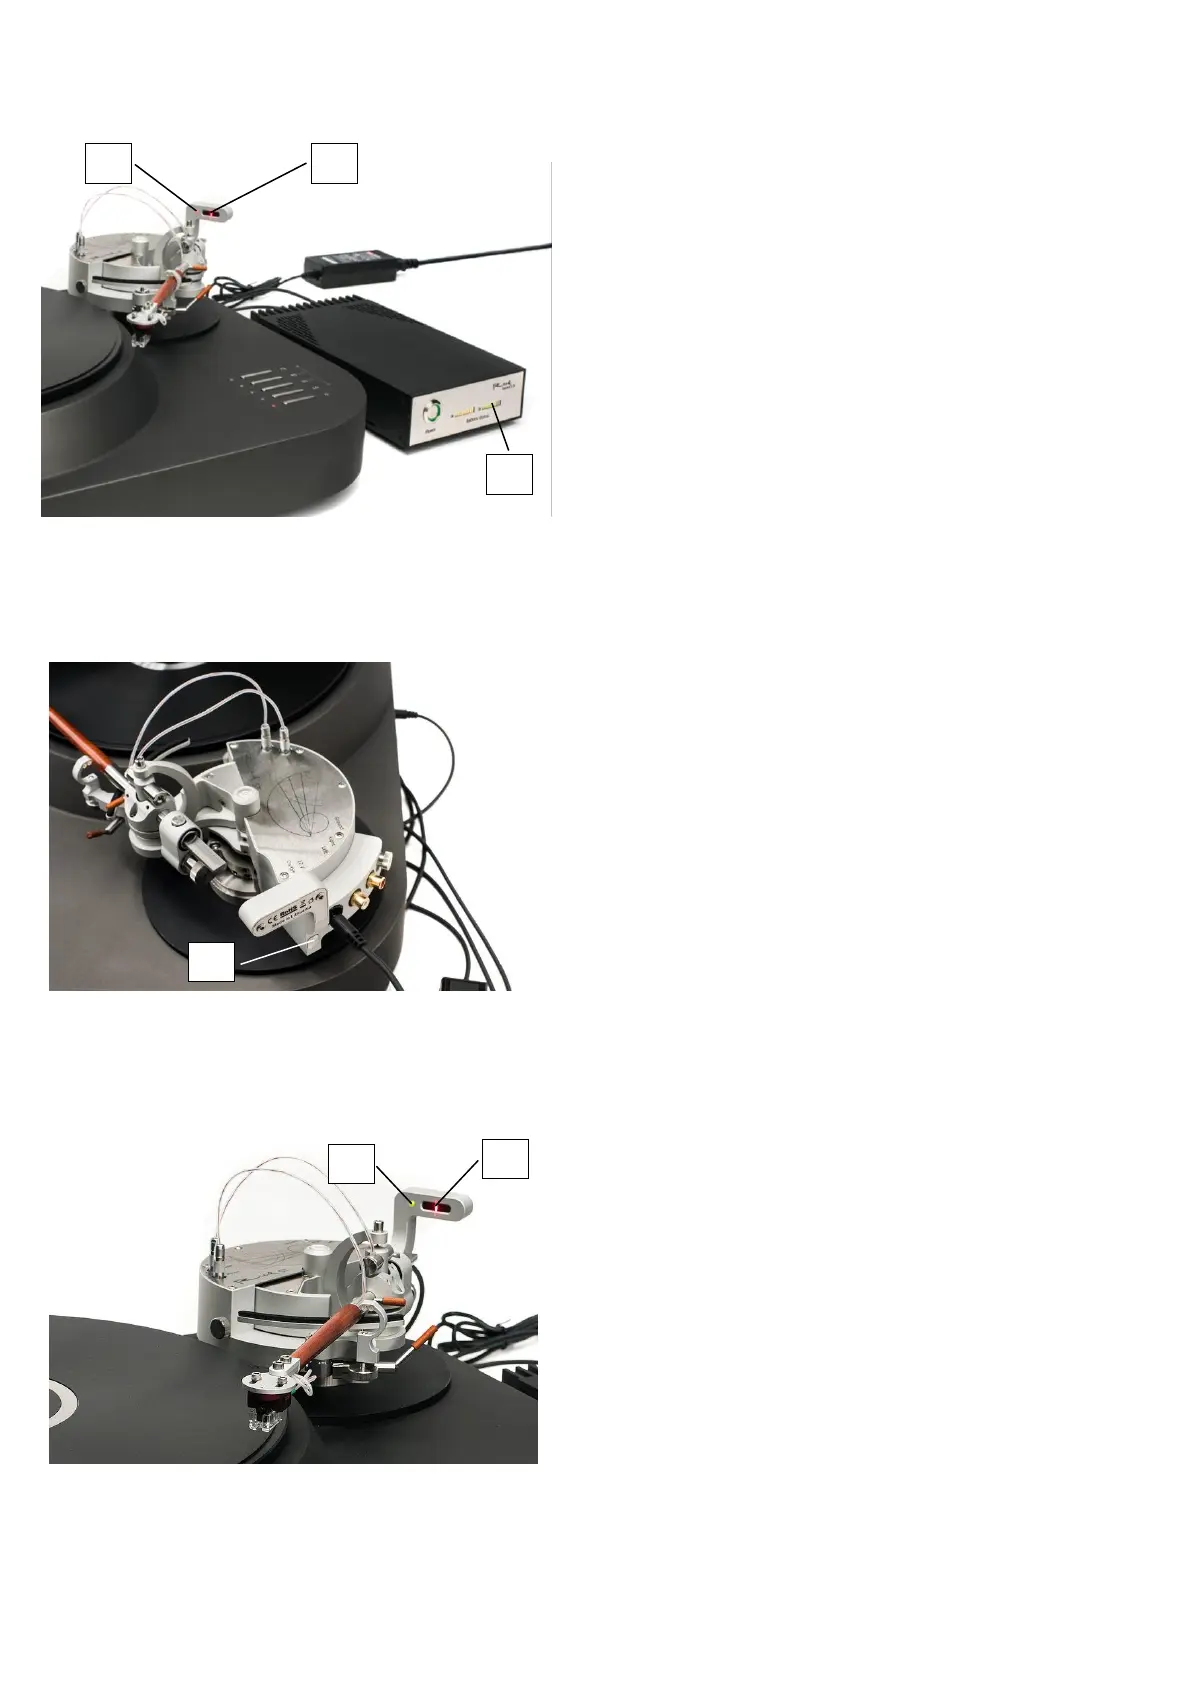
d) At least one Battery status indicator bar
should be lit green [1] (Figure 20).
e) Red-colored light [2] on a tonearm shows
that tonearm is connected to power
source, and tonearm’s laser beam points
at tonearm’s sensor grid [3].
f) Laser beam should point somewhere near
the center of sensor grid.
g) Power on the tonearm by pressing On/Off
button [1] (Figure 21).
h) Tonearm may move and green light [2]
starts to blink (Figure 22). It indicates
that tonearm is ready but is not yet
actively guided, since it is far from the
LP’s outer edge. Gently push tonearm’s
armtube towards LP. When green light [2]
stops blinking, it indicates that tonearm’s
guidance started. Do not resist to
tonearm’s movement, it has to operate
freely. Perform final adjustments of
cartridge position using Reed 5T
Protractor.
i) Lower down the microlift at any track of
LP and enjoy the music.
10. Tonearm operation:
a) When tonearm is operating, laser beam
should point to the center of sensor grid
[3] (Figure 22)
b) When tonearm’s armtube reaches the
end of LP record, it’s active guidance
stops and green light [2] starts to blink.
c) If you will interrupt laser beam for more
than 0.5 seconds or laser beam will not
point to the grid, automated guidance of
tonearm will stop and light [2] will start
to blink red and green.
d) If you interrupted laser beam while
playing the record, please press “On/Off”
button [1] while playing (Figure 21).
 Loading...